• Home
  • About
  • Portfolio
  • Shop
  • Collaboration
  • Imprint
Bloglovin
Instagram
Pinterest
Facebook
Twitter
Contact

Luloveshandmade

Crafts, colors & everyday life happiness

  • DIY
  • Handlettering & Illustration
  • Outfits
  • Recipes
  • Parties
  • Videos
  • Fashion and Portrait Photo Shootings in Berlin: New Colorful Photos with Anna in my Portfolio
    Fashion and Portrait Photo Shootings in Berlin: New Colorful Photos with Anna in my Portfolio
  • DIY: Wooden Geometrical Necklaces
    DIY: Wooden Geometrical Necklaces
  • A Little Love Letter to my Menstrual Cup
    A Little Love Letter to my Menstrual Cup
  • Potsdam Guide 2.0
    Potsdam Guide 2.0
  • Freebie: Herb Label Printable (in German)
    Freebie: Herb Label Printable (in German)
  • Free Printable: Motivating Handletterings (and a Giveaway)
    Free Printable: Motivating Handletterings (and a Giveaway)
  • DIY: Sewing Tutorial for a Sleepover Purse
    DIY: Sewing Tutorial for a Sleepover Purse
  • What I Wore: Abandoned Swimming Pool
    What I Wore: Abandoned Swimming Pool
  • DIY: Road Trip Embroidery Hoop Wall Decor
    DIY: Road Trip Embroidery Hoop Wall Decor
  • DIY Gift Ideas
    DIY Gift Ideas
Everything Else

Blog Party // DIY Summer Projects: Day 4.

July 7, 2011

Hello, happy Thursday! :) Today I wanna show you how to make jam yourself. I already posted this recipe last year, but since most of you haven’t been knowing my blog at that time, here is it again with a slightly different look. :) I just made jam according to the recipe a few days ago, so it is really easy and fast. :)

I made two different kinds of jar, so here are the ingredients for the first one:
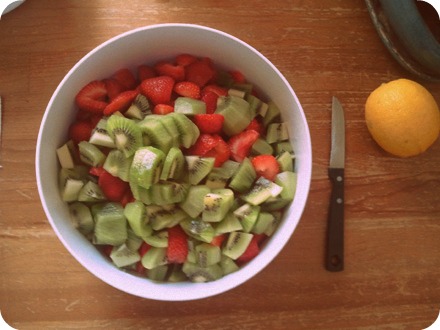
– About 3,7 pounds of strawberries (German: 1,7 kilo)  
– About 1,5 pounds of kiwis (German: 0,7 kilos)
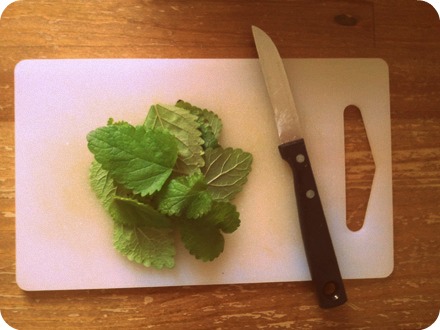
– Fresh lemon balm
– 5,3 pound of preserving sugar (German: 2,4 kilos) 
For the second jam, I used:
– Fresh red currants
– Lemon balm 
– Lime juice
– Preserving sugar (There are different ones: When I wrote this post for the first time, I used a type of preserving sugar whose proportion between sugar and fruits has to be at a ratio of 1 to 1, but this time, I used a type where the proportion between sugar and fruits has to be at a ratio of 1 to 3.)
Of course, you can vary the amount of fruits you use, the only thing that is important is that you don’t forget to stick to the right ratio between sugar and fruits. :)
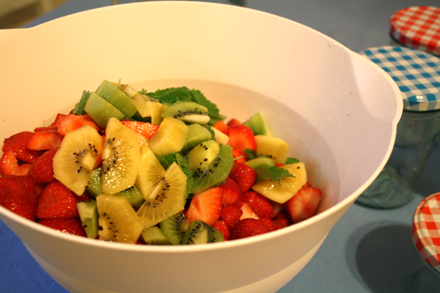
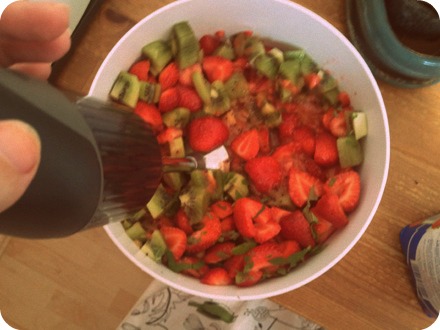
First, cut and wash the fruits. Here, I first made the jam with strawberries and kiwi, the other one I made afterwards.

Then, chop the fresh lemon balm and add it to the fruits.


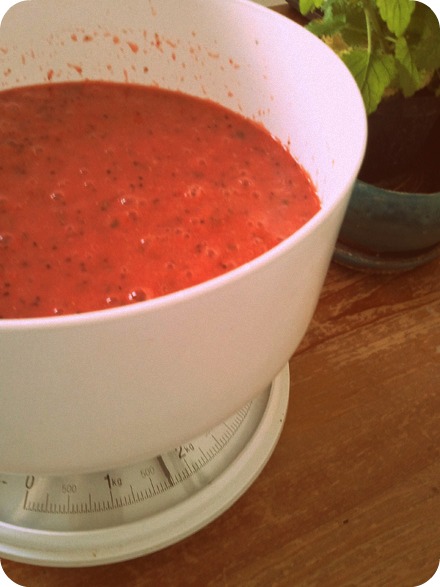
Next, mash everything and weight the mixture. Take sugar at a ratio of 1 to 1 (or at another ratio, depending on the type of preserving sugar you are using) and put the fruit mixture and the sugar into a pot where you heat it until it comes to the boil and then it has to boil for 4 minutes (Concerning the other jam, the mixture with the red currants only has to boil for one minute.). During that time, you have to stir up, so don’t stop doing this. :)


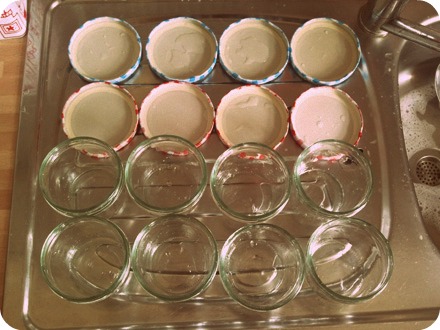
What is very important, before filling them with the hot jam (you have to do this directly after boiling), you have to clean the jam jars with hot water so that they become sterile.


After you filled the jars, turn them around so that the vacuum between the jam and the jar’s cover disappears. Thus, the jam keeps well much longer. :)

 
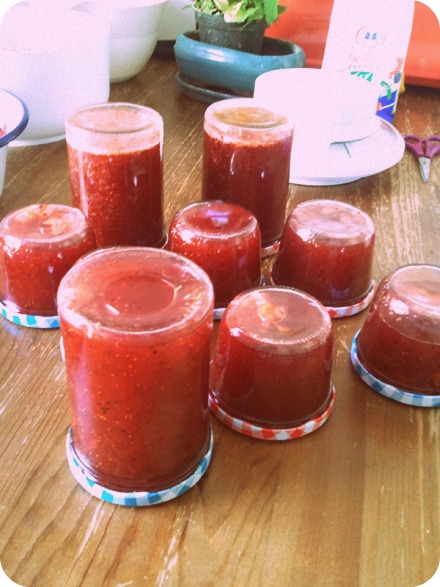
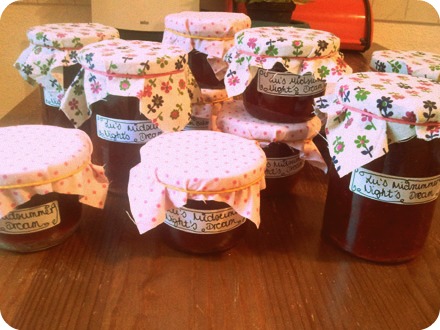
Of course I decorated the jars with some cute handwritten labels and some pieces of fabric. :)


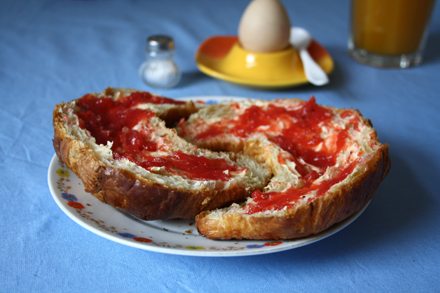
That’s it! :) I hope you like the recipe and will try it out yourself. :) If you do so, you can feel free to send me photos or post a link to your own version, I’d love to see it!
I’m planning to make jam with another flavor this summer, too, I want some with banana, mango, pineapple and kiwi, I think  this is going to be delicious, too, and then I can keep some jars for winter and preserve the taste of summer a bit longer. :)
Love, Lu

by luloveshandmade 
4 Comments
Everything Else

Blog Party // DIY Summer Projects: Day 3.

July 6, 2011

Hello everybody! :) Today Jenny from wolkengleich is going to show you an easy to follow tutorial for how to sew a summer dress. :)

***
Hi. I’m Jennifer and today I want to show you how to sew a lovely summer dress. This summer I felt in love with long floral dresses, but unfortunately, I couldn’t buy one, because the dresses used to be too long for me. So I decided to sew one by myself.
The idea of the dress is pretty simple and you only need about one hour to sew it.
All you need is airy fabric, an elastic band, a cord and two thread eyes.
1. First of all, you need to cut the fabric into the right shape of an oblong [the admeasurement depends on how tall you are ;)].
2. Now bend the upper border of the fabric and fix it with the sewing machine.
3. The next step is to sew the elastic band on the upper border. First of all you have to fix the elastic band, then stretch the elastic band until it is not elastic anymore and sew it onto the fabric at the same time.
So now the fabric has some lovely waves and you can still stretch it.
4. Now bend the fabric, so that you have the front of the dress in front of you and fix the thread eyes in the place which will be in the middle right under the breast.
5. You have to prepare a ribbon – so you can sew it at the same height as the thread eyes are, but at the inner face of the fabric. Later, you can put the cord into it and pull the cord through the tread eyes.
6. The next step is to bend the fabric and sew the open side.
7. Now you only have to bend the lower border piece of the dress and sew it.
Now your dress is ready to wear.
***
I hope you liked it and will try this out yourself! :) Anyway, thank you, Jenny, for preparing this tutorial! :)

Merken

by luloveshandmade 
7 Comments
Everything Else

Blog Party // DIY Summer Projects: Day 2.

July 5, 2011

Hello everybody! :) Today I wanna share a delicious recipe by Birdie from food and fotos. I love her blog, because she always writes about really tasty, vegan recipes and tries out a lot of new things with vegetables, fruits and other things and thus, she regularly inspires me to try out those recipes, too. :) 

*** 


Vegan Pudding-Tartlets

I’m really happy about the oportunity to write a guest post for the Blog of the lovely Lu.
Today I’m gonna exclusively show you a new recipe for delicious vegan pudding-tartlets. It is a very easy and fast recipe, made of ingredients that most people that cook and bake regularly probably have at home anyway.
Ingredients:
  • 7 organic Spelt-Tartlets
  • 3 plums
  • 2 apricots
  • 1 serving vanilla pudding powder
  • Sugar and soymilk (fort he pudding, look what the package says)
  • Vegan glaze
Prepare the pudding pursuant to the package. Let it cool down for some minutes and give some pudding on top of the tartlets. Let it cool down for some minutes again.
Put half of a apricot or plum on each tartlet.
Then prepare the glaze and put it on top of the tartlets.

***

Mhhjam, that sounds delicious! :) I hope you like that recipe and thank you for participating in my DIY week! :)

by luloveshandmade 
2 Comments
DIY

DIY: Felt Cupcake Pin Cushion

July 4, 2011


Hello, my dearest readers! :) As I have already announced, today’s the first day of my first blog party, thirteen days full of DIY summer projects. :) So here’s the first one, prepared by me. :) Hope you like it and come back tomorrow for the next one. :)


As you can see, this is a quick and easy tutorial for a felt pin cushion which looks like a cupcake. :)


1. What you need:
– Some thin felt
– Needle and thread
– Embroidery yarn
– Cotton wool
2. Cut out two large circles for the shape of the cupcakes themselves and two smaller ornaments which are supposed to be the sugar icing of the cupcakes. Sew the smaller ones onto one of the circles.
3. Take the embroidery yarn and sew the two circles onto each other like it is shown on photo number 3. Leave out an opening.
4. Next, put the cotton wool into the opening to fill your cupcake and give it a shape. After that, close the opening and tighten the yarn.


That’s it, here’s your cupcake you can use as a pin cushion.:) This way, the pins look like tiny nonpareils. :)
You could also attach a safety pin at the botton and use it as a brooch. :)

Hope you liked my tutorial, wish you a lovely Monday, see you tomorrow! :)
Lu <3

Merken

Merken

by luloveshandmade 
9 Comments
Everything Else

Summer jam.

July 3, 2011


Maybe you remember that one of my goals for summer was to make jam myself. :) Yesterday I bought lots of fresh fruits and made 4 glasses of the most delicious summer jam! <3 Today I enjoyed it for breakfast and you will be glad to hear that I’m going to share the recipe during my upcoming DIY week which is about to start tomorrow. :)
Have a nice evening! :)
Lu

by luloveshandmade 
2 Comments
« Previous Page
Next Page »

Hello & Welcome

Hello & Welcome

I'm Lu, I'm 34 years old and I live in wonderful Berlin. I am a Content Creator and DIY enthusiast and I am the founder and editor of Luloveshandmade.com where I share colorful everyday life happiness, handletterings, tutorials and other creative content. Apart from being a Handlettering Artist and running my own indie business, I'm a Content & Communications Manager. Read more about me and my creative work or visit my business portfolio page and have fun exploring this blog.

Get Inspired

  • Luloveshandmade-Handlettering-Feminism-Feminismus-Pro-Choice-Weg-mit-219a-bunt

    Pro Choice // Weg mit Paragraf 219a!

    January 24, 2021
  • Luloveshandmade-Shop-Update-Illustration-Handlettering-Spreadshirt-1

    Luloveshandmade Shop Update – New Products with my Letterings and Illustrations via Spreadshirt

    October 19, 2020
  • Luloveshandmade-Handlettering-Illustration-Make-Periods-Table-Talk-Menstruation-Feminism

    Make Periods Table Talk

    September 11, 2020
  • Luloveshandmade-Uncle-M-Music-All-Boobs-Are-Beautiful-6

    All Boobs Are Beautiful – Special Limited Edition Shirt via Uncle M Music Shop

    July 24, 2020
  • Luloveshandmade-Free Handlettering Printable-We Will All Make It Through All Of This (1)

    Free Handlettering Printable: We’ll Make It Through This

    April 13, 2020

Tags

advice balcony berlin guide christmas cities diy fake polaroid fashion favorite blogs favorite indie label favorite restaurants and cafes favorite shops featured fellow bloggers feminism food and cooking food table freebie giveaway handlettering handmade home decoration home tour instagram instagram photo printing service life and friends list lomography longboarding makeover market news painting and drawing party photography potsdam guide pretty online finds recipe review selling sewing shopping sponsoring travel video vintage what I wore wishlist
...
Followers
Follow
...
Followers
Follow
...
Fans
Like
...
Followers
Follow
...
Posts
0
...
amazing followers

My favorite Posts

  • Our Sweet And Happy Croatia Adventure // Summer Holidays on BraÄŤ
    Our Sweet And Happy Croatia Adventure // Summer Holidays on BraÄŤ
  • Pinterest Basics for Bloggers
    Pinterest Basics for Bloggers
  • A Colorful Portrait Shooting (& Advice for How to Prepare for It)
    A Colorful Portrait Shooting (& Advice for How to Prepare for It)
  • Handlettering Workshop Recap
    Handlettering Workshop Recap
  • Handlettering for Beginners (with Pinterest) & Valentine
    Handlettering for Beginners (with Pinterest) & Valentine's Day Printables

English: Imprint // Data Protection
German: Impressum // Datenschutzerklärung

Copyright © 2025 · Prima Donna theme by Georgia Lou Studios

© 2010 - 2017 luloveshandmade · Theme by Georgia Lou Studios, adapted by kathastrophal.de.