• Home
  • About
  • Portfolio
  • Shop
  • Collaboration
  • Imprint
Bloglovin
Instagram
Pinterest
Facebook
Twitter
Contact

Luloveshandmade

Crafts, colors & everyday life happiness

  • DIY
  • Handlettering & Illustration
  • Outfits
  • Recipes
  • Parties
  • Videos
  • DIY: Longboard Handlettering Project
    DIY: Longboard Handlettering Project
  • Dinosaur Photo Fun and Portrait Shooting in Berlin
    Dinosaur Photo Fun and Portrait Shooting in Berlin
  • DIY: Wooden Geometrical Necklaces
    DIY: Wooden Geometrical Necklaces
  • Handlettering with the new Samsung Galaxy Book 12, a free Printable and a huge Giveaway
    Handlettering with the new Samsung Galaxy Book 12, a free Printable and a huge Giveaway
  • Luloveshandmade Shop Update - My Illustrations and Letterings on Textiles via Spreadshirt
    Luloveshandmade Shop Update - My Illustrations and Letterings on Textiles via Spreadshirt
  • Fashion and Portrait Photo Shootings in Berlin: New Colorful Photos with Anna in my Portfolio
    Fashion and Portrait Photo Shootings in Berlin: New Colorful Photos with Anna in my Portfolio
  • A Little Love Letter to my Menstrual Cup
    A Little Love Letter to my Menstrual Cup
  • DIY: Sewing Tutorial for a Sleepover Purse
    DIY: Sewing Tutorial for a Sleepover Purse
  • Free Printable: Motivating Handletterings (and a Giveaway)
    Free Printable: Motivating Handletterings (and a Giveaway)
  • Free Printable: Handlettering Calendar 2019
    Free Printable: Handlettering Calendar 2019
Everything Else

Blog Party // DIY Summer Projects: Day 8.

July 11, 2011


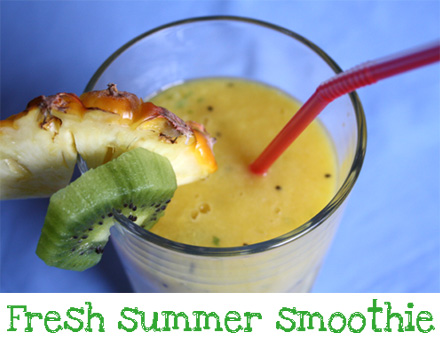
Hey dear readers, here’s a recipe for an easy summer smoothie! :)

 You need:
– A melon
– Bananas
– Kiwis
– A pineapple
– An apple
– Lemon balm
– Fresh lime juice

Of course you can also use other fruits to get another flavor. :)

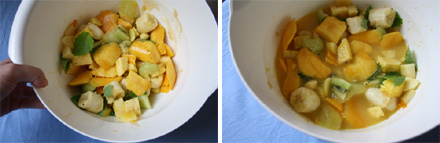
 The only thing you have to do is to peel all the fruits, then chopp them or cut them into slices, put them into a bowl, add the fresh lime juice and some lemon balm and strain everything until you have a smooth mixture. In case it isn’t fluid enough, add some water, juice or ice cones.

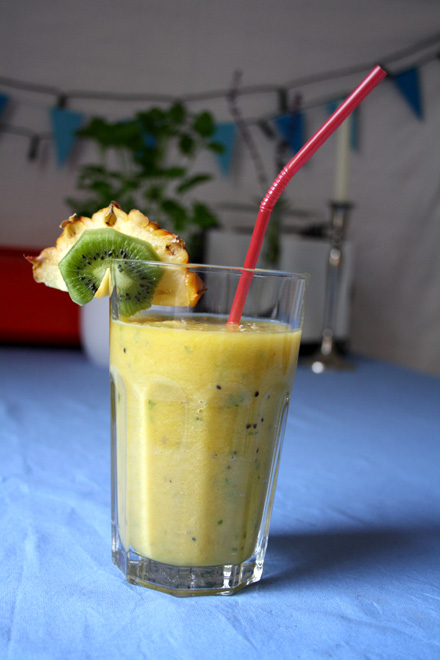
I used some leftovers of the fruits to decorate the glass and kept some smoothie for the next day for breakfast. <3

by luloveshandmade 
1 Comment
Everything Else

Sale on DaWanda!

July 10, 2011


On DaWanda there’s a special today and all my products are avialable at an 11% discont! :) So if you are interested, you can check out my German shop here.
For those who don’t understand German, I also have a shop on etsy where a lot my products are for sale. In case you find something in the German shop you want to purchase which isn’t listed on etsy, just let me know and I will list it there, too. :)

by luloveshandmade 
Leave a Comment
Everything Else

Blog Party // DIY Summer Projects: Day 7.

July 10, 2011


Hey readers, today another fellow blogger called Kim is going to show you an easy, detailed tutorial for how to sew a pouch for a compress. :) If you want to, you can also check out her blog notcrazyunwell. :) Have fun!
***
“beulentrost”

Thank you so much for having me, Lu. putting together this tutorial was a lot of fun and I hope you and your readers like it :)

One of the things I get the most “Aww, how practical”- and “What a great idea”-comments on are the pouches for cool/warm compresses I sew. they are so awesome to keep in your fridge – especially when you have kids – because you always have something handy to cool a little bump right away without having to find a towel to wrap around, fumble with the (much too big and possible dirty) towel…. all of that can be a huge p.i.t.a., especially when you have a screaming kid next to you who just fell and bumped his/her head. A nice side-effect: it’s also a great “distraction” from the pain if you point out the cute fabric, applique or what it says to the kid. I swear, it’ll take their mind off of the bump in no time. ;)

It’s really easy to make and you could even do it without a sewing machine (although I probably wouldn’t have the patience). Besides making one for yourself/your kid(s) these are also great gifts for a birth, a birthday, baptism or just because… I call them “beulentrost” which is german for beule = bump and trost= consolation and often put a little “label” on the front that says “beulentrost” or “gute besserung” (get well). I especially like to personalize my gifts and add the kid’s name to the label.

So for me, making the pouches always starts with my letter-stamp-set and fabric-ink-pad (which I LOVE). I usually make a whole bunch at once – in this case I made a bunch for a pre-school who wanted two for each group with the labels saying the name of the groups.

The next step would be to measure the compress (I make pouches for different size compresses).
 
Then, cut one piece of fabric (the one that’s gonna be the front) on all sides about 1 cm (1/2 inch) larger than the compress.
You then need another two pieces of fabric (which will be the back of the pouch). To get them, I cut a piece that’s the same width as the front piece, but about 8 cm (3 inches) longer. I then cut that long back-piece into two pieces (about 1/3 and 2/3), so I end up with two back pieces, one about 3 cm (1.2 inches) longer than the other.
Fold and iron one (short) side of each of the back pieces like I did here.
 
Then sew both of those folded edges with a straight stitch close to the edge.
 
 
Now you can put aside your two back-pieces and apply the label, applique, initial …. of your choice to the front piece. I use my zig-zag shears to cut out the labels (after letting them dry for a couple house and iron them from the left side for a few minutes!) and then sew them on with a straight stitch a few times around, trying not to be too exact because I like the “unclean” look of the crooked seams…
 
Then you lay your front piece, right side up, in front of you. Put the smaller one of the back-pieces at the “top” of the front piece (the part you want to be the top of the front side when your pouch is done) with the un-sewn edges and right sides together. Your sewn edge is going to be almost in the middle of the front piece.
 
The next “layer” would be the longer one of the back-pieces (which is your only one left. Duh!). You want to align that again, with the un-sewn edges and right sides together on top of the “bottom” halt of the front piece (this is also the step I attach my label). I’m lazy, so I only use a couple of needles to hold the three pieces together.
  
Now, sew around the whole thing about 0,5 cm / 1/4 inch away from the edges.
 
Now trim around with a zig-zag and the sewing part of your work is done. :)
 
Time to turn the pouch right side out and iron …


Then it’s time for the cool/warm compress to “move in”. :)
 
  
And you’re done! Congratulations!
 
This was easy, wasn’t it? Now if you sew your own pouch with this tutorial, I’d love to see a picture of your creation(s). ;)
***
Thank you so much for sharing this tutorial, Kim!! :)
by luloveshandmade 
Leave a Comment
Everything Else

Blog Party // DIY Summer Projects: Day 6.

July 9, 2011

Hello everybody, today I’d like to welcome Sammy who I know from Indie Biz 2. :) I invited her to join my first blog party, because she’s a really charming, young lady with a cute blog called The Cookie Button. Hopefully you’ll like her sweet tutorial for fresh strawberry ice cream! :)

***

***

Awww, I’d love to try it! :) Thanks for sharing, Sammy! :)

by luloveshandmade 
6 Comments
Everything Else

Blog Party // DIY Summer Projects: Day 5.

July 8, 2011

Hello everyone!

I am Katja, a german crafter and Blogger with a lovely blog called Maedchenmitherz. I love handmade and even more than handmade I love owls. So when Lu asked me to share a DIY for her blog party I knew it had to be this:

Make a cute owl with me today!

Supplies needed:
– A styrofoam ball (any size you want! I bought a bunch of these balls before christmas and wanted to turn them into ornaments. But somehow I forgot about it ^^)
– Felt in matching colours (+ white felt for the eyes and yellow or orange felt for the beak)
– Plastic eyes (the small ones)
– Scissors
– A hot glue gun (regular glue should work as well)

That’s all!

First, cut several leaf-shaped pieces from your felt.

You will need a bunch of them so cut, cut, cut!

Start sticking the “leaves” on the ball. Only use one small dot of glue on the tip of the felt piece so your owl will look more “fluffy”!

Let the top “leaves” cover the bottom ones.

Once you have finished covering the styrofoam ball with felt,


Cut two circles from white felt.

These are going to be the owls’ eyes.

Stick them on the ball.

And then add the black plastic eyes.

Cut the beak from yellow or orange felt.

And you get an owl!!!!!!!!

You might want to try different styles of this cute owl….

I went a bit nerdy and made a cute nerd-owl!
Hope you liked this fun DIY and if you craft some owls… let me see, I am curious!!!!!! Thank you Lu, for having me,- this was so much fun!

Have fun crafting!

Katja

***

Thank you so much for sharing this tutorial, Katja, and thank you again for participating in my blog party! :)
Lu

Merken

by luloveshandmade 
4 Comments
« Previous Page
Next Page »

Hello & Welcome

Hello & Welcome

I'm Lu, I'm 34 years old and I live in wonderful Berlin. I am a Content Creator and DIY enthusiast and I am the founder and editor of Luloveshandmade.com where I share colorful everyday life happiness, handletterings, tutorials and other creative content. Apart from being a Handlettering Artist and running my own indie business, I'm a Content & Communications Manager. Read more about me and my creative work or visit my business portfolio page and have fun exploring this blog.

Get Inspired

  • Luloveshandmade-Handlettering-Feminism-Feminismus-Pro-Choice-Weg-mit-219a-bunt

    Pro Choice // Weg mit Paragraf 219a!

    January 24, 2021
  • Luloveshandmade-Shop-Update-Illustration-Handlettering-Spreadshirt-1

    Luloveshandmade Shop Update – New Products with my Letterings and Illustrations via Spreadshirt

    October 19, 2020
  • Luloveshandmade-Handlettering-Illustration-Make-Periods-Table-Talk-Menstruation-Feminism

    Make Periods Table Talk

    September 11, 2020
  • Luloveshandmade-Uncle-M-Music-All-Boobs-Are-Beautiful-6

    All Boobs Are Beautiful – Special Limited Edition Shirt via Uncle M Music Shop

    July 24, 2020
  • Luloveshandmade-Free Handlettering Printable-We Will All Make It Through All Of This (1)

    Free Handlettering Printable: We’ll Make It Through This

    April 13, 2020

Tags

advice balcony berlin guide christmas cities diy fake polaroid fashion favorite blogs favorite indie label favorite restaurants and cafes favorite shops featured fellow bloggers feminism food and cooking food table freebie giveaway handlettering handmade home decoration home tour instagram instagram photo printing service life and friends list lomography longboarding makeover market news painting and drawing party photography potsdam guide pretty online finds recipe review selling sewing shopping sponsoring travel video vintage what I wore wishlist
...
Followers
Follow
...
Followers
Follow
...
Fans
Like
...
Followers
Follow
...
Posts
0
...
amazing followers

My favorite Posts

  • Pinterest Basics for Bloggers
    Pinterest Basics for Bloggers
  • Handlettering Workshop Recap
    Handlettering Workshop Recap
  • A Colorful Portrait Shooting (& Advice for How to Prepare for It)
    A Colorful Portrait Shooting (& Advice for How to Prepare for It)
  • Handlettering for Beginners (with Pinterest) & Valentine
    Handlettering for Beginners (with Pinterest) & Valentine's Day Printables
  • Our Sweet And Happy Croatia Adventure // Summer Holidays on Brač
    Our Sweet And Happy Croatia Adventure // Summer Holidays on Brač

English: Imprint // Data Protection
German: Impressum // Datenschutzerklärung

Copyright © 2025 · Prima Donna theme by Georgia Lou Studios

© 2010 - 2017 luloveshandmade · Theme by Georgia Lou Studios, adapted by kathastrophal.de.