• Home
  • About
  • Portfolio
  • Shop
  • Collaboration
  • Imprint
Bloglovin
Instagram
Pinterest
Facebook
Twitter
Contact

Luloveshandmade

Crafts, colors & everyday life happiness

  • DIY
  • Handlettering & Illustration
  • Outfits
  • Recipes
  • Parties
  • Videos
  • DIY: Road Trip Embroidery Hoop Wall Decor
    DIY: Road Trip Embroidery Hoop Wall Decor
  • Free Printable: Handlettering Calendar 2019
    Free Printable: Handlettering Calendar 2019
  • Happy Words - Free Handlettering Calendar Printable 2020
    Happy Words - Free Handlettering Calendar Printable 2020
  • DIY: Longboard Handlettering Project
    DIY: Longboard Handlettering Project
  • DIY: Sewing Tutorial for a Sleepover Purse
    DIY: Sewing Tutorial for a Sleepover Purse
  • Dinosaur Photo Fun and Portrait Shooting in Berlin
    Dinosaur Photo Fun and Portrait Shooting in Berlin
  • Free
    Free 'Get Well Soon' Handlettering Printables
  • DIY Gift Ideas
    DIY Gift Ideas
  • A Colorful Summer Craft Party
    A Colorful Summer Craft Party
  • DIY: FIMO Statement Earrings & Five Further Creative DIY Projects with FIMO
    DIY: FIMO Statement Earrings & Five Further Creative DIY Projects with FIMO
Everything Else

Blog Party // DIY Summer Projects: Day 12.

July 15, 2011

Hello dear readers! :) Today my lovely friend Malin is going to show you a really awesome sewing tutorial for a really original bag! :)

***
 
Hello everybody!
I hope that you are having a very rainy and boring summer so that you can do all the great DIY tutorials the bloggers provided you with. :)
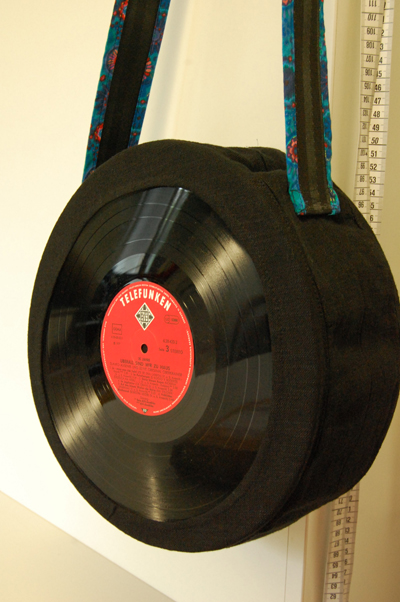
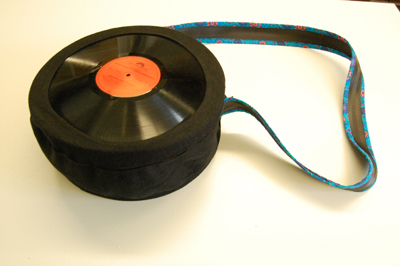
I am gonna explain how to make a very cool bag: a bag out of 2 records.
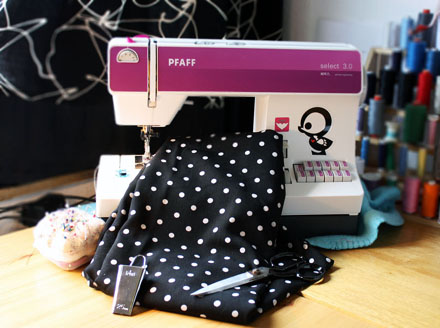
Material needed:
  • Fabric for the outer face of cotton or linen, approximately 1meter (I took black linen)
  • Fabric for the inner face of cotton, approximately 1 meter (I took blue floral patterned fabric)
  • 1 zipper of 30cm
  • 1 car seatbelt or a belt from a fabric store (I took a seatbelt from my father)
Prearrangements:
In the beginning start with ironing the fabric with steam and let it cool down, this is the first step I ever do before I start cutting or even sewing. It’s good against shrinking and it makes the farbic smoother.

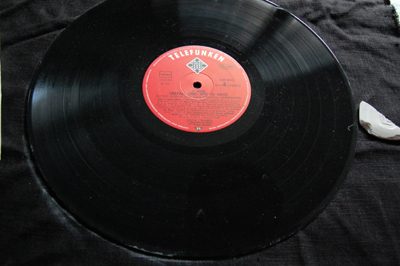
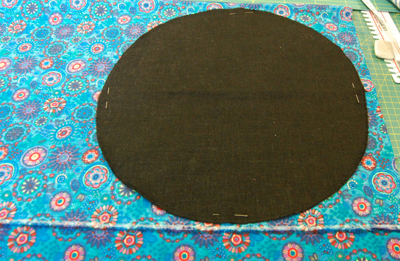
Step 1: You take the fabric for the outer face, put right face on right face, so now you’ve got the left face up. Take a disc record and put it on the fabric, you need 2 cm space from the border. Draw the excact circle line with tailor’s chalk, then another plus 2 cm (not less, you need this seam allowance!) Now cut it out.

 
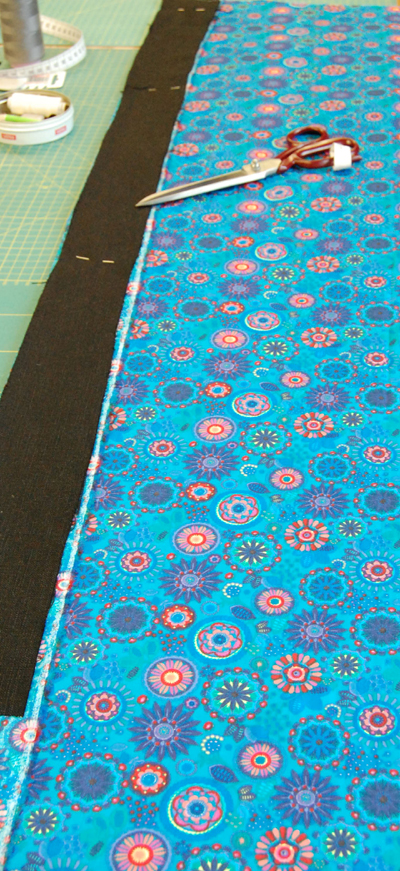
Step 2: Measure the amount of the circle so that you will gain the lenght of the middle part of the bag (must be about 1 meter, but please do measure!). Take this length (+2cm seam allowance) x 7cm, draw this on the fabric and cut it out two times.
Step 3: To hold the records, I made up some frames out of two rings. You take the circles you already have, draw this line on the farbic and measure 6 cm to the inside and cut it again two times.
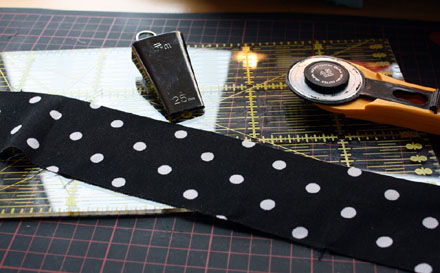
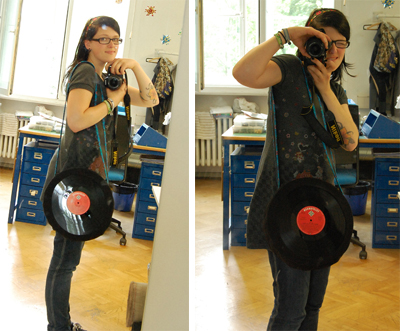
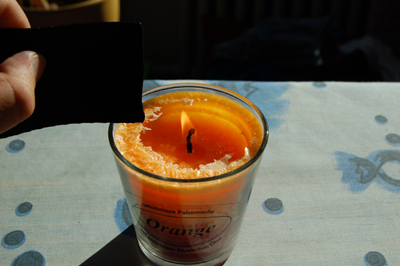
Step 4: Take the car seat belt or whatever you took for the belt and cut it to the right lenght. I cut 126cm, because I like it when bags are a bit longer. Afterwards, I took a candle and burned the endings, so the belt won’t come undone.
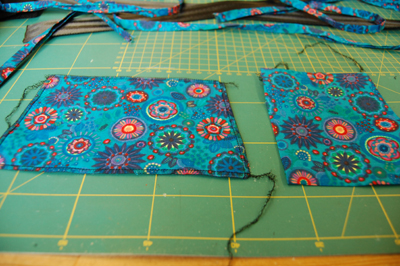
Step 5: You take the cut circle and the cut bands, put the inner face right face on right face and put the cuts on the fabric. Cut them out. (If you want to, you can cut two more squares or trapeziums for small bags inside of your bag, for a mobile or keys, for example).
 
Step 6: Take the cuts for the outer face and paste them with interlining, iron about 12 seconds and let them cool down again, be sure you won’t stretch the cuts. It is important to do that, because the outer bag needs this strenght, or it will be messed up too soon. :/
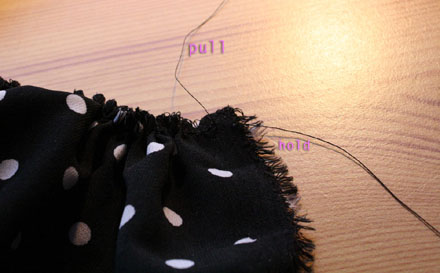
Step 7: Take all cuts and de-baste them all around, it makes sure they won’t come undone. If you don’t have the possibilty to do it “professionally“, do the zig zag stitch with you sewing machine at the border of the cuts.
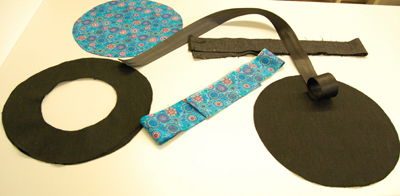
Now you have got these things(double):
Sewing:
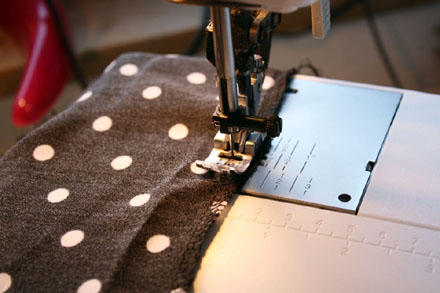
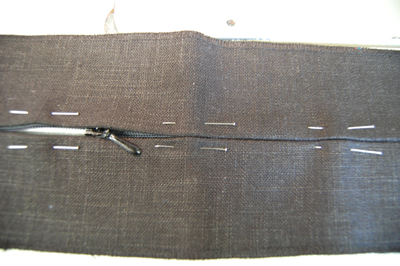
Step 8: You begin with the outer bag. Take the two bands right face on right face and sew them together at 1cm. The clue is: this is the part you put the zip in, so you need to find out where the middle is and from this point 15 and 15 cm to the right and to the left, at these points you lock the seam, make the biggest sticht you have on your machine and lock again at the point (so this seam is locked right now and you can easily open the seam after ironing). Iron the seam apart. After that, you can open the middle part of the seam.
 
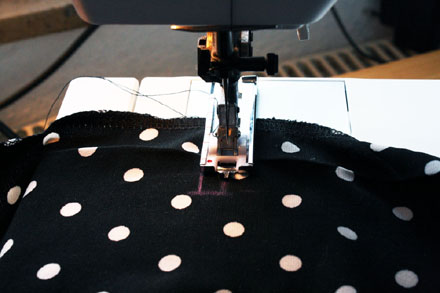
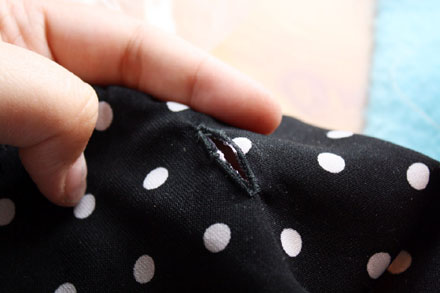
Step 9: Attach the zip like if its closed so that you can’t see it anymore. I only used fixpins, because I am used to it, if you’re not, just tack it before sewing with the machine. Step from the outside, it’s the easiest way and, if you also use another color of thread, it looks pretty cool. ;)
Step 10: Close the band as a circleband with amounting right face on right face with 1cm. Iron apart. Open the zip!
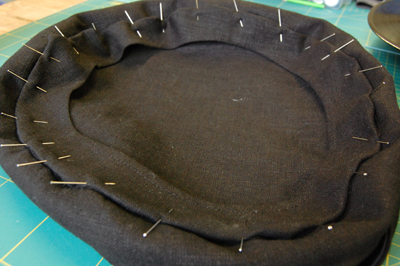
Step 11: Pin the two circles onto the circleband and sew them togeteher with 1cm seam allowance, same here: if you’re unsure with the width, tack them together before. If the circleband is too wide, change the width. Iron the seams together to the middle part and turn the bag to the right side out.
Step 12: Now, do the same with the inner face. If you want to have small bags in it, begin with them, just cut them, de-baste them and tack them onto the position you want to have.
 
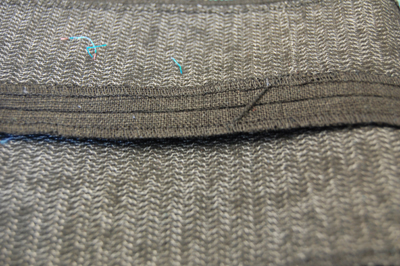
Step 13: Take the frames, turn the inner circle over with 1 cm and quilt it along the lenght, be aware not to stretch the frame! Iron it (I could write almost after every step ironing, as you see ;) ). Right now you can iron the outer circle with 1 cm.
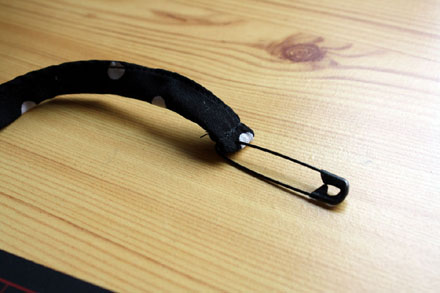
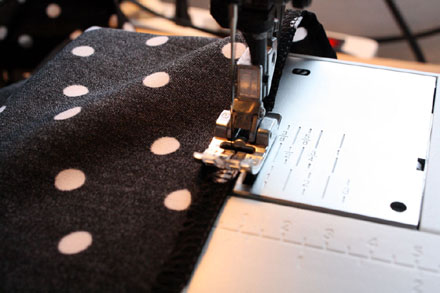
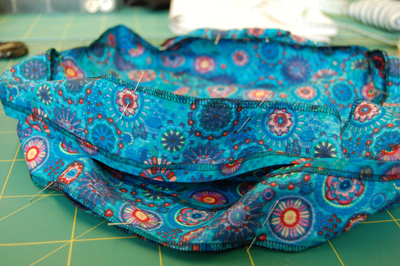
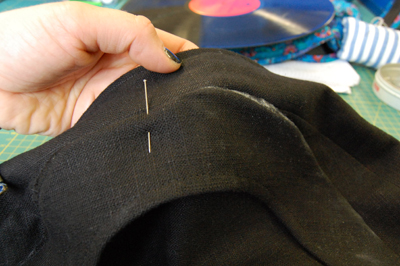
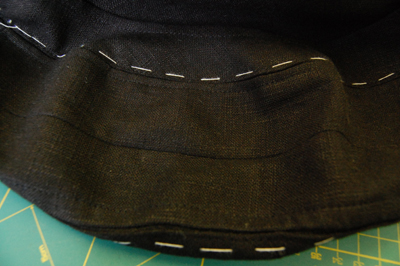
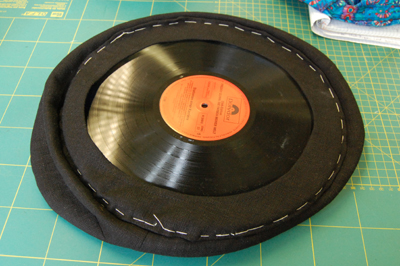
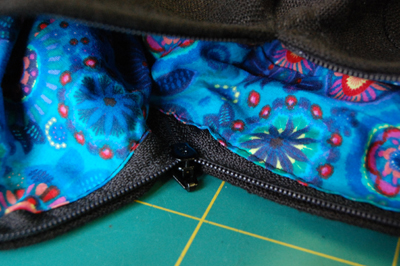
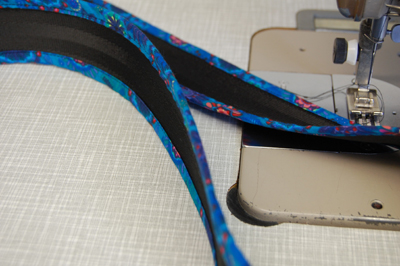
Step 14: Take fixpins and stick the frame onto the circle so that it looks like on the two first ones of the following photos. After this, tack it! It is not that easy to sew now with the machine, I confess, so tacking is very helpful right now. This step can be seen on the third photo following. Try to put your disc record in it, if it’s working, you’ve done everything right and you can go on (put it out again :D). Do it the same way on the other side, turn the bag over to the left and stitch close to the border (it is much easier stitching this way, for you can turn the bag over and over and you can do it in one single step) Turn it to the outside again and iron. ;)
 
I tried it this way, but I am sure you can also first put the frame onto the circle and then turn the circle over with the circleband just before. This is the way I did it (and well, it was my first try), because it looks more vivid, but you could also do it otherwise, because its much easier and faster. .
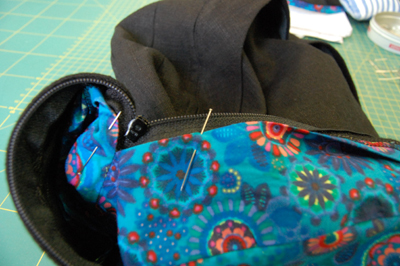
Step 15: Put the inner face into the bag and stick it close (not to close!) to the zip. Tack it and stitch it close to the border.
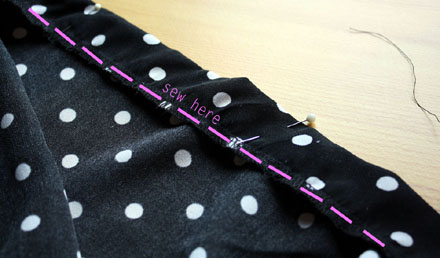
Step 16: As you can see on the picture, I did not use the seatbelt as it was, I embellished it with the inner face fabric on the borders. Here’s my explanation:
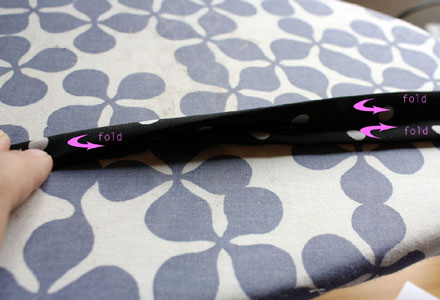
Take 2 bands of the belt-length x 4 cm. Iron the first side right to the middle, do the same with the other sode, place them together with ironing.
Now you take this band and lay it around the border and step close the the open border of the band, that’s all.
 
Step 17: Now take the belt and apply it to the bag, right below the zip, I could have also applied it before turning the bag over with the inner face, but I think it is much more firm if you do it like that. Be sure there won’t be any creases on the inner face, fix it with fixpins and stitch an X.
Step 18: Last step (finally!!!): Put the records into the frames, smile and drink a cup of coffee, you’ve done a lot ofexhausting work!
 
Thanks and love to Lu with this great idea of a Blog Party :* That was fun and a good experience explaining it in English ;)
***
Awww, thank you so much sweetie for sharing this unique tutorial! :)

Merken

by luloveshandmade 
4 Comments
Everything Else

Blog Party // DIY Summer Projects: Day 11.

July 14, 2011


Hello! :) Today my beloved friend Anja is going to show you how to make the best homemade pesto. :)

***


I like cooking very much and today I made pesto for the first time. It’s really easy and you do not need many ingredients.

Here’s what you need: 

Oregano, parsley, basil (all fresh from our garden <3).


Pine nuts, Parmesan and garlic.


Moreover, you also need some salt and olive oil.

Preparation:  


You have to crush the pine nuts and the herbs and the garlic. Next, bray the Parmesan.

Put everything into one bowl and stir everything together with the olive oil. Maybe you also have to add some water.
Then, fill the mixture in a sterile jar and pour some olive oil on top, this way it can be kept longer. :)

That’s it! :) Serves best with spaghetti and some Parmesan. :)
Enjoy your meal! :)
aentschie

***

Thank you so much for sharing! <3

by luloveshandmade 
2 Comments
Everything Else

Homemade summer jam.

July 13, 2011


Hey! :) I just wanted to share photos of the jam I made a few days ago. :) Maybe you remember the recipe of the strawberry jam I already posted due to the blog party week and now I made another flavour, using the same recipe.
On the left bread roll you can see the strawberry jam with kiwi and lemon balm and the new flavour I made consists of 5 mangos, 4 bananas, 1 pineapple, 3 golden kiwis and again some lemon balm. I’m not exaggerating when I tell you that this is the best jam ever!!! When looking at the photo beneath you can probably image how much I’m looking forward to every breakfast… :)
Have you ever made jam yourself and if yes, which flavour? :)
Love, Lu

by luloveshandmade 
3 Comments
Everything Else

Blog Party // DIY Summer Projects: Day 9.

July 12, 2011

Hello, happy Tuesday! :) Today lovely Trisha who I got to know through Indie Biz 2.0 and even met in person two times is going to show you an awesome tutorial for how to sew a skirt. :)
***
Hi, I am Trisha from MarySew (http://www.mistyillusions.org/marysew/) and my wonderful friend Lu asked me to share a summer sewing tutorial for her amazing Blog Party. So here is what I came up with:

I’m showing you how to make a very simple Tiered Skirt.  It’s made from 3 tiers: A, B, and C (see pattern)

 
You’ll need about 1,50 – 2,00 meters of lightweight fabric (I used viscose, perfect for the summer). You’ll also need: – sewing machine
– thread, scissors, safety pin, iron
– optional: a bias tape maker, a bit of fusible lining
Measure your hip, waist, and how long you want your skirt to be. Cut fabric according to the pattern (you might want to change it according to your measurements). Add seam allowance. Serge all raw edges.
At first you need a buttonhole about 5 cm (2-2,5cm) under the top edge of your fabric, right in the front of skirt. If you’re using a very lightweight fabric you might want to support the button hole by ironing in a piece of fusible lining.
Sew the short ends together. You should have a loop now.
Fold over and sew close to the edge, creating your drawcord.
Now we make the drawstring. I use my fancy bias tape maker. If you don’t have a fancy gadget like that, just fold in both sides of your fabric so they meet in the middle.
Press over it. Now that you have your bias tape (okay, fake bias tape since it is not cut in bias ;) ) fold it over, press and sew, creating a drawstring. Fold over the ends and sew.
Use a safety pin to get the drawstring in the drawcord. You should now have a very short skirt ;)
Now we need tier B.  Set your sewing machine to a very long gather stitch and sew along the top edge. Don’t (!) lockstitch (backstitch)!
Gather carefully by pulling the bottom thread. Make sure you’re using a strong thread. Gather to a length that is the same as tier A and sew the short ends together.
Pin tier A and B together, right sides facing each other, and sew them together.  Press your seam allowance up towards to tier A and top stitch.
Now repeat that step with tier C.
Hem your skirt and that’s it. Easy peasy summer tiered skirt.
A few basic sewing tips for this skirt:
– If you use very lightweight/summer-y fabric make sure you’re using the right needle.
– You can also use elastic band instead of a drawstring. No need of a buttonhole then ;)
– Serge all your raw edges or your skirt might fall apart when after you washed it for the first time. Just use your zigzag stitch. If you don’t know how to, I made a tutorial about it here (http://www.mistyillusions.org/marysew/?p=3022)
-Don’t underestimate the seam allowance ;)
Have fun sewing!!
Liebe Grüße, Trisha
***
Thank you so much for sharing this great tutorial! <3
Lu

Merken

by luloveshandmade 
2 Comments
Outfits

Lu loves fashion // Candy Colors

July 11, 2011

Earrings: Handmade by me
Top: H&M
Brooch: Handmade by me
Skirt: Handmade by me
Purse: H&M
Leggings: Yorn
Shoes: Osco
Nailpolish: p2
Rings: Gift from Flo and vintage ring from my mother <3

Hey! :) I haven’t been doing a ‘What I Wore’ post for a few weeks and I still wanted to show you my first self-made piece of clothing, the jersey skirt, so here’s what I wore this Sunday. :)


Merken

Merken

Merken

by luloveshandmade 
2 Comments
« Previous Page
Next Page »

Hello & Welcome

Hello & Welcome

I'm Lu, I'm 34 years old and I live in wonderful Berlin. I am a Content Creator and DIY enthusiast and I am the founder and editor of Luloveshandmade.com where I share colorful everyday life happiness, handletterings, tutorials and other creative content. Apart from being a Handlettering Artist and running my own indie business, I'm a Content & Communications Manager. Read more about me and my creative work or visit my business portfolio page and have fun exploring this blog.

Get Inspired

  • Luloveshandmade-Handlettering-Feminism-Feminismus-Pro-Choice-Weg-mit-219a-bunt

    Pro Choice // Weg mit Paragraf 219a!

    January 24, 2021
  • Luloveshandmade-Shop-Update-Illustration-Handlettering-Spreadshirt-1

    Luloveshandmade Shop Update – New Products with my Letterings and Illustrations via Spreadshirt

    October 19, 2020
  • Luloveshandmade-Handlettering-Illustration-Make-Periods-Table-Talk-Menstruation-Feminism

    Make Periods Table Talk

    September 11, 2020
  • Luloveshandmade-Uncle-M-Music-All-Boobs-Are-Beautiful-6

    All Boobs Are Beautiful – Special Limited Edition Shirt via Uncle M Music Shop

    July 24, 2020
  • Luloveshandmade-Free Handlettering Printable-We Will All Make It Through All Of This (1)

    Free Handlettering Printable: We’ll Make It Through This

    April 13, 2020

Tags

advice balcony berlin guide christmas cities diy fake polaroid fashion favorite blogs favorite indie label favorite restaurants and cafes favorite shops featured fellow bloggers feminism food and cooking food table freebie giveaway handlettering handmade home decoration home tour instagram instagram photo printing service life and friends list lomography longboarding makeover market news painting and drawing party photography potsdam guide pretty online finds recipe review selling sewing shopping sponsoring travel video vintage what I wore wishlist
...
Followers
Follow
...
Followers
Follow
...
Fans
Like
...
Followers
Follow
...
Posts
0
...
amazing followers

My favorite Posts

  • A Colorful Portrait Shooting (& Advice for How to Prepare for It)
    A Colorful Portrait Shooting (& Advice for How to Prepare for It)
  • Our Sweet And Happy Croatia Adventure // Summer Holidays on Brač
    Our Sweet And Happy Croatia Adventure // Summer Holidays on Brač
  • Pinterest Basics for Bloggers
    Pinterest Basics for Bloggers
  • Handlettering Workshop Recap
    Handlettering Workshop Recap
  • Handlettering for Beginners (with Pinterest) & Valentine
    Handlettering for Beginners (with Pinterest) & Valentine's Day Printables

English: Imprint // Data Protection
German: Impressum // Datenschutzerklärung

Copyright © 2025 · Prima Donna theme by Georgia Lou Studios

© 2010 - 2017 luloveshandmade · Theme by Georgia Lou Studios, adapted by kathastrophal.de.