• Home
  • About
  • Portfolio
  • Shop
  • Collaboration
  • Imprint
Bloglovin
Instagram
Pinterest
Facebook
Twitter
Contact

Luloveshandmade

Crafts, colors & everyday life happiness

  • DIY
  • Handlettering & Illustration
  • Outfits
  • Recipes
  • Parties
  • Videos
  • Handlettering with the new Samsung Galaxy Book 12, a free Printable and a huge Giveaway
    Handlettering with the new Samsung Galaxy Book 12, a free Printable and a huge Giveaway
  • Free
    Free 'Get Well Soon' Handlettering Printables
  • DIY: Longboard Handlettering Project
    DIY: Longboard Handlettering Project
  • All Boobs Are Beautiful - Charity Shirt with NUDE x Luloveshandmade
    All Boobs Are Beautiful - Charity Shirt with NUDE x Luloveshandmade
  • Free Printable: Motivating Handletterings (and a Giveaway)
    Free Printable: Motivating Handletterings (and a Giveaway)
  • A Colorful Summer Craft Party
    A Colorful Summer Craft Party
  • DIY: Road Trip Embroidery Hoop Wall Decor
    DIY: Road Trip Embroidery Hoop Wall Decor
  • DIY: Sewing Tutorial for a Sleepover Purse
    DIY: Sewing Tutorial for a Sleepover Purse
  • A Little Love Letter to my Menstrual Cup
    A Little Love Letter to my Menstrual Cup
  • Dinosaur Photo Fun and Portrait Shooting in Berlin
    Dinosaur Photo Fun and Portrait Shooting in Berlin
DIY

DIY: Colorful Bike Restyle

October 28, 2013


Hello hello! Eeeeks, I’m so excited about this blogpost, because it is about a project I have been wanting to do for so long!!
I got my current bike more than 15 years ago and although it’s a great bike, the colors are totally not my style anymore. I’ve been thinking about painting it for a long time, but I didn’t get startet, because I thought it was too complicated and because I was too lazy.
Then, a few weeks ago, I met someone really nice from edding, a German company which sells all kinds of pens. We talked about DIY projects and their new spray paint and I spontaneously asked if it could also be used for painting a bike…

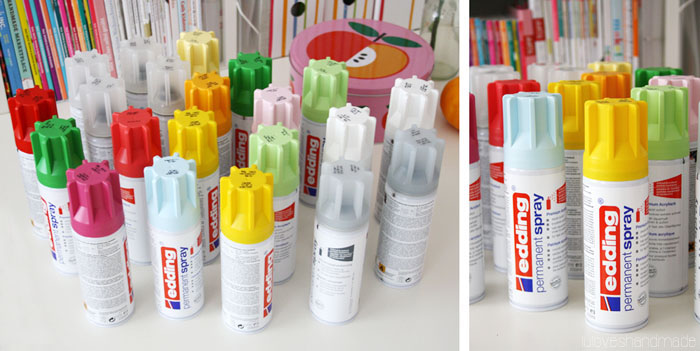
… and one week later I received a huge parcel with all my favorite colors that I had chosen to test them any way I wanted.

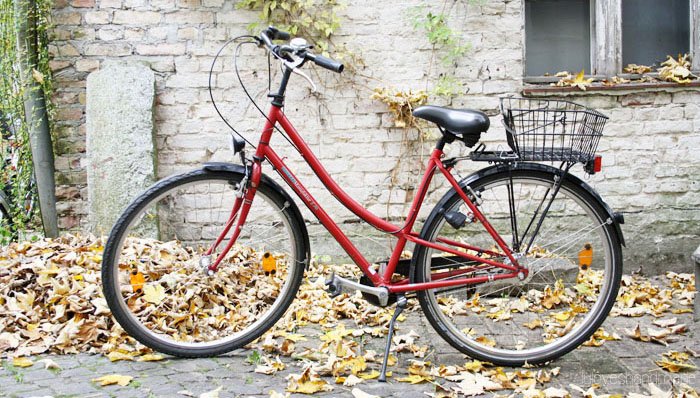
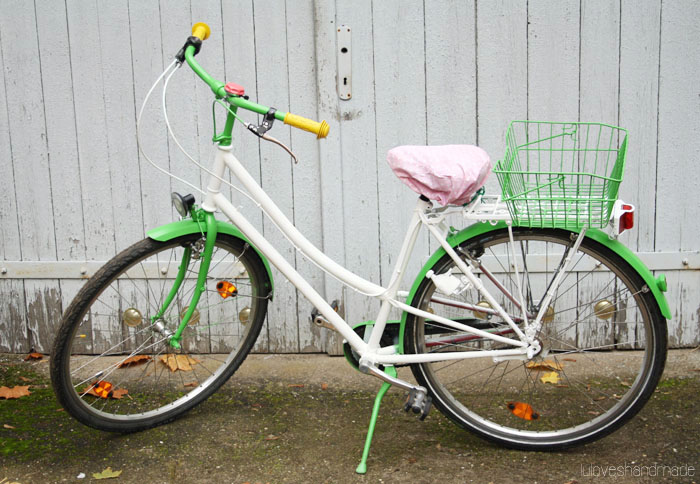
The perfect opportunity to finally get started with restyling my bike! :) This is how it has been looking before, just a normal bike with boring colors.

What I used for my bike makeover:
– A towel, paper towels, brushes and soap water for cleaning the bike
– If you want to, use gloves to protect your hands from dirt and color
– Painter’s tarpaulin (and / or old newspapers) for protecting the floor
– Crepe tape
– Permanent spray paint, plastic primer and universal primer for the undercoat, clear varnish to protect the layers of paint and spray heads in different sizes (I got mine all via edding)

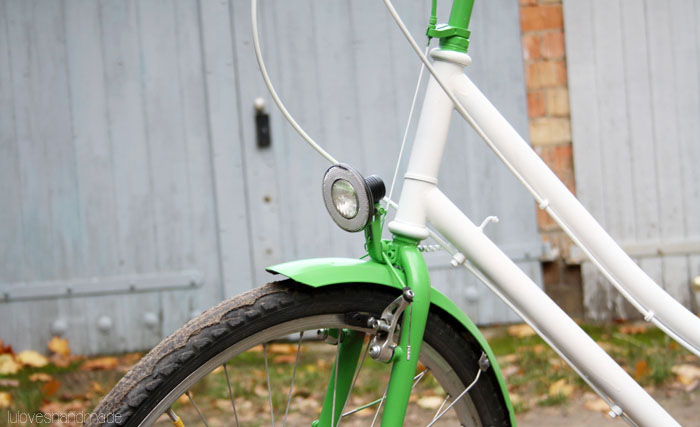
For spray painting a bike, you will need spray paint in your favorite colors, primer and clear varnish. I chose green and white for my bike.

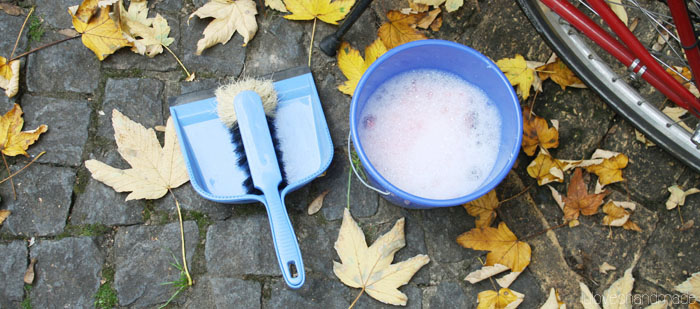
First of all, you need to carefully clean and wash your bike. Remove all dirt, stickers, etc.

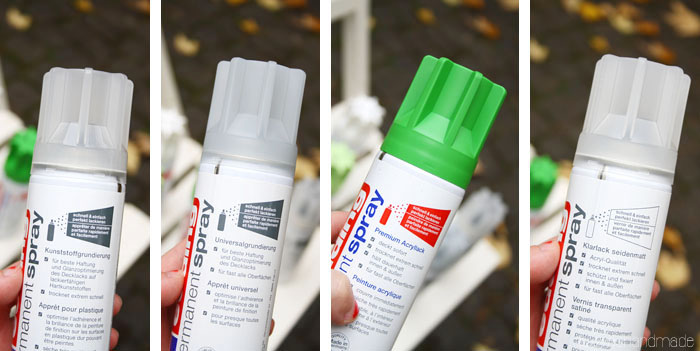
Those are the bottles that I used: (1) primer for plastic (for my mudguards), (2) universal primer for all the metal parts of the bike, (3) color spray paint and finally (4) clear varnish for the last layer of paint.

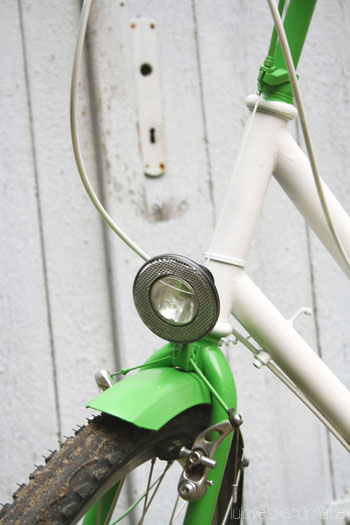
At first, cover all parts of the bike which aren’t going to be painted and won’t need primer. In my case, I had to protect the saddle, the tyres, the spokes, the brakes, lights and other tiny details. I used tape and newspapers to cover everything. Then I applied the primer to the bike. You then have to let it dry (only took a few minutes) and then, according to the primer’s bottle, you should sand the bike a bit, but I left that step out and it still worked well.

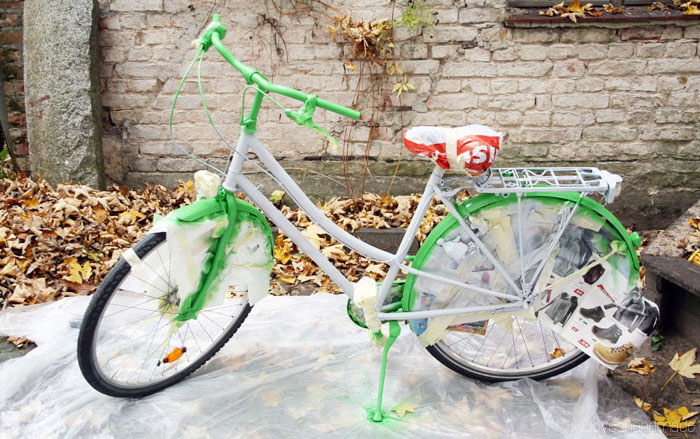
Next, you can apply the first coat of paint. I painted all parts of the bike which I wanted to be green.

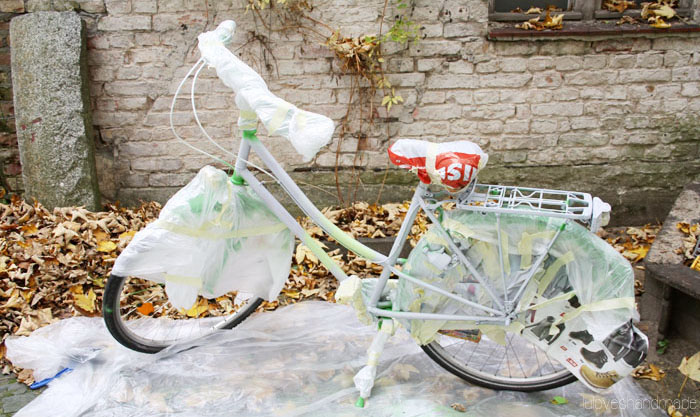
After the first layer of color has dried properly, you can then cover those parts – I used painter’s tarp leftovers for this – and use the next color (I chose white) to spray paint the rest.

After having let the white dried, I removed all the covers. I have to say that spray painting was the easiest part and the colors covered the bike really well. The only annoying and most time-consuming part of the makeover was covering the parts of the bike which I didn’t want to paint during the respective step. ;)
After having finished coloring the bike, I waited for the colors to dry and then I sprayed it with three different coats of clear varnish. This should be enough to protect it.
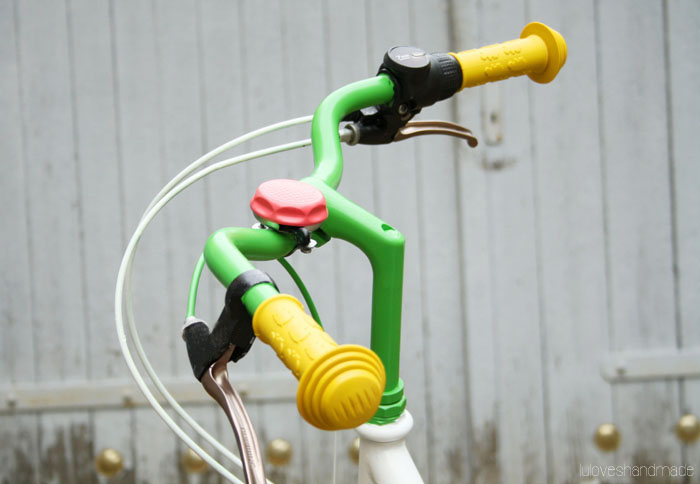
Afterwards, I bought yellow handles and sewed a seat cover (DIY coming soon) to make the makeover complete.

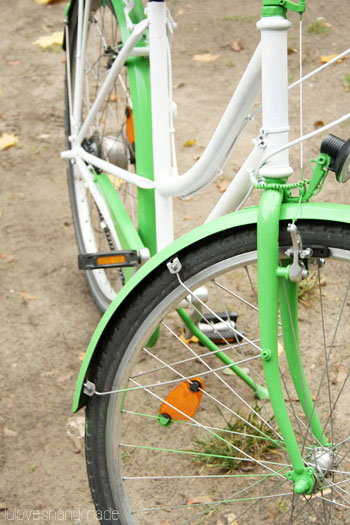
I’m soooo incredibly happy about how this bike has turned out in the end!!
The colors perfectly match my style and absolutely make me happy. I don’t wanna do anything else than riding my bike all day. :D
The spray paint is great and I hadn’t expected it to be so easy and uncomplicated. You don’t need many layers (a maximum of two paint coats is enough), the bottles are easy to handle and the colors are just beautiful. Huh, pretty bike, happy girl!
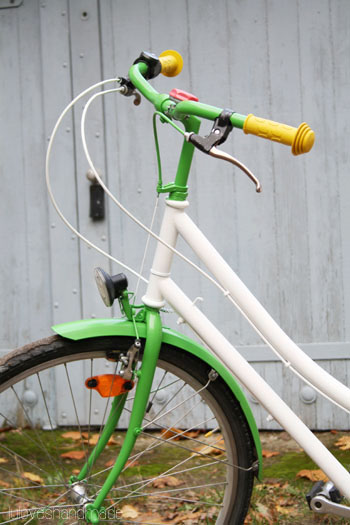
So here are finally lots of detail photos of my new bike:

My cute new yellow handles have such a great color, too!

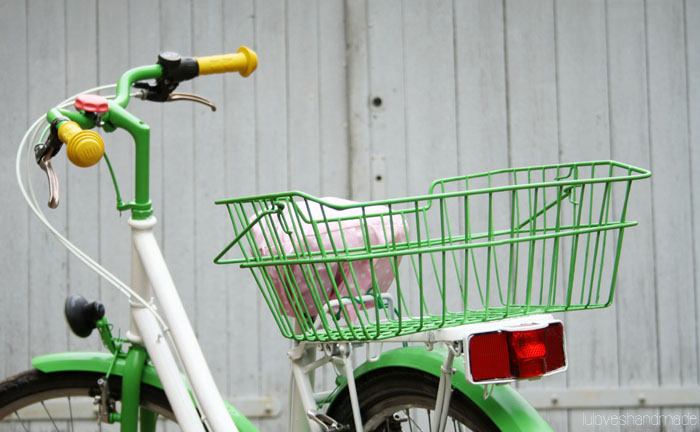
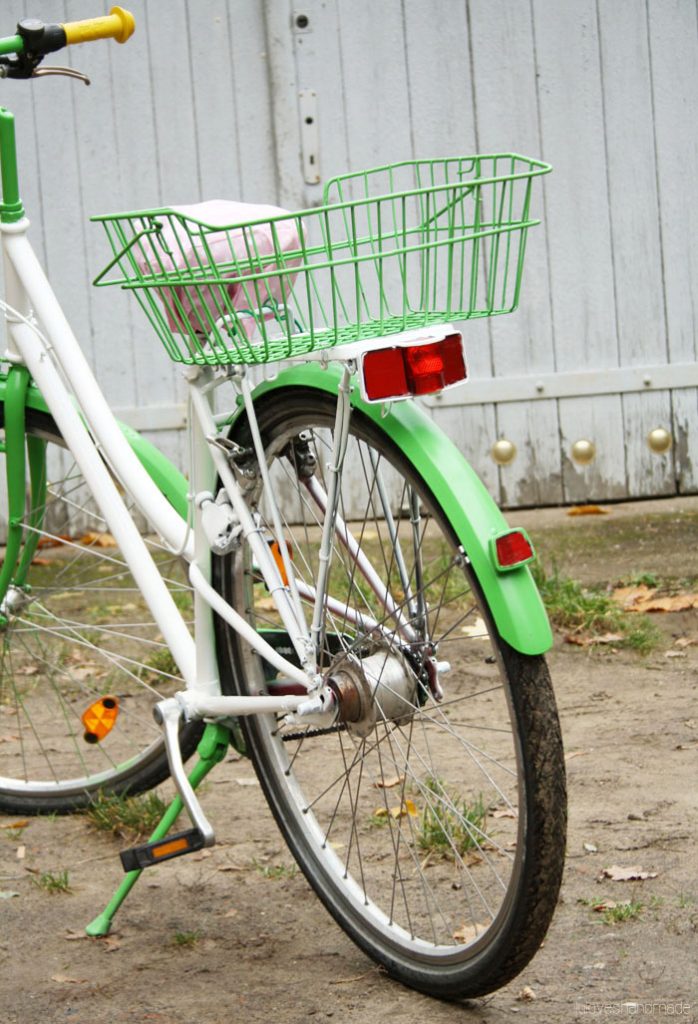
Of course I also painted my bike’s basket.


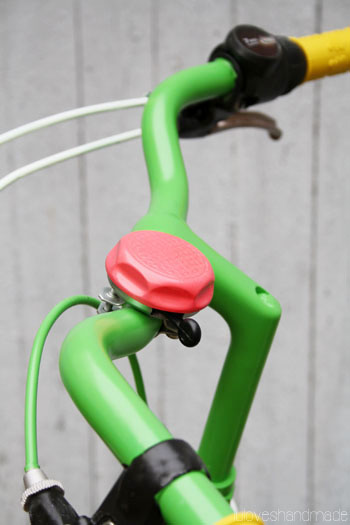
Have you already seen that I even painted my bike’s bell? I chose bright coral as complementary contrast to all the green elements.

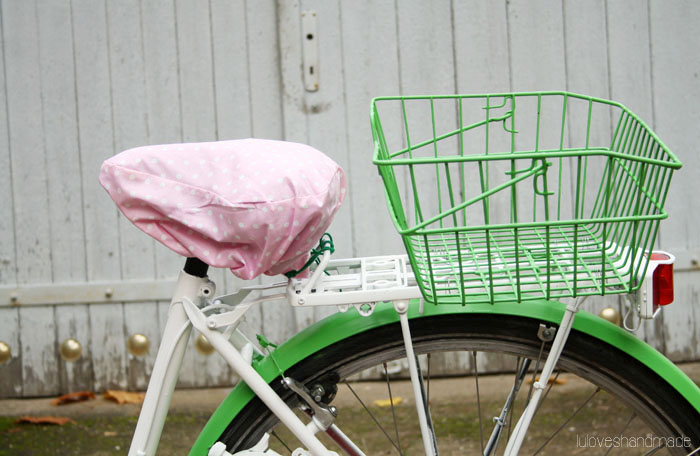
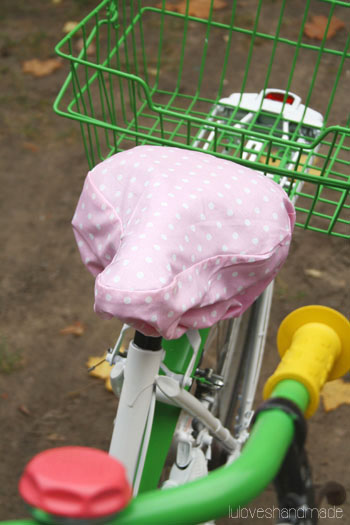
To hide the boring black saddle and to protect it from rain, I spontaneously sewed a rose polka dot oil cloth saddle cover (DIY coming soon).


Colors make me oh so happy!

Awwww, I couldn’t be happier about how my bike turned out! It took me a total of about seven hours (as I already said, covering all the parts with paper was the most annoying and time-consuming part) and it was sooo worth it. Now I love my bike more than ever.
What do you say? :)
Happy day!
Lu
P.S.: edding kindly provided me with all this spray paint, but this of course didn’t influence this blog post’s content and my opinion about their products!

Merken

by luloveshandmade 
15 Comments
DIY, Videos

DIY Video with DaWanda: Winter Wonderland Advent Calendar

October 27, 2013


Hello, my dear readers! Two weeks ago, DaWanda and I have been making a Christmas DIY video for how to make a super pretty winter wonderland Advent calendar. It is made of different paper and cardboard elements and it’s super easy to be made, you don’t need expensive supplies and materials.
I wanted to make a calendar which is interesting to look at and which still matches my style and so I developed this concept in matching colors and with bright elements. The video is in German, but it is quite self-explanatory, so you can even watch it without understanding German and you will still learn how to make this calendar. :)
Have fun!

YouTube

By loading the video, you agree to YouTube's privacy policy.
Learn more

Load video


For filming this video, my lovely colleague Lena again came to visit me
and we spent the morning in my craft corner, I really enjoyed it!

Paper cone trees, a matchbox sleigh, a gift bag house and a toilet roll Santa.

Sewn clouds which could contain a sweet message.

Origami envelopes.


How did you like my DIY video? :) Will you be making an Advent calendar this year?
Last year, I made three different ones, one Advent calendar for Anja, one Advent calendar for Flo and one Advent calendar for my mother. Lots of work and it took me super long, but it was worth the effort!
This year, this winter wonderland calendar is my favorite! :)
Happy crafting!
Lu
P.S.: If you wonder about the weird thing on my left wrist, this was a super cute sewing machine sticky tattoo from DaWanda, but it was already a week old and I forgot to remove the leftovers from my arm before filming the video. ;)

by luloveshandmade 
13 Comments
Outfits

What I Wore: Polka Dots and Yellow Leaves

October 25, 2013


Coat, dress, cardigan, tights, skirt and bag: h&m
Scarf & wrist warmers: handmade by me
Shoes: via mirapodo

Hello, dear readers! I wish you a happy Friday and a cozy weekend! :) Here’s an outfit I wore about two weeks ago, my best friend Anja took those photos during an afternoon in the city. :)


Enjoy those lovely fall days!
Lu

by luloveshandmade 
6 Comments
Everything Else

Review: PhotoLove Prints

October 23, 2013


Hello everyone! Today I’ve got another review for you! I have recently been contacted by PhotoLove, a great small company from Hamburg which turns your photos from Instagram, Facebook or Eyeem into pretty polaroid pictures. Of course I was super excited and chose my fave phone photos for this review.


When ordering your prints on PhotoLove, you have three different options:
a) PhotoMail, an envelope filled with four prints for 5€
b) PhotoBag, a bag filled with up to twelve prints for 13€
c) PhotoBox, a handmade cardboard box filled with up to 24 photo prints for a total of 24€

You can see all three options in the photo above (but my PhotoBox has been shipped in an additional gift box). I really like that there are those three different options and I think their price is fair, too. When receiving all those three packages, I immediately thought about the PhotoMail version with its four photos as a nice surprise gift for a friend, such a nice idea. Moreover, the PhotoBox is great when you want to have more photos at once and the Bag is great for just for fun projects for which you need some polaroid prints of your photos. One package for each occassion, that’s fine!

For the PhotoMail package, I decided to order four prints of some of my favorite outfits to turn them into a collage that makes me happy when looking at it.

The only thing that I didn’t like that much about those PhotoLove prints is the back: of course this black background reminds of the back of original polaroids and it’s a nice visual contrast with the information about PhotoLove, but I rather prefer anything colorful instead of black and I think the information in the back is way too big so that the polaroids don’t serve well as a present. Nevertheless, I really like the kind note on the cardboard holder of the photos.

This is a collection of twelve photos, exactly the amount that you can get when ordering a PhotoBag. I love all the colors of my photos and I love seeing them at another place than only on my phone’s display. :)

I’m super satisfied with the quality if the prints: the colors are super bright and the surface is a little but glossy which makes the polaroids nearly look like real ones, that’s super cool!

Next, here’s my gift box I received with the order of a PhotoBox with 24 photos. Nicely packed and handmade in Hamburg, that makes it extra special.

When I have finally been holding all my pretty photos in my hands, I immediately thought about what to use them for. Some will be added to presents and some will simply be glued into photo albums:

You know I love bright colors and I love masking tape, it’s a perfect combination when attaching the polaroids onto the plain pages of a photo album. Keeping memories like this is a perfect way to spend a grey afternoon in fall. :)


Apart from filling my photo album with the photos, I also hung some of them up on my wall so that they can always be seen and make me happy! Because the colors are so bright, they perfectly match everything else in my home!

Here are finally two of the prints with the original place where I took them. I like those kinds of photos

All in all, I’m super satisfied with everything – the good service, the quality of the photos, the colors and their overall look which is very close to an original polaroid. Moreover, the website is really pretty and the ordering process is super easy, you simply have to log in your respective account (Instagram, etc.) and choose the photos. The black back with the big company information is the only tiny thing that I didn’t like that much, but as long as I don’t want to use them as postcards, that doesn’t matter.

Have you already ordered at PhotoLove? I hope my review was helpful for you and you enjoyed the colorfulness in this blog post! :)
Happy day!
Lu

P.S.: The items in this blogpost have been sponsored for the purpose of this review, but this doesn’t touch or influence my personal opinion!

by luloveshandmade 
5 Comments
DIY, Freebies, Handlettering & Illustration

DIY: Fall Paper Decor for Table and Wall

October 21, 2013


Hello! :) Today I’ve got a pretty fall decor project for you. We recently spent our Sunday afternoon with mushroom picking with friends and afterwards invited them over for a homemade fall dinner in our kitchen. For this dinner, I prettily decorated the table and the kitchen wall with paper leaves and here’s the easy tutorial – or rather inspiration project – for you.

You need:
– Branches and rosehips
– Papier napkins and matching wool
– Scissors, pens, a puncher and white cardboard
– Optional: my pattern for the leaves which you can download here

Take your pen and either use my pattern or your own creativity to freely draw leaves onto white cardboard.

Cut out the cardboard leaves.

Take the puncher to make holes into the leaves.

Turn them around and also draw the leaves onto the other side of each piece of cardboard.


Then take your wool or cord and pull it through the holes.

Now you need the paper napkins and the rosehips to finish the decorative elements for your guest’s plates.

Take the rosehips and use the wool to attach it to the cardboard leaves. You can then put them onto the napkins and use them to decorate all the plates. I used napkins matching my turquoise table and decided to add red to this color concept.


The leaves with the wool hangers can be used to decorate the branches which are put into a vase on the table.

Sooo pretty!


Those colors are so pretty and made it possible to combine one of my fave colors (turquoise) with this light red as a fall color in order to make a pretty fall decor for our dinner.

You can then make some more of those leaves and simply pull a long cord through it. Although mine has a rather different style, this bunting is inspired by my best friend Anja’s fall bunting. So if you rather prefer colorful leaves, you can print out her pretty printable. :)

My leaf bunting is black and white and perfectly matches the red apple bunting which I sewed two years ago when we moved in here.

This was such a lovely Sunday with friends and as you know, I love every nice opportunity to work on a little decor concept.
Happy crafting!
Lu

Merken

by luloveshandmade 
8 Comments
« Previous Page
Next Page »

Hello & Welcome

Hello & Welcome

I'm Lu, I'm 34 years old and I live in wonderful Berlin. I am a Content Creator and DIY enthusiast and I am the founder and editor of Luloveshandmade.com where I share colorful everyday life happiness, handletterings, tutorials and other creative content. Apart from being a Handlettering Artist and running my own indie business, I'm a Content & Communications Manager. Read more about me and my creative work or visit my business portfolio page and have fun exploring this blog.

Get Inspired

  • Luloveshandmade-Handlettering-Feminism-Feminismus-Pro-Choice-Weg-mit-219a-bunt

    Pro Choice // Weg mit Paragraf 219a!

    January 24, 2021
  • Luloveshandmade-Shop-Update-Illustration-Handlettering-Spreadshirt-1

    Luloveshandmade Shop Update – New Products with my Letterings and Illustrations via Spreadshirt

    October 19, 2020
  • Luloveshandmade-Handlettering-Illustration-Make-Periods-Table-Talk-Menstruation-Feminism

    Make Periods Table Talk

    September 11, 2020
  • Luloveshandmade-Uncle-M-Music-All-Boobs-Are-Beautiful-6

    All Boobs Are Beautiful – Special Limited Edition Shirt via Uncle M Music Shop

    July 24, 2020
  • Luloveshandmade-Free Handlettering Printable-We Will All Make It Through All Of This (1)

    Free Handlettering Printable: We’ll Make It Through This

    April 13, 2020

Tags

advice balcony berlin guide christmas cities diy fake polaroid fashion favorite blogs favorite indie label favorite restaurants and cafes favorite shops featured fellow bloggers feminism food and cooking food table freebie giveaway handlettering handmade home decoration home tour instagram instagram photo printing service life and friends list lomography longboarding makeover market news painting and drawing party photography potsdam guide pretty online finds recipe review selling sewing shopping sponsoring travel video vintage what I wore wishlist
...
Followers
Follow
...
Followers
Follow
...
Fans
Like
...
Followers
Follow
...
Posts
0
...
amazing followers

My favorite Posts

  • Our Sweet And Happy Croatia Adventure // Summer Holidays on Brač
    Our Sweet And Happy Croatia Adventure // Summer Holidays on Brač
  • Handlettering Workshop Recap
    Handlettering Workshop Recap
  • A Colorful Portrait Shooting (& Advice for How to Prepare for It)
    A Colorful Portrait Shooting (& Advice for How to Prepare for It)
  • Handlettering for Beginners (with Pinterest) & Valentine
    Handlettering for Beginners (with Pinterest) & Valentine's Day Printables
  • Pinterest Basics for Bloggers
    Pinterest Basics for Bloggers

English: Imprint // Data Protection
German: Impressum // Datenschutzerklärung

Copyright © 2025 · Prima Donna theme by Georgia Lou Studios

© 2010 - 2017 luloveshandmade · Theme by Georgia Lou Studios, adapted by kathastrophal.de.