
Hello hello! Eeeeks, I’m so excited about this blogpost, because it is about a project I have been wanting to do for so long!!
I got my current bike more than 15 years ago and although it’s a great bike, the colors are totally not my style anymore. I’ve been thinking about painting it for a long time, but I didn’t get startet, because I thought it was too complicated and because I was too lazy.
Then, a few weeks ago, I met someone really nice from edding, a German company which sells all kinds of pens. We talked about DIY projects and their new spray paint and I spontaneously asked if it could also be used for painting a bike…
… and one week later I received a huge parcel with all my favorite colors that I had chosen to test them any way I wanted.
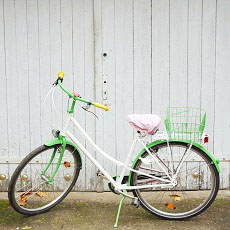
The perfect opportunity to finally get started with restyling my bike! :) This is how it has been looking before, just a normal bike with boring colors.

What I used for my bike makeover:
– A towel, paper towels, brushes and soap water for cleaning the bike
– If you want to, use gloves to protect your hands from dirt and color
– Painter’s tarpaulin (and / or old newspapers) for protecting the floor
– Crepe tape
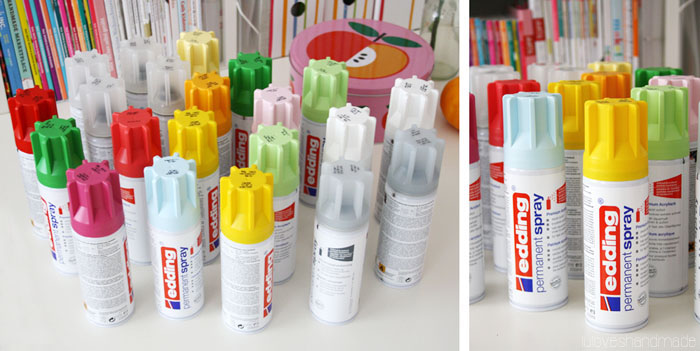
– Permanent spray paint, plastic primer and universal primer for the undercoat, clear varnish to protect the layers of paint and spray heads in different sizes (I got mine all via edding)

For spray painting a bike, you will need spray paint in your favorite colors, primer and clear varnish. I chose green and white for my bike.
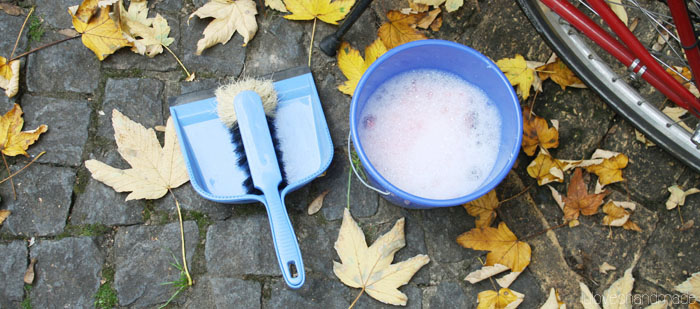
First of all, you need to carefully clean and wash your bike. Remove all dirt, stickers, etc.
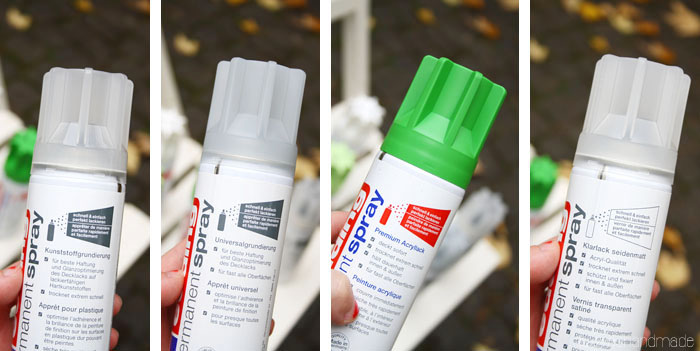
Those are the bottles that I used: (1) primer for plastic (for my mudguards), (2) universal primer for all the metal parts of the bike, (3) color spray paint and finally (4) clear varnish for the last layer of paint.

At first, cover all parts of the bike which aren’t going to be painted and won’t need primer. In my case, I had to protect the saddle, the tyres, the spokes, the brakes, lights and other tiny details. I used tape and newspapers to cover everything. Then I applied the primer to the bike. You then have to let it dry (only took a few minutes) and then, according to the primer’s bottle, you should sand the bike a bit, but I left that step out and it still worked well.
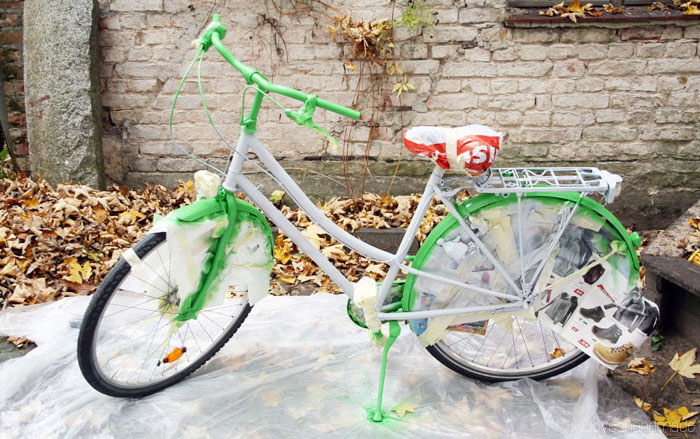
Next, you can apply the first coat of paint. I painted all parts of the bike which I wanted to be green.
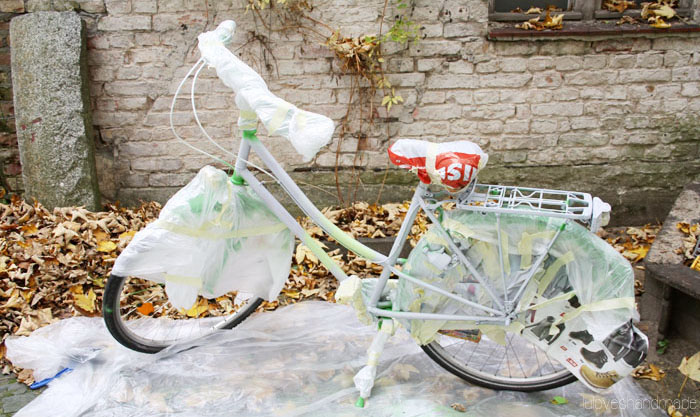
After the first layer of color has dried properly, you can then cover those parts – I used painter’s tarp leftovers for this – and use the next color (I chose white) to spray paint the rest.

After having let the white dried, I removed all the covers. I have to say that spray painting was the easiest part and the colors covered the bike really well. The only annoying and most time-consuming part of the makeover was covering the parts of the bike which I didn’t want to paint during the respective step. ;)
After having finished coloring the bike, I waited for the colors to dry and then I sprayed it with three different coats of clear varnish. This should be enough to protect it.
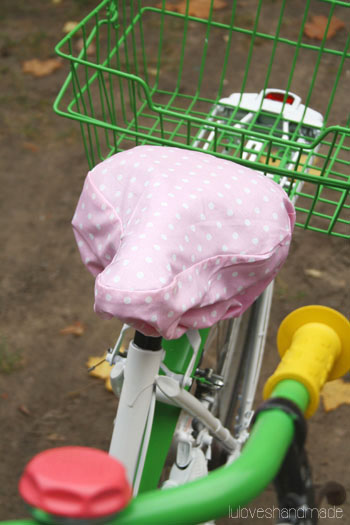
Afterwards, I bought yellow handles and sewed a seat cover (DIY coming soon) to make the makeover complete.

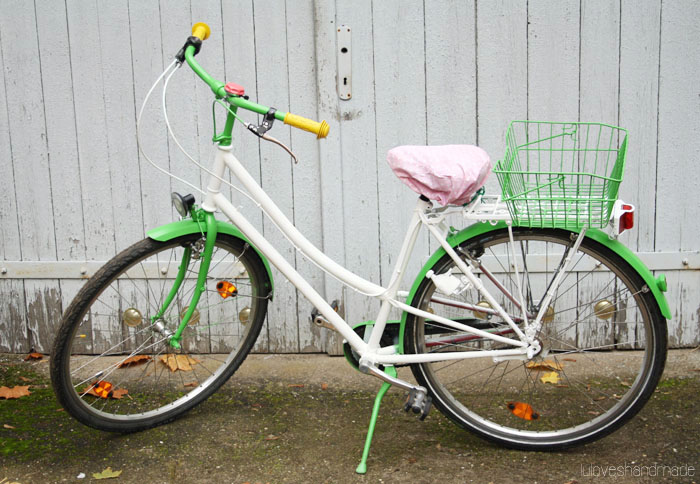
I’m soooo incredibly happy about how this bike has turned out in the end!!
The colors perfectly match my style and absolutely make me happy. I don’t wanna do anything else than riding my bike all day. :D
The spray paint is great and I hadn’t expected it to be so easy and uncomplicated. You don’t need many layers (a maximum of two paint coats is enough), the bottles are easy to handle and the colors are just beautiful. Huh, pretty bike, happy girl!
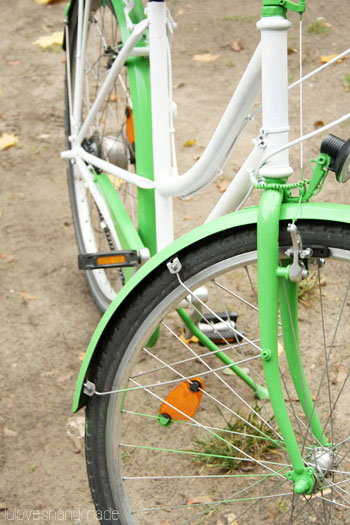
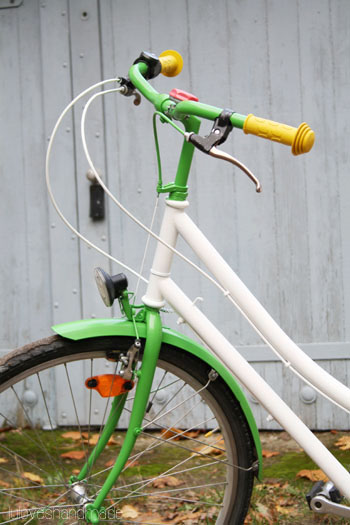
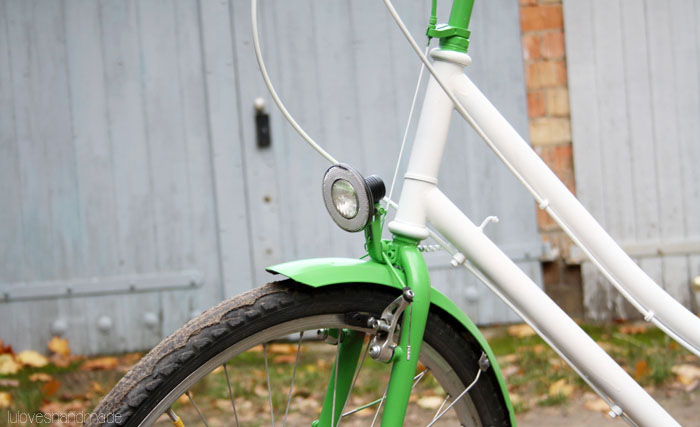
So here are finally lots of detail photos of my new bike:

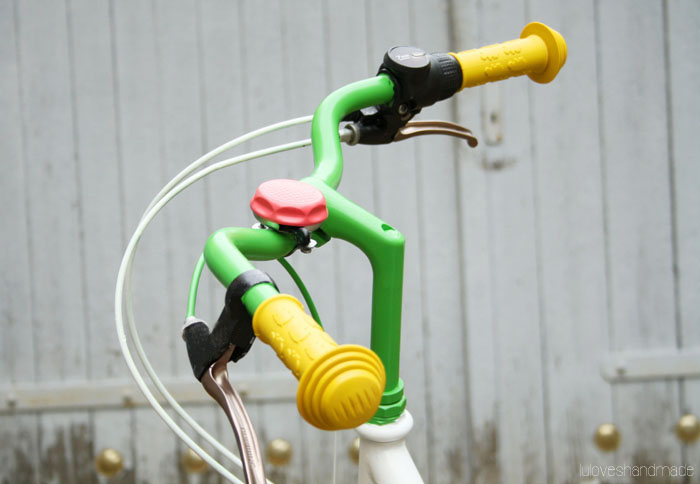
My cute new yellow handles have such a great color, too!
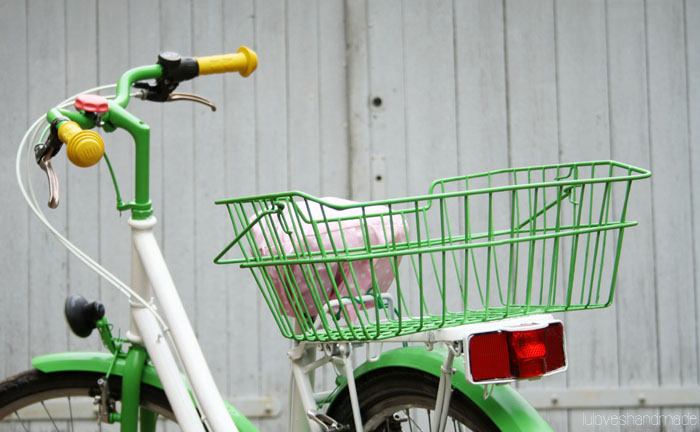
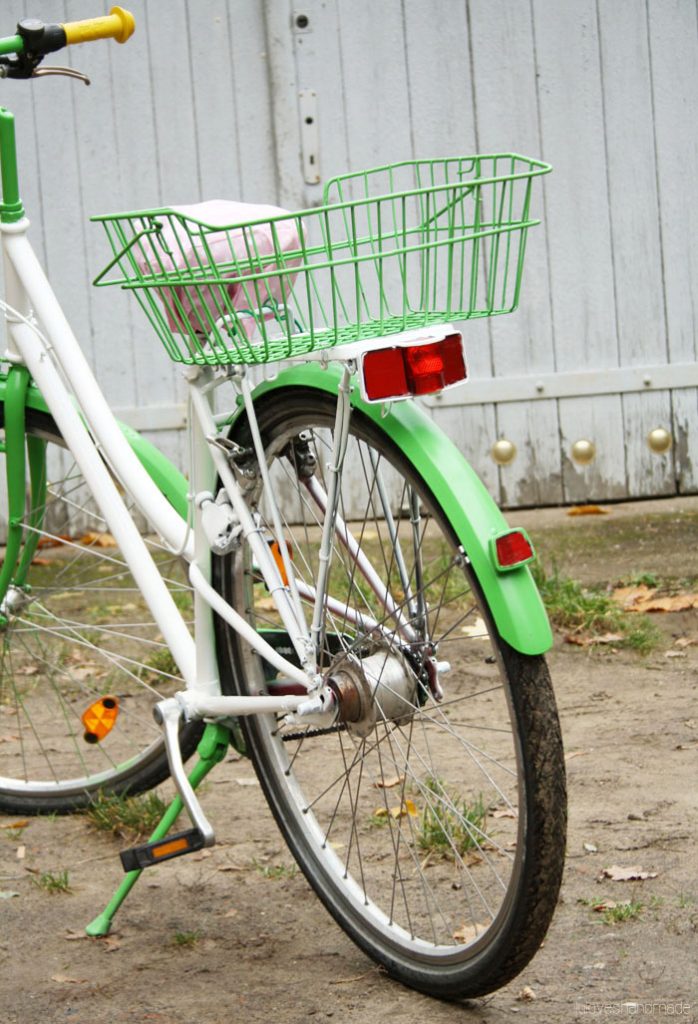
Of course I also painted my bike’s basket.

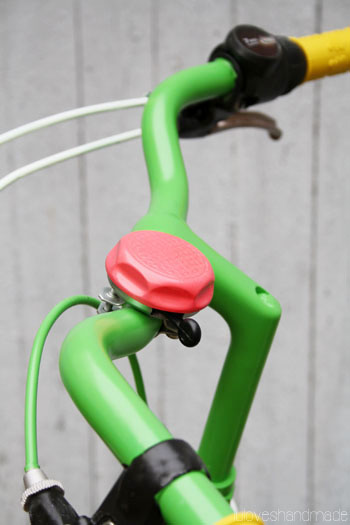
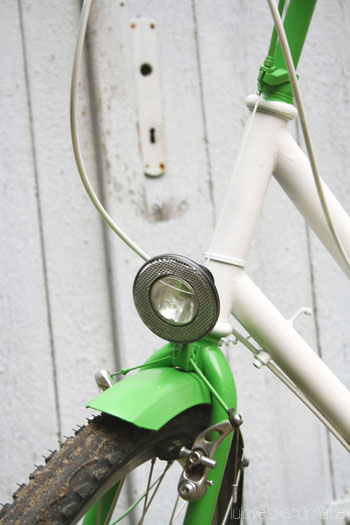
Have you already seen that I even painted my bike’s bell? I chose bright coral as complementary contrast to all the green elements.
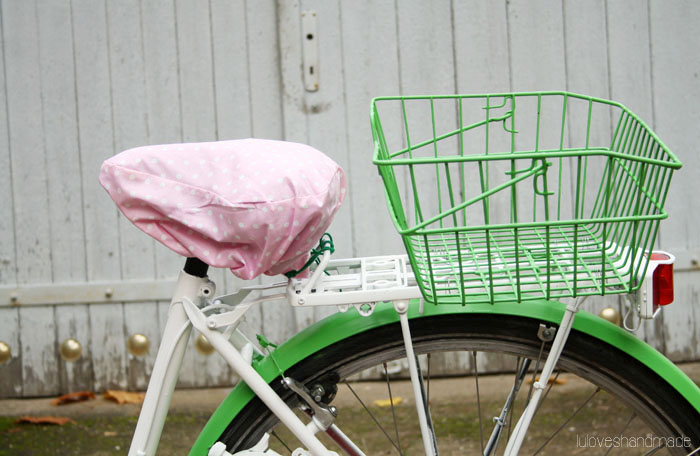
To hide the boring black saddle and to protect it from rain, I spontaneously sewed a rose polka dot oil cloth saddle cover (DIY coming soon).

Colors make me oh so happy!
Awwww, I couldn’t be happier about how my bike turned out! It took me a total of about seven hours (as I already said, covering all the parts with paper was the most annoying and time-consuming part) and it was sooo worth it. Now I love my bike more than ever.
What do you say? :)
Happy day!
Lu
P.S.: edding kindly provided me with all this spray paint, but this of course didn’t influence this blog post’s content and my opinion about their products!


Dein " neues " Rad schaut jetzt wirklich kunterbunt hübsch aus :) ! Ich werde meines zwar nicht umfärben , aber die kleinen Details , wie Griffe , Klingel und Sattelschutz werde ich mir abschauen ! Danke für die Inspiration !
Einen feinen Wochenstart wünscht dir Ursula
Ich hab grad das Da wanda video von deinen 2 Liebsten auf You Tube gesehn :D
Soo sooo süß ! :)))
perfect!
Sooo schön!
Liebe Grüße
Karin
Ich hab mein Fahrrad auch so verändert. Den alten Lack abgeschliffen, blau angesprüht und rote Herzen udn Marienkäfer drauf geklebt! :) Deins ist auch sehr schön geworden!
Kisses
Tabea
http://wolkedrei.blogspot.de/
Oh wie schön! Mein langweiliges Rad wartet auch schon lange auf ein "Makeover" aber ich glaube es muss noch bis zum Frühling warten… Liebe Grüße Lisa
Ach was für eine schöne Idee! :) Ich habe auch mal ein altes Rad in quietschgrün umgesprüht. Ist gar nicht mal sooo schnell gemacht, wie man denkt… mit all dem Abkleben und den mehreren Schichten. Und deine Farbkombi gefällt mir sehr gut – deshalb bestimmen sie auch mein Zimmer ;)
Viele Grüße und weiter so, dein Blog ist mir sehr sympatisch!!!
Ist richtig, richtig schön geworden :-) Ich wusste gar nicht, dass Edding nun auch Spray-Paint macht, gut zu wissen :-) Liebste Grüsse, Francesca
AH! wie cool! gefällt mir supergut! Ich hätte garnicht gedacht, dass man aus einem normalen Fahrrad so ein süsses und schönes machen kann :)
Ernsthaft – nur 9 Kommentare? Dein Fahrrad-Restyling ist einfach großartig und hat Beifallsstürme verdient! Die Farben sind großartig, das Rad ist jetzt SO Lu-like! (: Ganz ganz toll. Mein Rad ist zwar erst zwei Jahre alt, aber ich hätte eigentlich auch Lust, das weinrot-metallic durch gelb oder orange zu ersetzen… Gut zu wissen, dass es mit der Edding-Farbe so gut geklappt hat! Maik hatte vor ein paar Jahren mal sein Rad angesprüht und es war das reinste Desaster. (;
Alles Liebe und viel Freude mit deinem neuen Gefährten (bevor der Winter kommt),
Laura
tolles rad!! hält das wenn man es nicht anschleift?
glg eva
Hallo Eva! Ich habe nichts angeschliffen und es hält immernoch super mit der edding Farbe. :)
Liebe Grüße, Lu
Wie viele Spray Flaschen hast du ingesamt benötigt? Kannst du das etwa abschätzen?
Hallo! :) Ich glaube es waren insgesamt 2 Dosen Grundierung, 4 Dosen Farbe (Weiß & Grün) und 2 Dosen Klarlack. Liebe Grüße! :)
Thanks for sharing the information. That’s a awesome article you posted. I found the post very useful as well as interesting. I will come back to read some more.carbon wheel