• Home
  • About
  • Portfolio
  • Shop
  • Collaboration
  • Imprint
Bloglovin
Instagram
Pinterest
Facebook
Twitter
Contact

Luloveshandmade

Crafts, colors & everyday life happiness

  • DIY
  • Handlettering & Illustration
  • Outfits
  • Recipes
  • Parties
  • Videos
  • DIY: FIMO Statement Earrings & Five Further Creative DIY Projects with FIMO
    DIY: FIMO Statement Earrings & Five Further Creative DIY Projects with FIMO
  • DIY: Longboard Handlettering Project
    DIY: Longboard Handlettering Project
  • Free
    Free 'Get Well Soon' Handlettering Printables
  • Happy Words - Free Handlettering Calendar Printable 2020
    Happy Words - Free Handlettering Calendar Printable 2020
  • DIY Gift Ideas
    DIY Gift Ideas
  • Free Printable: Handlettering Calendar 2019
    Free Printable: Handlettering Calendar 2019
  • What I Wore: Abandoned Swimming Pool
    What I Wore: Abandoned Swimming Pool
  • Freebie: Herb Label Printable (in German)
    Freebie: Herb Label Printable (in German)
  • DIY: Road Trip Embroidery Hoop Wall Decor
    DIY: Road Trip Embroidery Hoop Wall Decor
  • DIY: Wooden Geometrical Necklaces
    DIY: Wooden Geometrical Necklaces
Everything Else

7 Years of Luloveshandmade – Thank you!

March 21, 2017

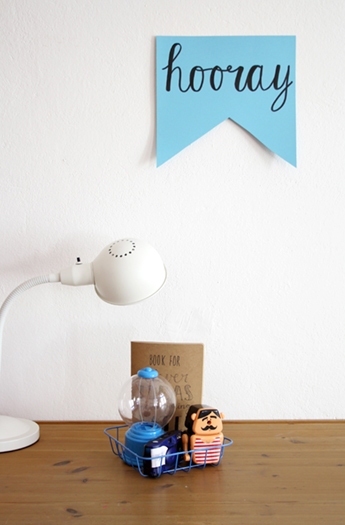
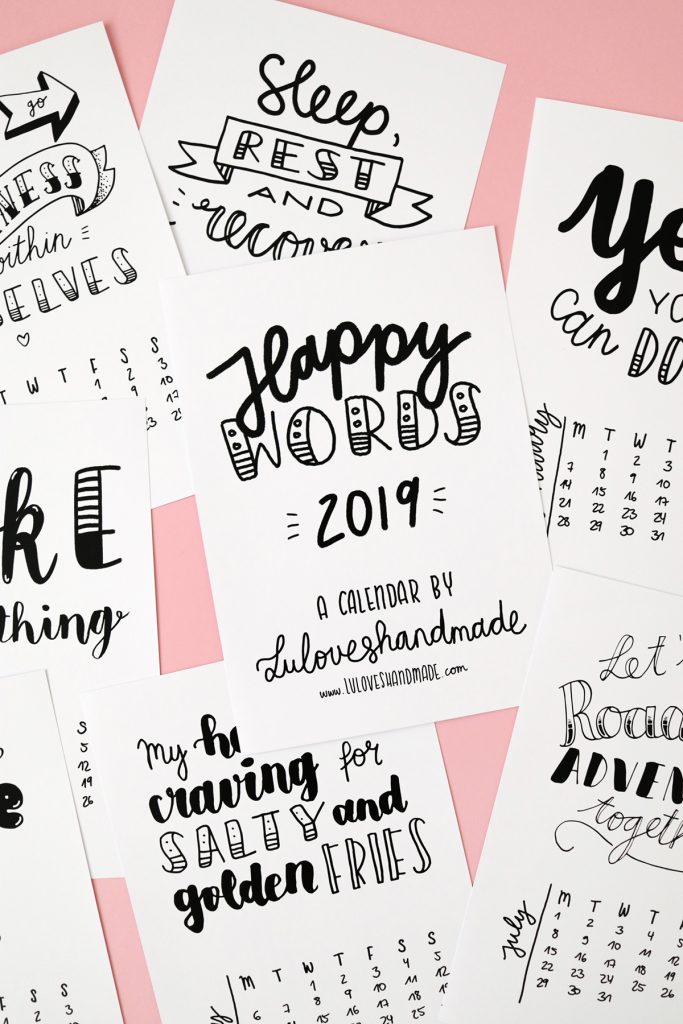
Hooray, such a pleasure! It’s been exactly seven years ago that I published my very first blogpost here on Luloveshandmade.


After having previously written a private blog for my friends after I had moved from Kassel to Berlin, I opened this blog in March 2010 and I was already dreaming big:
“Because I want to become more famous with this blog and since I dream of
selling my handmade stuff one day, I deciced to change the name and
have also decided on getting a new blog address. (…) You hopefully like my new name, I’m really in love with lu loves handmade and am looking forward feedback. :)” (- written by my slightly younger self 7 years ago)
Awww, how cute, I am melting a little bit right now, because this post is too cute and it triggers so many emotions and memories about those very early days of writing blogposts, about exchanging thoughts and of setting up my DaWanda shop. Good times!
When I wrote this very first Luloveshandmade blogpost, I had ABSOLUTELY no idea what was about to come. I could have never dreamed of all those things that have actually happened.
I met so many exciting people through my blog, some of them have become really close friends, I developed my personal style and skills, tried out many different techniques, I built up a strong creative network, worked for great clients, generated an income with my blog, positioned myself as an expert with topics that I love, learned A LOT and most of all, I had tons of fun.
Thank you so much for reading my blog and for following my creative journey, I am incredibly thankful and appreciate your support and lot!

Big hugs,
Lu

by luloveshandmade 
3 Comments
Everything Else

Pinterest Basics for Bloggers

February 27, 2017

A while ago, I already wrote a little beginner’s guide to using Pinterest and told you about how to get started with handlettering while using Pinterest as a learning tool.


Since then, I have been constantly filling my boards with pretty images and many sources of inspiration, I’ve been guest pinner on awesome company accounts and I’ve done several cooperations for brands which involved Pinterest. My Pinterest profile‘s followership has grown ever since to more than 55.000 followers, hooray! :) Next to Instagram, it’s my fave app and I use it nearly on a daily basis.


Over the last couple of months and years, other friends or bloggers have been asking me for advice concerning their profiles and Pinterest strategy and I have already had a look at several accounts and gave them advice about what they could improve. Just recently, my lovely flatmate You and I DIY and her photographer friends approached me and asked me for a private Pinterest workshop. Thus, I put together my knowledge, created an info sheet and spent an evening sharing what I know about this awesome platform and answered their questions. To sum up everything, I put together some of the information for you as well. Have fun and let me know in case you have something to add! :)

Why you should use Pinterest:

  • Discover, save, do: Pinterest is the perfect place to discover new trend topics, get inspired, save and sort ideas and then put them into use. It is for example great to collect useful business tools and advice, to acquire new skills and to simply save what visually inspires you. Pinterest is a great place for learning something new.
  • Most of the users are women. Depending on your target group, it is awesome to have such a huge audience.
  • The half-life period of a pin on the virtual discovery tool is way longer than the one of any other posting on social media channels like Instagram or Facebook. On Instagram, for example, people usually only scroll their current timeline and rarely discover people’s postings from a few days ago. Thus, content which is older is barely prominently visible anymore. But on Pinterest, as long as other people discover and share your pins, the number of repins becomes higher after a while, your content can work for you and steadily increases your website’s traffic over time when you pin images that people are attracted to. This way, you can gain new readers and your website’s user statistic becomes more impressive for potential clients, since more people see the content you are posting.
  • Pinterest can perfectly be used as a visual portfolio to represent your brand, projects and taste and to express your style. It is completely up to you to curate content according to your personal asthetics and you can also show your own work: for example, I use Pinterest to collect photos that other people took of my handmade products or to keep track of other people mentioning me in a business context.

  • Group boads can be used for organization, to work on projects with others and also to increase your reach, because you can also profit from the reach of the other group members. As one fun project, I created the board ‘My Happy Pops Of Color‘ a while ago and invited people whose taste I like. Since then, we have been filling this board with hundreds of inspiring images.
  • Secret boards are an awesome means to collect inspiration just for yourself without your followers knowing about it. They are for example a great tool to put together gift ideas, to organize parties, to make a visual briefing or to plan holidays.

Advice to improve your Pinterest profile:

Improve the profile itself:

To use Pinterest in order to attract more follwers, to be found easily and to have extra fun while pinning, here are a few ideas to improve your profile without much effort: 
  • Improve your profile description by adding your name, information about where to find you elsewhere, by adding focus topics you want to be related to and an outstanding profile picture. Also improve your board titles by using SEO-friendly (clear expressions and not cryptic, e.g. ‘Bedroom interior’ instead of ‘Furniture for my favorite cozy place’), specific and easy to read headlines. Also take care of your board descriptions (long texts which are nice to read, but still full of keywords, helping users to find your content through the search), pin descriptions and cover images (make navigation easy and help people to quickly find the content they are looking for). Moreover, choose a board category that fit’s the boards content so that it can easily be found by others.
  • Optimize the structure of your boards: most important content should come first. Nobody wants to scroll through 80 boards to find your favorite ones. Your content should be easy to find and you need a clear arrangement of boards.
  • Find a good balance between pinning own content and curating and repinning the content of others. 
  • Create pins that are valuable for pinners, because people want to discover and to learn. This may for example be educational content like DIY tutorials, recipes or a guide for how to make a great media kit, or this may be hair styling tips or a good photography tutorial. You could also pin a travel or city guide with your favorite places and recommend spots that others should visit.

  • Verify your website in order to gain access to the analytics that Pinterest provides. To do so, you have to insert a meta tag provided by them. Create a business account to use Pinterest Analytics in order to get insights into your website’s most successful content, to find out more about your audience and followers and to get an overview of popular content on your profile. For me, it was super helpful to see which content from my website people really like. As you can see in my statistics, my profile has an average of 200.000 daily impressions which is pretty cool. Moreover, I currently reach about 970.000 monthly viewers, which is nearly a million (!!!).

  • When looking at the specific statistics of your domain, you can see the interplay with your Pinterest account. Your website provides content and your Pinterest account provides traffic and enlarges your audience in case you pin good content. In this example, you can see how many impressions the original pins from my website received in the last 30 days, how many clicks to my blog they generated, how often they have been saved and how many likes they got. This is an amazing feature to monitore your content and to see what’s popular among your readers. Moreover, it is also an awesome option to see how the content of a cooperation is performing on Pinterest and you can use it as a basis for your monitoring and reporting.
  • Pin frequency: pin on a regular basis and find out at which time to pin best and when your followers are most active. I often use spare time during train rides to enjoy looking through my Pinterest time-line. Moreover, take into consideration where your main audience is from, e.g. from the US or Germany, and take into account which time of the day it is there while you are pinning.

  • Pin quality and topics: pin images displaying niche topics and create boards that are more specific to stand out in the masses of pinboards, e.g ‘DIY: Leather Handbags’ instead of just creating DIY boards in which you pin all various kinds of projects. Apart from my basic DIY board, I created boards for all different kind of special DIY topics to make content clusterering more visible and to find the right project at any time.
  • Use affiliate links when pinning products and use affiliate services in order to gain some income through your pins and the traffic you redirect from them to a webshop.
  • Tidy up your boards and delete content which you have pinned a while ago and which does not express your style and visual language anymore. Thus, followers do not get distracted and you ensure an overall coherent visual expression.
  • Pay attention to the importance of giving proper credit to other people’s work and intellectual property. When you fill Pinterest with new content, make sure to only pin from the original source and add a solid pin description.

Make your website or blog pin-friendly: 

To make pinning from your website easier for yourself and your followers, read the following advice:
  • Fill your blog or website with vertical format images, they are discovered and pinned more frequently and better stand out in the time-line on Pinterest.
  • Activate rich pins which are pins with additional information for even more service and informational value for your followers (there are rich pins for products, places, recipes, articles, apps and movies). My wonderful friend Katha from Kathastrophal has written a great guide for how to activate rich pins (in German) which empowered me to do it myself a while ago.
  • Use the ‘Pin it!’ button on your website and also add the Pinterest button to your own browser.

  • Make your content pinnable and create graphics for blog content to be pinned. They should match your overall brand’s visual aesthetics and for example contain your standard fonts, colors and typical photo motifs.
    Create customized and oversize pins: create pins including various images and typo for one project or post. Those pins are longer than conventional pins, stand out more in people’s time-lines and can be uploaded manually. This is also a great way to promote old website content and gain even more traffic.

  • Use the Pinterest widget to promote your Pinterest account in your blog / on your website. Open one of your boards, click onto the three dots on the top and create a widget. You can then choose the size and the style and embedd it in the sidebar or directly in blogposts when it fits the topic.
Hooray, Pinterest is awesome! Let me know in case you have something to add, if you have criticism or of you have questions. :)
And in case you want to go more into detail, simply contact the Pinterest team, e.g. Pinterest DACH, or visit the Pinterest business page.
If you liked this article and found it helpful, feel free to share it:

Happy day and thank you for reading! :)
Lu
P.S.: No, this is not a sponsored coop post, I simply truly love Pinterest and use it for my creative everyday work. Yay! :)
by luloveshandmade 
3 Comments
Handlettering & Illustration

Shop Update: New Luloveshandmade Handlettering Collection

February 22, 2017

Horray, hooray! Over the past few months, I’ve been doing handlettering projects like crazy and filled my Instagram feed with new motifs under the hashtag #luloveshandmadespenandpaperadventures.


After sketching, scanning, editing and printing a whole bunch of my new letterings, they are finally available in my DaWanda shop:
>>> My handletterings in my shop

So here’s a full blogpost with all my new drawings so that you know what is awaiting you.

New Handletterings in My Shop:


Hooray, so many letterings! I am super excited about this new collection and I already sold and then relisted some of them. The cat print is from the last collection, but still one of my best sellers.

Which ones are your favorites? :)
Can’t wait for creating even more letterings, such a fun thing to do!
Happy day and thank you for following along!
Lu

by luloveshandmade 
Leave a Comment
DIY, Handlettering & Illustration

DIY: Road Trip Embroidery Hoop Wall Decor

February 15, 2017

[Werbung: this post is sponsored by Volkswagen]

Hooray horray, DIY time! Over the last several months, I have teamed up with Volkswagen for various creative projects and this time, we are making road trip themed embroidery hoops as decoration for your home.


Handlettering, illustrations, cars, road trip memories and embroidery combined with each other, that’s what today’s DIY is about.


Either use my motifs as inspiration, or create your own ones. Here we go:

Materials for  Embroidery Hoop Wall Decor:


This is what you need:
– Wooden embroidery hoops in different sizes
– Embroidery fabric
– Embroidery yarn, scissors and an embroidery needle
– A hot-glue gun (optional, not pictured here)

Make Your Own  Road Trip Embroidery Hoop Wall Decor:


First of all, use a pencil and then a felt tip to draw your motifs. Make sure they fit the size of your hoops and leave some space on the edges. Put the fabric into the wooden hoops and then carefully draw your motifs onto the fabric.

Now, you can start embroidering. I didn’t use any fancy technique or knot, I simply made it freestyle. The mountains are calling and we must go!

A handlettering slogan, a mountain silhouette and a retro Volkswagen Passat car.


When you are finished, use a hot-glue gun or simply needle and thread to
carefully attach the edges of the fabric at the back of your piece of
art.


Such a nice gift! Have fun making your own versions and don’t forget to show me your results! :)

DIY Bloggers for Volkswagen:

Are you curious about more awesome car-related tutorials? Volkswagen is currently also working with several other bloggers who are all sharing their DIYs on a group pinboard on Pinterest:
>>> ‘DIY Bloggers for Volkswagen’ board on Pinterest
Most of the DIYs are great, even when you don’t own a car, so take a look and see for yourself which fun projects you can discover over there!
Have fun and happy day!
Lu
P.S.: As you can see, this blogpost was written in cooperation with Volkswagen and is a sponsored post. Of course, my opinion is my own and all contents are created by me.
by luloveshandmade 
2 Comments
DIY, Parties

Circus Theme Party and Costumes

February 1, 2017

You know I love colorful theme parties and food tables, don’t you? Two years ago, for example, I threw a Rock’n’Roll theme party with a colorful food table for my 28th birthday. It was colorful, it was delicious, I had a wonderful evening with all of my friends.

Last year, for my 29th birthday, I wanted to host a theme party again and a topic was found quickly: a circus-themed birthday bash, CIRCUS LUISALLI.


After some planning, I decorated my whole home and made a huge buffet. See yourself and find some advice for throwing your own circus theme party! :)

Circus Theme Party: Make Your Own Fake-Barbell:


Of course, every theme party needs a photobooth, so I created and bought some photo props to make it extra fun.
Every circus has a ‘strong man’ (or woman, of course! ;)), so I went to the craft store and came up with the idea and supplies to make a fake-barbell.

What you need for making a fake-barbell:
– Two huge styrofoam balls (or like in my case, four half balls)
– A wooden stick
– A cutter and scissors
– Duct tape in white and in black
How to make your own fake-barell:
Cut holes into the sides of both of the balls which are as big as the wooden stick so that it slightly fits trough. Tape everything together with duct tape and make sure that the endings of the wooden sticks are secured with tape as well. Yay!

Create An Abstract Circus Tent Ceiling:


Another decor project I made was hanging up paper stripes to imitate the abstract shape of a circus tent. The idea is from The Party Elves, I found it via Pinterest. They used a ceiling fan for attaching the paper.

What you need for your tent’s ceiling:
– Many rolls of crepe paper in the colors of your choice
– Crepe tape / painter’s crepe tape
– A grid lampshade to attach the crepe
– A ladder
How to make this abstract tent:
For my version of this decor DIY, use your rolls of paper crepe, climb onto your ladder and attach the endings of the crepe tape to your lampshade. This works best when the lampshade is hanging from the ceiling in the middle of your room. Let all other endings hang down, use your ladder again, take the tape and attach the paper to your walls. Let the paper hang loose a little so that you can slightly imitate she shape of a circus tent’s ceiling.

Such an easy an inexpensive idea for a circus party!


Of course I also made some handletterings for the party. Such a fun project!

The Photobooth:


For the photo area, I bought red fabric and white crepe paper and I sewed a golden star bunting. Moreover, I cut out bright blue “Circus” letters which were inspired by a photo from My Sweet Saucy that I also found on Pinterest.


The guests were able to choose from a set of fun photo props, for example animal noses, glasses or bow ties.


Home sweet home one year ago, ready and set for the party.

How much I enjoyed coming up with all the details!

Setting up a Colorful Food Table:

Each time I throw a party, I can’t help but set up a colorful and delicious food table. For this one, my boyfriend brought this striped fabric from IKEA and I taped it onto the table.

As always, it takes me several days to browse recipes, make a list of savory and sweet food and then I stand in the kitchen for two days in a row to prepare all the delicious treats. I always enjoy this time of preparation all by myself, soaking up the whole process and celebrating not only the party, but also the preparations.

This is how the kitchen looked in the end. How much I loved this view!

As with every party, I get my paper dishes from Partyerie, she has the best collection of party supplies for all occasions and for all color concepts!

This is the savory part of the buffet: homemade meat balls, dates wrapped in bacon, a cheese plate, a Greek salad topped with pepperoni, pickles wrapped in ham, a beetroot and orange salad, a salad with gnocci, a noodle salad and a salad with sweet potatoes. Hmmmm!


So much good food, I could eat it all over again!


This is probably one of my favorite photos from the whole party. The arrangement, the colors, all the work which flowed into creating the food. :)

This was a vegan raw mango coconut cake. It looked pretty, but was BAH, so I won’t share the recipe. ;)


Moreover, I made a chocolate tarte after a recipe by pure ella. I found it via Pinterest and it was delicious and easy to make.

I found this recipe for a no-bake raspberry cheesecake by tinatausendschön via DaWanda’s DIY portal. It was easy, quick and oh so tasty!


Those vegan lemon raspberry bars which don’t need baking and were invented by Wife Mama Foodie were really delicious as well.
 
Dreierlei Liebelei has once posted a recipe for chocolate pretzel cupcakes with peanut butter and caramel. I tried out her recipe as well and my guests loved them.


Lots. of. food. Mhhh!

The Party Decoration:


Each great party, especially a circus party, needs balloons. Of course, I bought helium ballons. They are one of my fave party props ever! More decor ideas can be found on my circus party decor board on Pinterest in case that you need more inspiraion.


Dressing up for parties is so much fun. I got myself a golden and sparkling dress.

As each time, I asked my guests to dress up. The person with the best costume was supposed to win this set. We totally forgot about it during the party, so the set got split up between the two guests who stayed the longest, haha. :)

Circus Party Photobooth Fun:


Shortly before the party, I also set up my daylight lamps, my tripod and my camera so that people could take photos with their costumes, yay! On Pinterest, I set up a board with circus party costume ideas so that my guests could find lots of inspiration.

Ringmistress and ringmaster.
My friends came up with the most wonderful costumes!


A LOT of my beautiful friends came as clowns or mimes, the whole room was full of stripey costumes. Apart from one bunny, we didn’t have any other animal. :D

The Aftermath:


My home looked a little chaotic and my smartphone had disappeared during the party and was nowhere to be found ever since. A mistery which will never be solved. :D
Apart from this, it was a wonderful fun evening. Thank you for coming and making it a great birthday! The next one is coming soon.
Thank you for reading! :)
Lu

Merken

Merken

by luloveshandmade 
11 Comments
« Previous Page
Next Page »

Hello & Welcome

Hello & Welcome

I'm Lu, I'm 34 years old and I live in wonderful Berlin. I am a Content Creator and DIY enthusiast and I am the founder and editor of Luloveshandmade.com where I share colorful everyday life happiness, handletterings, tutorials and other creative content. Apart from being a Handlettering Artist and running my own indie business, I'm a Content & Communications Manager. Read more about me and my creative work or visit my business portfolio page and have fun exploring this blog.

Get Inspired

  • Luloveshandmade-Handlettering-Feminism-Feminismus-Pro-Choice-Weg-mit-219a-bunt

    Pro Choice // Weg mit Paragraf 219a!

    January 24, 2021
  • Luloveshandmade-Shop-Update-Illustration-Handlettering-Spreadshirt-1

    Luloveshandmade Shop Update – New Products with my Letterings and Illustrations via Spreadshirt

    October 19, 2020
  • Luloveshandmade-Handlettering-Illustration-Make-Periods-Table-Talk-Menstruation-Feminism

    Make Periods Table Talk

    September 11, 2020
  • Luloveshandmade-Uncle-M-Music-All-Boobs-Are-Beautiful-6

    All Boobs Are Beautiful – Special Limited Edition Shirt via Uncle M Music Shop

    July 24, 2020
  • Luloveshandmade-Free Handlettering Printable-We Will All Make It Through All Of This (1)

    Free Handlettering Printable: We’ll Make It Through This

    April 13, 2020

Tags

advice balcony berlin guide christmas cities diy fake polaroid fashion favorite blogs favorite indie label favorite restaurants and cafes favorite shops featured fellow bloggers feminism food and cooking food table freebie giveaway handlettering handmade home decoration home tour instagram instagram photo printing service life and friends list lomography longboarding makeover market news painting and drawing party photography potsdam guide pretty online finds recipe review selling sewing shopping sponsoring travel video vintage what I wore wishlist
...
Followers
Follow
...
Followers
Follow
...
Fans
Like
...
Followers
Follow
...
Posts
0
...
amazing followers

My favorite Posts

  • Handlettering for Beginners (with Pinterest) & Valentine
    Handlettering for Beginners (with Pinterest) & Valentine's Day Printables
  • A Colorful Portrait Shooting (& Advice for How to Prepare for It)
    A Colorful Portrait Shooting (& Advice for How to Prepare for It)
  • Our Sweet And Happy Croatia Adventure // Summer Holidays on BraÄŤ
    Our Sweet And Happy Croatia Adventure // Summer Holidays on BraÄŤ
  • Pinterest Basics for Bloggers
    Pinterest Basics for Bloggers
  • Handlettering Workshop Recap
    Handlettering Workshop Recap

English: Imprint // Data Protection
German: Impressum // Datenschutzerklärung

Copyright © 2025 · Prima Donna theme by Georgia Lou Studios

© 2010 - 2017 luloveshandmade · Theme by Georgia Lou Studios, adapted by kathastrophal.de.