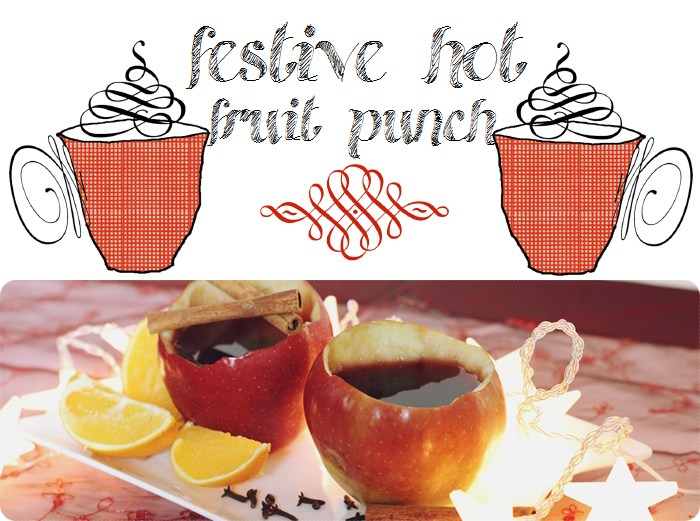


Here’s a great tutorial by my lovely friend Malin, she writes the blog normalean and she makes music as Mary Jane Insane. <3
***

Hello
dear readers!
dear readers!
I am
very happy that Lu invited me to her “Bloc Party“ for the 2nd
time to share another tutorial I created on my own.
very happy that Lu invited me to her “Bloc Party“ for the 2nd
time to share another tutorial I created on my own.
Since it
became autumn and finally winter, I started drinking even more tea
than I usually do (even in the hottest summer I drink much tea, for
it is very healthy!). So this DIY shows you how you can create your
own winter tea you can give away or to drink on your own :)
became autumn and finally winter, I started drinking even more tea
than I usually do (even in the hottest summer I drink much tea, for
it is very healthy!). So this DIY shows you how you can create your
own winter tea you can give away or to drink on your own :)
Supplies
needed:
needed:
– loose
winter tea
winter tea
– big tea
filters
filters
– teaspoon
– yarn in
red and green, particularly cotton
red and green, particularly cotton
– paper
and pen for your patterns
and pen for your patterns
– a scale
– a sewing machine or a normal needle to sew by hand
I’ll
later tell you how to make the right mixture, but now I’ll show you
how to sew Christmassy tea bags.
later tell you how to make the right mixture, but now I’ll show you
how to sew Christmassy tea bags.
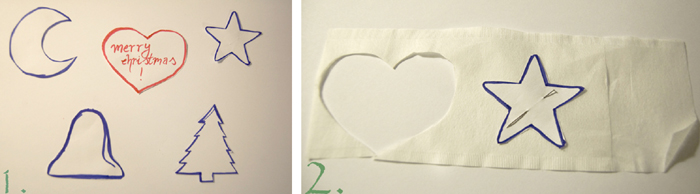
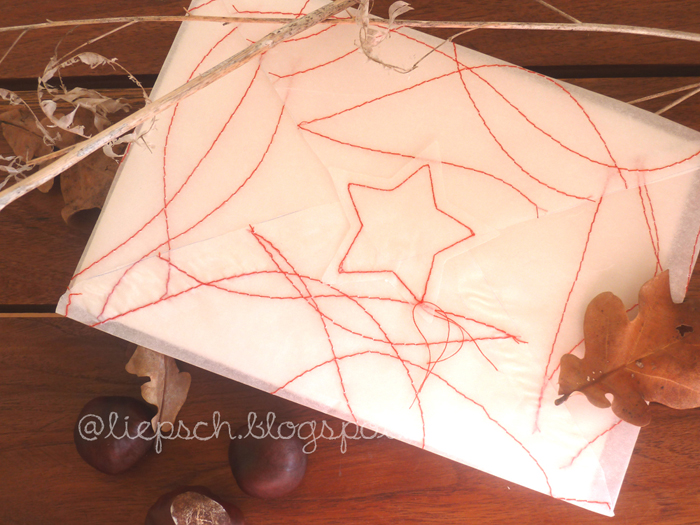
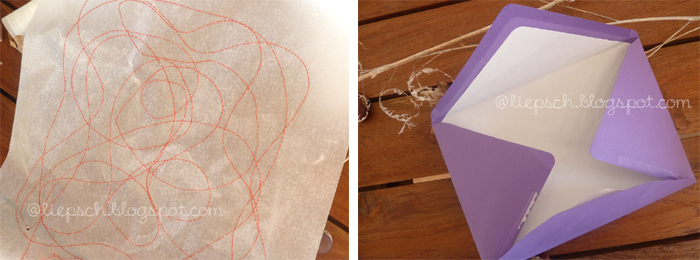
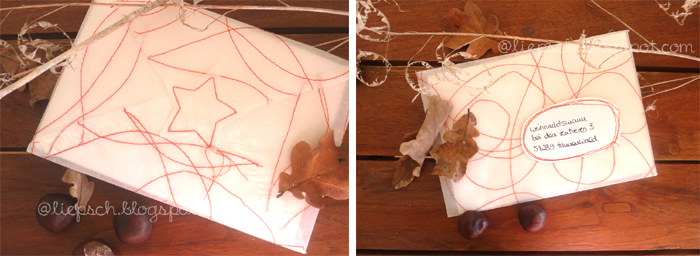
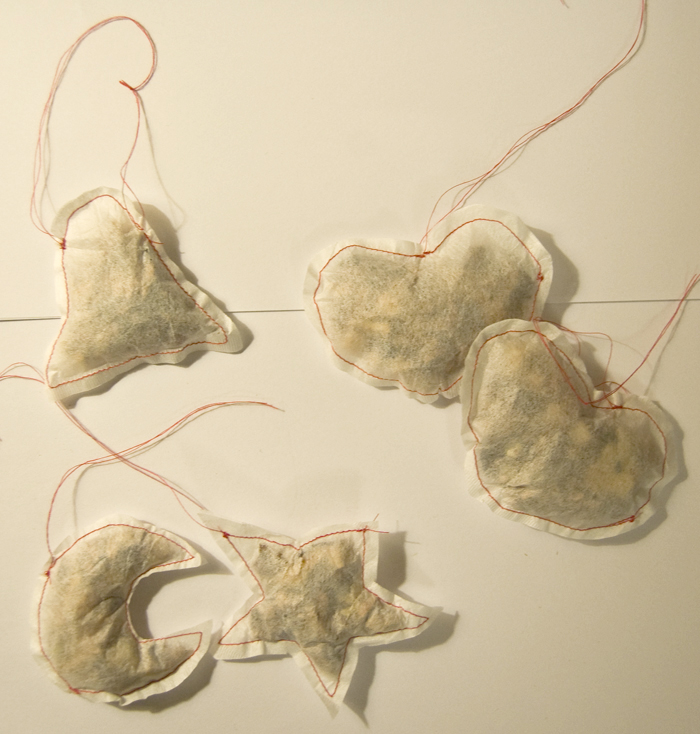
1. Draw
some patterns for your bags in Christmassy shapes. I used a heart, a
star, a moon and a bell. You can use whatever you like most, but it also
depends on the tea you use. If you use very fine tea, you can use
every shape (like the Christmas tree I also drew, but didn’t
sew), but if you’re gonna use tea which has for example big dry fruits
in it like apple slices, you might choose a bigger and not angled
shape, like the star for exemple. Before you produce a high number
of tea bags, be sure the size is big enough (5-8 g of tea should fit
in).
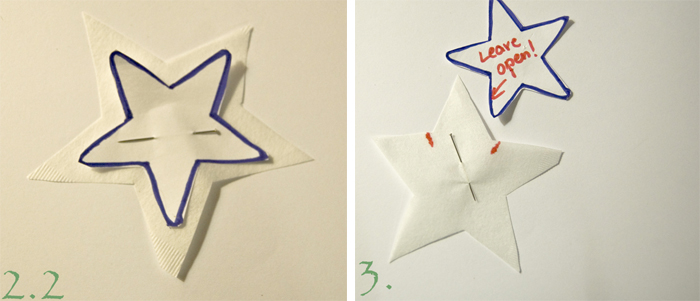
2. + 2.2 Cut out
your shapes and pin them onto the tea filter, cut them out with a sewing allowance of approximately 3-5mm.
your shapes and pin them onto the tea filter, cut them out with a sewing allowance of approximately 3-5mm.
3. Leave an opening for later filling in the tea.

3.1 Now
sew with your sewing machine (fine needle plus stitch lenght of 2),
leave 3-4 cm open for easy filling (I chose red yarn, for I like the
colour of red and green most for Christmas time, but of course you can
use whatever you like).
sew with your sewing machine (fine needle plus stitch lenght of 2),
leave 3-4 cm open for easy filling (I chose red yarn, for I like the
colour of red and green most for Christmas time, but of course you can
use whatever you like).
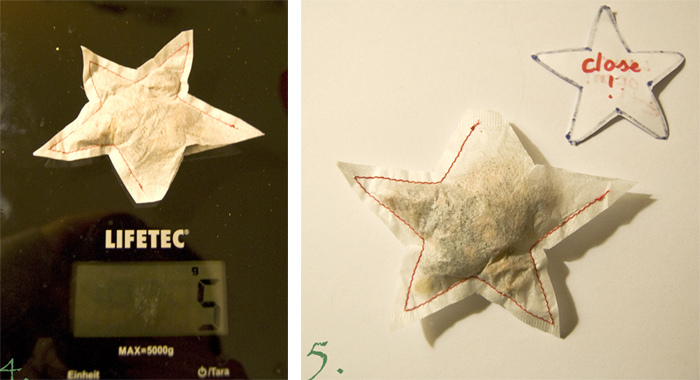
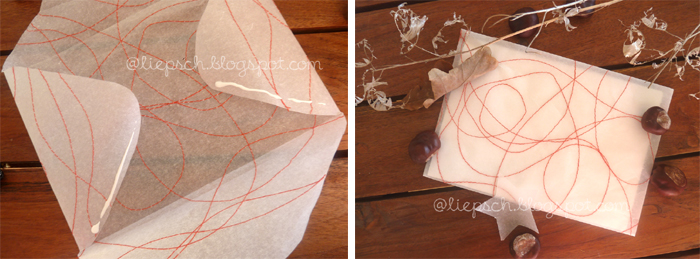
4. Fill
in the tea and scale the filling.
in the tea and scale the filling.
5. Now close the opening with your sewing machine.

6. Sew
a thread of double length to the upper middle of your selfmade tea bag
to use it properly and maybe to hang it up on your christmas tree. ;)
a thread of double length to the upper middle of your selfmade tea bag
to use it properly and maybe to hang it up on your christmas tree. ;)
The tea mixture:
Now I
come to the tea mixture. In fact, I went to a tea shop and got some advice of a salesgirl there. I wanted to
have some tea with apples (but not too sour and fresh), almonds,
cinnamon (of course!), and some other winter/Christmas flavours I
adore :) Sadly, you can’t really mix yourself a tea, for these shops
have so many finished mixes so you don’t really need to mix them on
your own or you are not allowed to. Sometimes at some Christmas
fairs or in pharmacies, you can get loose tea which isn’t already
mixed.
I used
the mixtures: „Gebrannte Mandel“ (rosted almond) and „Winter
Apfel“ (winter apple) which have the following ingredients:
the mixtures: „Gebrannte Mandel“ (rosted almond) and „Winter
Apfel“ (winter apple) which have the following ingredients:
Apple
pieces, almond pieces, beetroot pieces, hibiscus blossoms, rose hip
parings, currants, cinnamon pieces, vanilla pieces and finally,
calendula blossoms.
pieces, almond pieces, beetroot pieces, hibiscus blossoms, rose hip
parings, currants, cinnamon pieces, vanilla pieces and finally,
calendula blossoms.
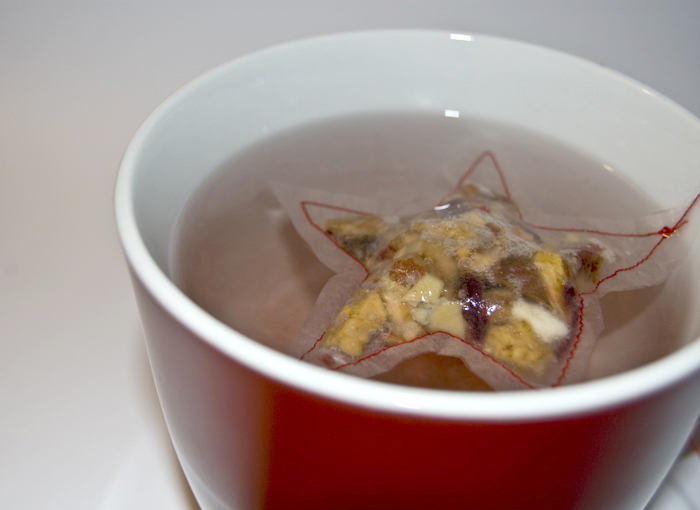
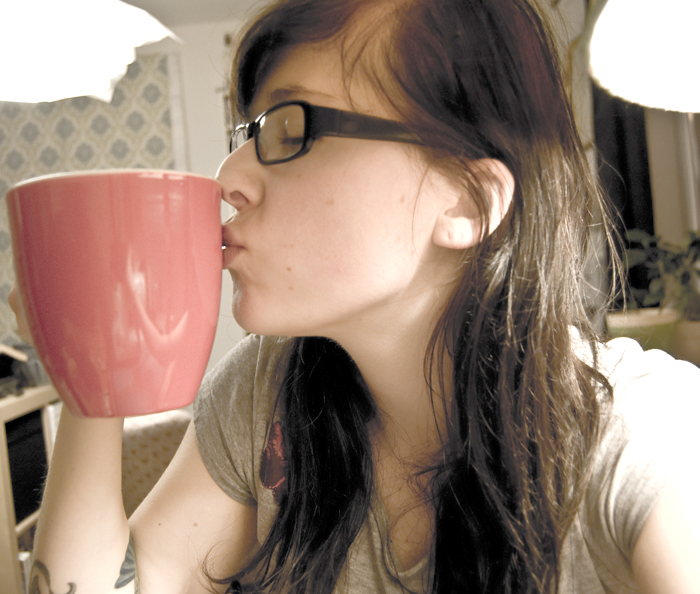
Now you
can boil your tea and after the brewing time of 5 to 10 minutes, you
can enjoy it with some cookies and a book. :) Have a great winter
time!!!
can boil your tea and after the brewing time of 5 to 10 minutes, you
can enjoy it with some cookies and a book. :) Have a great winter
time!!!
***
Awww, Sweetie, thanks for preparing this great tutorial! <3