• Home
  • About
  • Portfolio
  • Shop
  • Collaboration
  • Imprint
Bloglovin
Instagram
Pinterest
Facebook
Twitter
Contact

Luloveshandmade

Crafts, colors & everyday life happiness

  • DIY
  • Handlettering & Illustration
  • Outfits
  • Recipes
  • Parties
  • Videos
  • Potsdam Guide 2.0
    Potsdam Guide 2.0
  • A Little Love Letter to my Menstrual Cup
    A Little Love Letter to my Menstrual Cup
  • What I Wore: Abandoned Swimming Pool
    What I Wore: Abandoned Swimming Pool
  • DIY Gift Ideas
    DIY Gift Ideas
  • Fashion and Portrait Photo Shootings in Berlin: New Colorful Photos with Anna in my Portfolio
    Fashion and Portrait Photo Shootings in Berlin: New Colorful Photos with Anna in my Portfolio
  • Luloveshandmade Shop Update - My Illustrations and Letterings on Textiles via Spreadshirt
    Luloveshandmade Shop Update - My Illustrations and Letterings on Textiles via Spreadshirt
  • DIY: Longboard Handlettering Project
    DIY: Longboard Handlettering Project
  • Free Printable: Motivating Handletterings (and a Giveaway)
    Free Printable: Motivating Handletterings (and a Giveaway)
  • Free
    Free 'Get Well Soon' Handlettering Printables
  • DIY: Road Trip Embroidery Hoop Wall Decor
    DIY: Road Trip Embroidery Hoop Wall Decor
DIY, Videos

DIY Video with DaWanda: Flower Crown

July 27, 2014


Hello my dear readers! While you are all hopefully still enjoying those awesome summer days, I have been preparing a new DIY video with DaWanda for you: this time, I’m showing you how to make a super pretty flower crown out of artificial plastic flowers. Of course this can’t ever beat a floral crown with freshly picked flowers from the garden, but it lasts forever and you can use it each year for music festival, garden parties, weddings, birthday celebrations, outfit photos or even just to brighten up everyday life.


So let’s get started:

Watch my Flower Crown DIY Video:

YouTube

By loading the video, you agree to YouTube's privacy policy.
Learn more

Load video

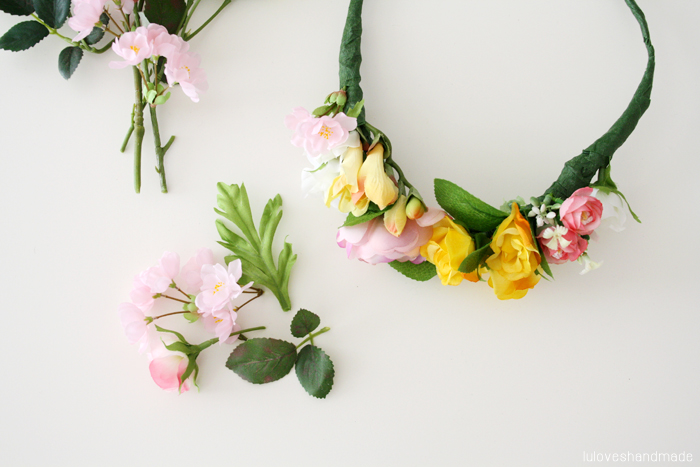
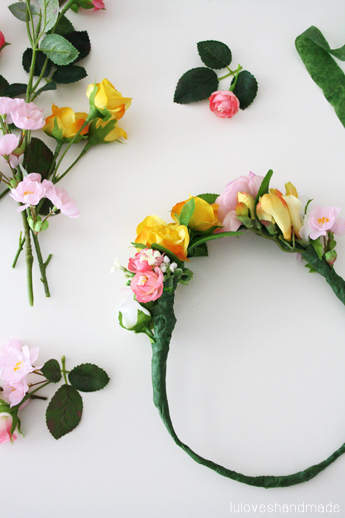
Yippie, I hope you had fun watching the video! :) In addition, here are some photos for you and even a photo overview of the materials you need:

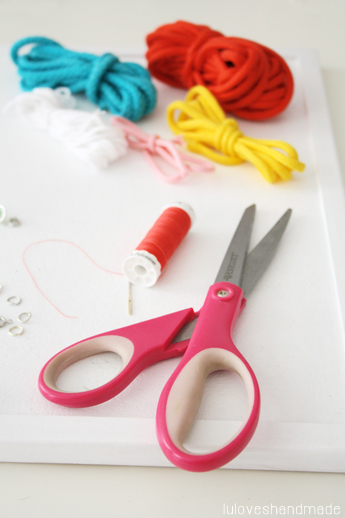
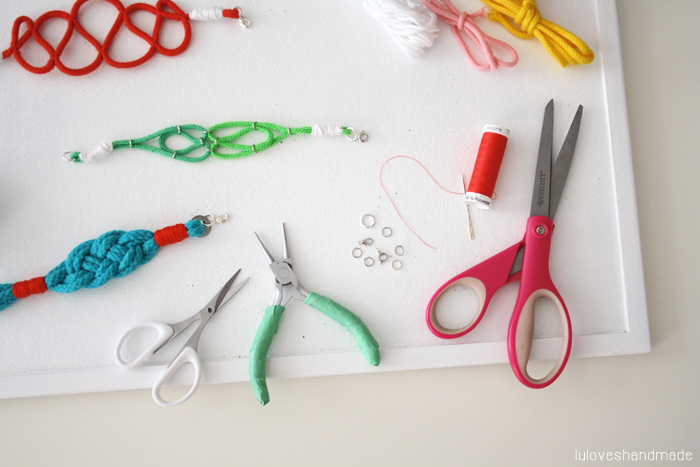
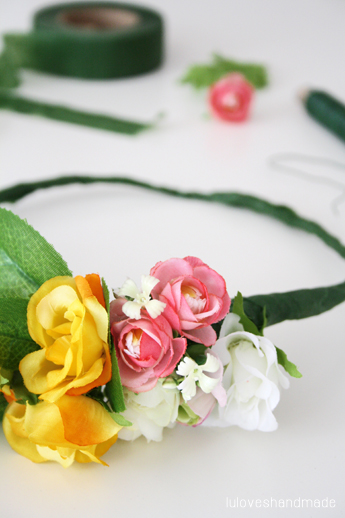
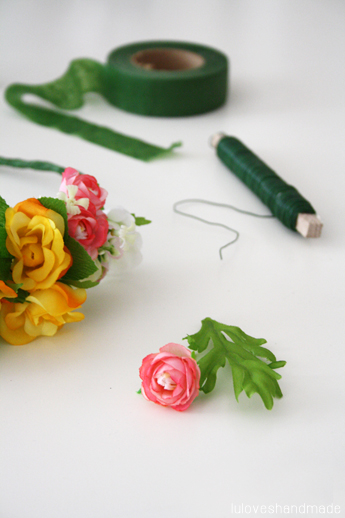
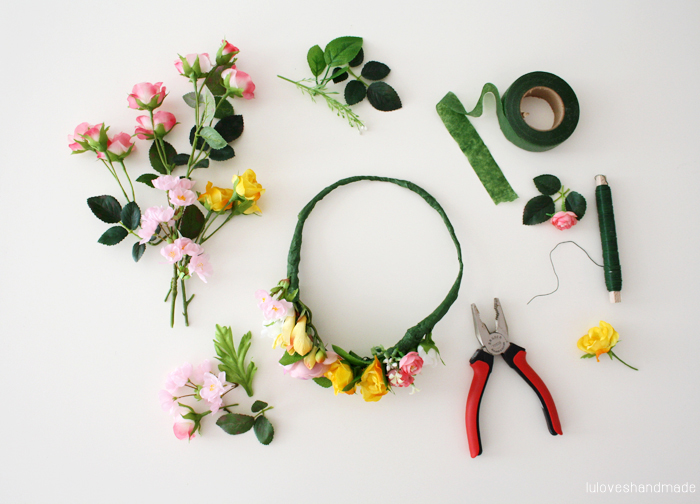
Supplies for a Flower Crown:


What you need:
– Artificial plastic flowers
– A plier
– Green wire
– Self-adhesive flower masking tape in green

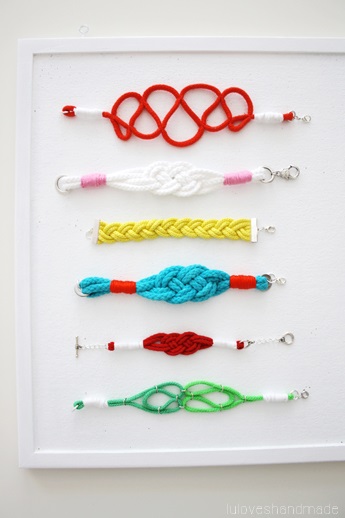
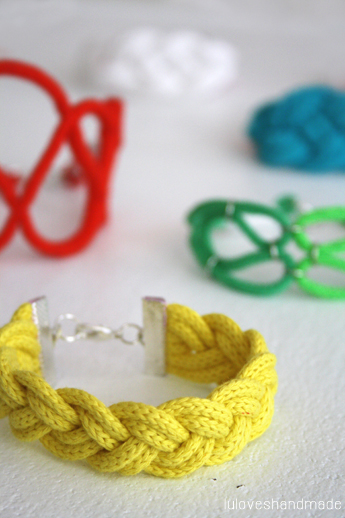
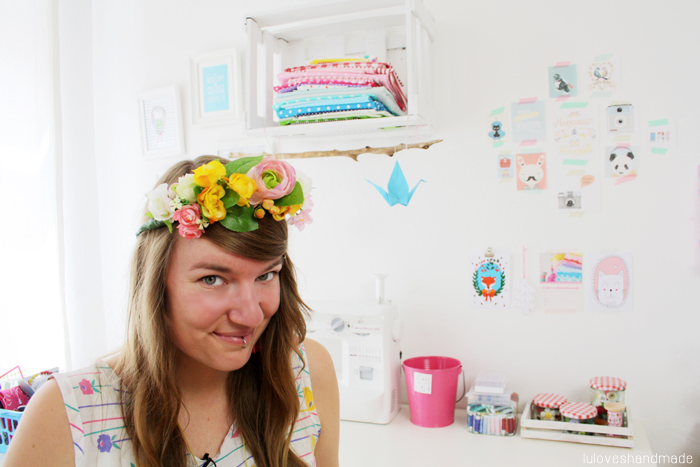
Your Handmade Flower Crown:


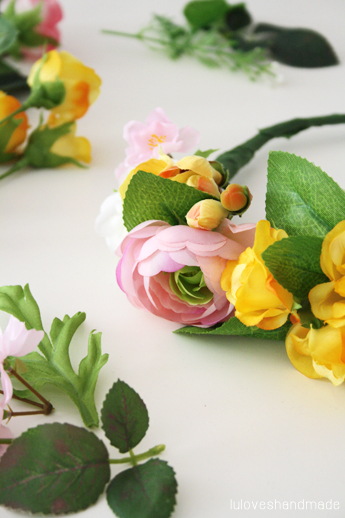
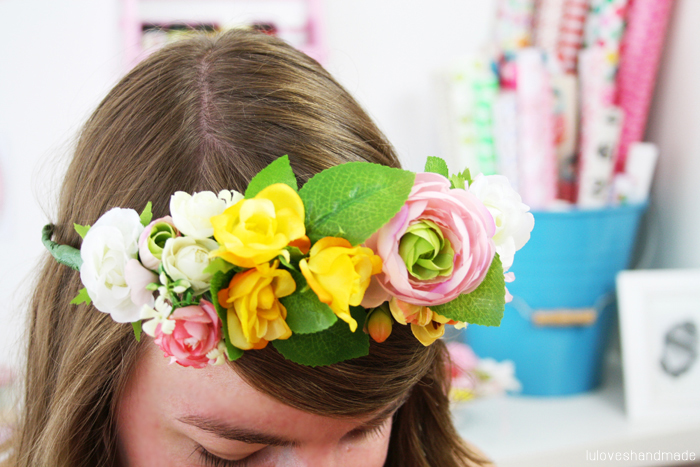
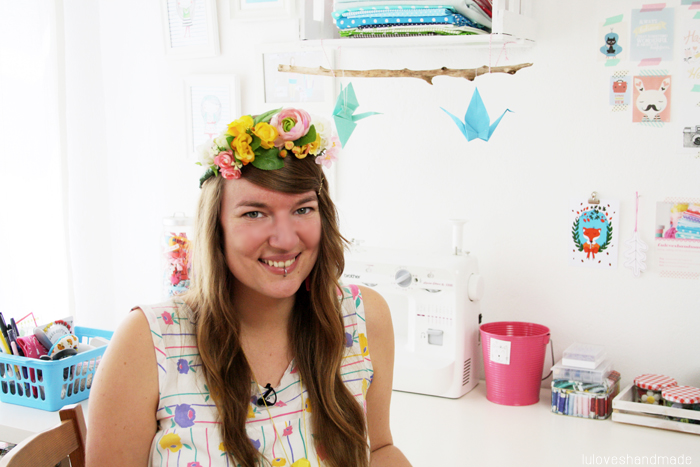
The flower crown that I made has a huge flower collection at its front and is rather a statement piece than a plain crown. I love it!


Have fun making your own flower crown with the help of this video and make sure to share photos afterwards, can’t wait to see them! :)
Happy day,
Lu
by luloveshandmade 
7 Comments
Recipes

Recipe: Orange Mango Cake

July 25, 2014


Happy day everyone, the weekend is close! :) In case you’re looking for a delicious summer recipe for the weekend, here’s an article about how to make this super delicious orange mango cake which I made for my tropical food table a few weeks ago.

Ingredients for the Orange Mango Cake:


Here’s what you need:
– 300g flour
– 200g sugar
– 100ml milk
– 2 spoons of butter
– 4 eggs
– 2 tea spoons of baking powder
– coconut rasps
– 1 mango
– 2 oranges
– 250g neutral flavored cream cheese
– 250g powder sugar

How to Make the Orange Mango Cake:


Separate egg white and egg yolk. Mix egg yolk, sugar, butter and half of the milk until everything is creamy. Next, add the rest of the milk, flour and baking powder until you have a creamy mixture. Then cut one mango and an orange into tiny pieces and add them.
Finally stirr the egg yolk until it is stiff, add it to the dough, butter your baking pan and fill the dough inside.
Preheat your oven and bake at about 180° for about 40 minutes.

Let your cake cool down, make a mixture of poweder sugar, cream cheese and a teeny tiny bit of orange juice for the flavor and spread it all over your cake. 

Next, use a grater to rub off some orange zext (best use organic oranges) and spread it all over the cake.

Yippie, your’re done! Enjoy your fresh and fruity summer cake! :)
Lu

P.S.: Check out my other recipes or my parties and food tables!

by luloveshandmade 
7 Comments
DIY

DIY: Nautical Rope Bracelets

July 21, 2014


Hello and happy Monday, everyone! Some of you might just be sitting at work while reading this, others may be enjoying their well-deserved summer holidays, yippie! :)
To celebrate those awesome hot days, here’s a DIY for you about how to make nautical rope bracelets. Of course all those shapes can also be used for making necklaces or belts out of ropes, but here I will only focus on bracelets and how to create those shapes. For how to close them, read the text below or even use own methods for attaching a jewellery clasp.
So in this blogpost, I will show now you which supplies you need, you will be provided with sketches for better understanding of some of the sailor knots and of course I’m gonna show you my sources of inspiration, since I didn’t invent all those knots myself! :)
Happy crafting!

Supplies for Making Nautical Rope Bracelets:


You need:
– Cotton ropes in all kinds of colors
– Scissors, a jewellery plier, needle and thread
– Jewellery claps and tiny rings
– Wool / thick yarn (not shown in the photo)
– Masking tape (not shown in the photo)
– All-purpose glue which dries fast (not shown in the photo)


Once you’ve gathered all your supplies, you can get started. :)

Here’s How to Make Those Nautical Rope Bracelets:

As you can see on the two photos above, there’s a huge variety of bracelets in different shapes which you can make. There are real sailor knots, simple braiding techniques and folding schemes which you can use.

Here we go with the first one:


This bracelet is made with a real sailor knot. Thanks to the Internet, I found tons of photo and video instructions for how to make these, so I learned it really quickly.

For a better understanding, I made those drawn instructions for you with which you can easily follow all steps. Use two pieces of rope which are each about 60cm long, use masking tape to hold their endings together and then you can get started.
In case you rather prefer a photo tutorial, hop over to the etsy blog, there’s an awesome photo DIY for such a sailor knot rope bracelet and they even have a great way to attach the clasp which could be really helpful for you.

If the first knot shown above is too complicated and you rather want to try out an easier and more time saving version, you can also use this one: for making a bracelet with it, you will need two pieces of rope (with the same color or in two different colors) which are each about 30cm long. Then simply put the ropes onto the table according to the drawing above. In the end you can use a wide clasp which you can jam onto the endings of the rope.


The next bracelet is the easiest one, it’s a braided rope bracelet:


For making this bracelet, cut off six pieces of rope which are each about twice as long as the circumfence of your arm. Next, glue the endings and press them in between the jewellery clasp. Then start braiding like if you were braiding a girl’s hair and always use two ropes at a time. As soon as your bracelet is long enough, cut off the remaining pieces of rope and glue the bracelet into the clasp.

The next one is the ‘snake’ bracelet:


This is an awesome way of how to fold a rope which I found on Rotkehlchen’s blog: she made a necklace by simply folding the rope like a snake, always sewing parts next to each other.
 
Then I used her great idea for making a bracelet, I just changed the way or making the clasp. Above, there’s a sketch for you for where to sew. This is not complicated, but the sewing takes some time. Best use yarn in the color of you rope, then it won’t be seen.


Finally, there’s still another version for how to make a bracelet:


This one is simply made out of two pieces of rope which are laid onto the table and then attached to each other by tiny jewellery rings.


Cut off two pieces of rope which are each about 35cm long. Put them onto the table and fold them like seen on the drawing above. Then you will need your jewellery plier and the tiny rings to attach both pieces of rope to each other at the spots where it is shown. Then you will get this cool shape. :)

Your Handmade Nautical Rope Bracelets:

That’s it! :) As you can see, this is super easy and there’s a huge variety of shapes for how to make such a nautical rope bracelet.
For closing the bracelets, you can either buy such a wide clasp which is pressed onto the rope by using a plier, or you can use a clasp which you bind at the ending of a rope (like seen above with the white, green, orange and turquoise bracelets) by means of folding over the ending, putting it onto the remaining piece of the rope and then binding everything with a piece of wool or yarn.
Have tons of fun making your own bracelets and don’t forget to share photos! :) Can’t wait!
Enjoy these summer days!
Lu

P.S.: For more tutorials, check out my blog’s DIY page or have a look at my DIY videos! :)

by luloveshandmade 
13 Comments
DIY, Videos

DIY Video with DaWanda: Summer Fabric Printing

July 7, 2014


Happy Monday, everyone!
Hopefully you are all enjoying those awesome summer days! Most of you already know I love textile printing DIYs and in case you are looking for a fresh and bright summer project, here’s one for you:
In my current video with DaWanda, I show you how to print your own summer clothes and how to turn them into statement pieces with fruity motives.


If you want to get started and see the whole tutorial, simply watch my video. :)

My fabric printing DIY video with DaWanda:

YouTube

By loading the video, you agree to YouTube's privacy policy.
Learn more

Load video

So let’s go, make your own bright summer clothes with simply printing onto white shirts or dresses!


With using all those bright textile colors, I printed pineapples, ice cream, lemons, watermelons and strawberries. So much fun!


It’s super hard to pick a favorite, but the pineapple shirt and the ice cream shirt might be the coolest ones! :)

Have tons of fun printing your own shirts, can’t wait to see with which motives and color combinations you come up. Don’t forget to share photos! :)

Happy day!
Lu

Merken

by luloveshandmade 
7 Comments
Everything Else

How to Plan a (Tropical) Food Table

July 2, 2014


Hello everyone! :) Do you remember last week’s blogpost about my tropical food table which I made for my blog’s party category?
I’ve already been planning such a food table several times in the past years and this time I thought it would be nice for you to get some insights into my planning process from idea to finished table. :)

How to plan a food table:

The first thing to do when thinking of making a new food table for me always is to write down some ideas and make notes. I think about a theme, the style of the table’s decor and a color scheme.

Next, I usually browse Pinterest, make a secret board (these are so extremely useful for planning and collecting visual inspiration) and collect recipes and decor ideas which inspire me and which fit the concept in my head. This is always so helpful when trying to decide on recipes or when trying to find additional decor ideas.

A good plan is everything:


When I have a rough idea of what the recipes will be about, I always make a first sketch to get a feeling of the food table’s style. Moreover, this helps me to keep an overview and to see if everything really fits together. When making this sketch, I always draw the food with the kitchenware we own, this makes planning easier and I can better see what else I will have to buy.

After having made a sketch, I love to color everything. Thus, one can perfectly get into the mood for the color scheme and already collect some decor ideas and tiny details.

As a next step, I write a shopping list (with having the recipes in mind) and make a tiny plan for what to do when. Thus, I don’t forget any detail and don’t become confused.

Decor preparation:


When the plan and timing are done, I usually make decor. For the tropical party, my decor concept was mainly based on colorful fruits and I love making buntings and cake toppers myself.

Afterwards I love to go shopping for missing supplies and put everything together according to my color scheme I had in mind from the beginning on.


Those tiny pineapple cake toppers and the fruit buntings are handmade. Eeeks, so pretty!

To take photos of supplies, our ladder is always very useful. :)

Behind the scenes:


For taking photos in my room, I always close the light white curtains and thus turn my room into a natural soft box. This time, I finally also installed curtains in our kitchen so that there are also good conditions for taking photos.

For later sharing the recipes on my blog, I always take many photos while I am preparing a food table. This takes A LOT of additional time during the preparations, but is an important part for me. I rather like to provide you with recipes which also include some step-by-step photos.  

The finished food table:


So all in all, the whole process of making a food table usually takes me about 50 to 60 hours.
It takes about 15 hours of collecting ideas, making sketches, preparing decor and food shopping, then I need about 15 additional hours for preparing the food and drinks and for finalizing the setup. Additional 10 hours are needed for taking photos of the table, for sorting those photos and for editing them and then there are about 10 to 20 hours needed for writing the blogposts (depending on the amount of recipes, but usually there will be between 4 and 6 blogposts for one table).
As you can see, in the end there’s a total amount of about 50 to 60 working hours just for one food table, wowza! :) Nevertheless, I totally love this and always enjoy this whole process. It’s usually quite a lot of effort, but as you could see in this blogpost, it absolutely gets easier with detailed planning, good time management and a proper overview of to do’s and priorities.

Such a fun project!
Happy food table planning! :)
Lu

by luloveshandmade 
7 Comments
« Previous Page
Next Page »

Hello & Welcome

Hello & Welcome

I'm Lu, I'm 34 years old and I live in wonderful Berlin. I am a Content Creator and DIY enthusiast and I am the founder and editor of Luloveshandmade.com where I share colorful everyday life happiness, handletterings, tutorials and other creative content. Apart from being a Handlettering Artist and running my own indie business, I'm a Content & Communications Manager. Read more about me and my creative work or visit my business portfolio page and have fun exploring this blog.

Get Inspired

  • Luloveshandmade-Handlettering-Feminism-Feminismus-Pro-Choice-Weg-mit-219a-bunt

    Pro Choice // Weg mit Paragraf 219a!

    January 24, 2021
  • Luloveshandmade-Shop-Update-Illustration-Handlettering-Spreadshirt-1

    Luloveshandmade Shop Update – New Products with my Letterings and Illustrations via Spreadshirt

    October 19, 2020
  • Luloveshandmade-Handlettering-Illustration-Make-Periods-Table-Talk-Menstruation-Feminism

    Make Periods Table Talk

    September 11, 2020
  • Luloveshandmade-Uncle-M-Music-All-Boobs-Are-Beautiful-6

    All Boobs Are Beautiful – Special Limited Edition Shirt via Uncle M Music Shop

    July 24, 2020
  • Luloveshandmade-Free Handlettering Printable-We Will All Make It Through All Of This (1)

    Free Handlettering Printable: We’ll Make It Through This

    April 13, 2020

Tags

advice balcony berlin guide christmas cities diy fake polaroid fashion favorite blogs favorite indie label favorite restaurants and cafes favorite shops featured fellow bloggers feminism food and cooking food table freebie giveaway handlettering handmade home decoration home tour instagram instagram photo printing service life and friends list lomography longboarding makeover market news painting and drawing party photography potsdam guide pretty online finds recipe review selling sewing shopping sponsoring travel video vintage what I wore wishlist
...
Followers
Follow
...
Followers
Follow
...
Fans
Like
...
Followers
Follow
...
Posts
0
...
amazing followers

My favorite Posts

  • Our Sweet And Happy Croatia Adventure // Summer Holidays on Brač
    Our Sweet And Happy Croatia Adventure // Summer Holidays on Brač
  • Pinterest Basics for Bloggers
    Pinterest Basics for Bloggers
  • Handlettering for Beginners (with Pinterest) & Valentine
    Handlettering for Beginners (with Pinterest) & Valentine's Day Printables
  • Handlettering Workshop Recap
    Handlettering Workshop Recap
  • A Colorful Portrait Shooting (& Advice for How to Prepare for It)
    A Colorful Portrait Shooting (& Advice for How to Prepare for It)

English: Imprint // Data Protection
German: Impressum // Datenschutzerklärung

Copyright © 2025 · Prima Donna theme by Georgia Lou Studios

© 2010 - 2017 luloveshandmade · Theme by Georgia Lou Studios, adapted by kathastrophal.de.