• Home
  • About
  • Portfolio
  • Shop
  • Collaboration
  • Imprint
Bloglovin
Instagram
Pinterest
Facebook
Twitter
Contact

Luloveshandmade

Crafts, colors & everyday life happiness

  • DIY
  • Handlettering & Illustration
  • Outfits
  • Recipes
  • Parties
  • Videos
  • DIY: FIMO Statement Earrings & Five Further Creative DIY Projects with FIMO
    DIY: FIMO Statement Earrings & Five Further Creative DIY Projects with FIMO
  • A Little Love Letter to my Menstrual Cup
    A Little Love Letter to my Menstrual Cup
  • Potsdam Guide 2.0
    Potsdam Guide 2.0
  • Fashion and Portrait Photo Shootings in Berlin: New Colorful Photos with Anna in my Portfolio
    Fashion and Portrait Photo Shootings in Berlin: New Colorful Photos with Anna in my Portfolio
  • DIY Gift Ideas
    DIY Gift Ideas
  • Dinosaur Photo Fun and Portrait Shooting in Berlin
    Dinosaur Photo Fun and Portrait Shooting in Berlin
  • Free Printable: Motivating Handletterings (and a Giveaway)
    Free Printable: Motivating Handletterings (and a Giveaway)
  • DIY: Sewing Tutorial for a Sleepover Purse
    DIY: Sewing Tutorial for a Sleepover Purse
  • DIY: Longboard Handlettering Project
    DIY: Longboard Handlettering Project
  • Handlettering with the new Samsung Galaxy Book 12, a free Printable and a huge Giveaway
    Handlettering with the new Samsung Galaxy Book 12, a free Printable and a huge Giveaway
DIY

DIY: Dishtowel Sewing Tutorial and Fabric Printing Inspiration

June 28, 2014


Hey everyone, happy weekend! Today it’s time for a new DIY! You know I love simple potato fabric printing, right? :) I wanted to make dishtowels with my own patterns, so I combined the process of printing onto fabric with a simple sewing tutorial.

This tutorial is pretty easy and absolutely suitable for sewing beginners. Have fun!

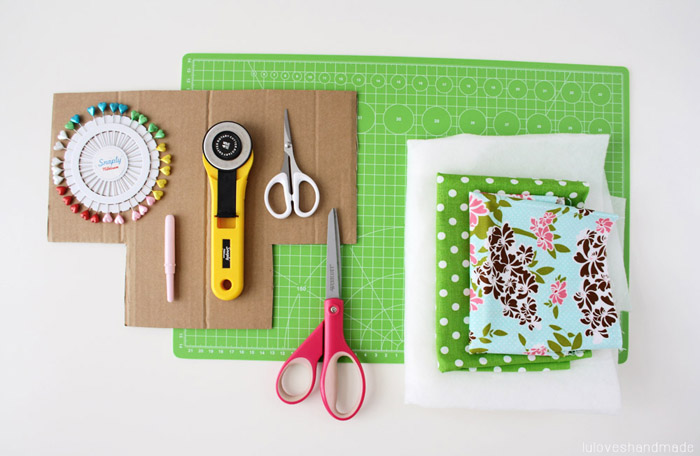
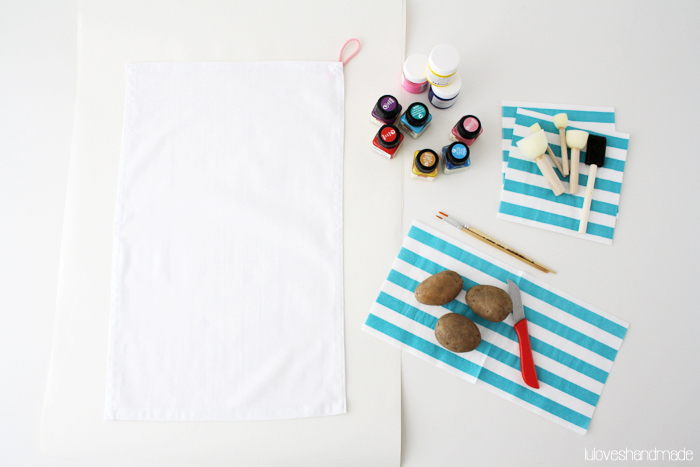
What you need for sewing and printing your own dishtowels:


You need this for sewing the dishtowels:
– White fabric (depending on amount & size of your dishtowels – I simply used old ones as pattern)
– Cottons cords
– Sewing machine and sewing supplies like scissors, pins and measuring tape
– Hot iron and ironing board
– Makes it easier: roll cuter and cutting board (mine are from Snaply)

You need this for fabric printing:
– Textile colors, brushes, potatoes, a sharp knife
– Paper or old newspaper to put under the fabric while printing

How to sew a dishtowel:


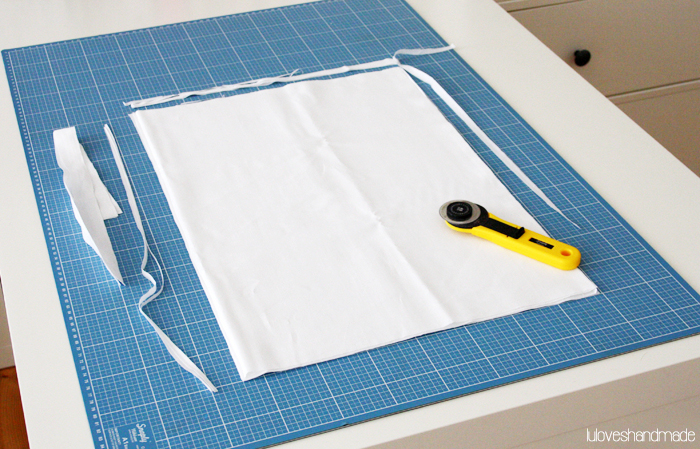
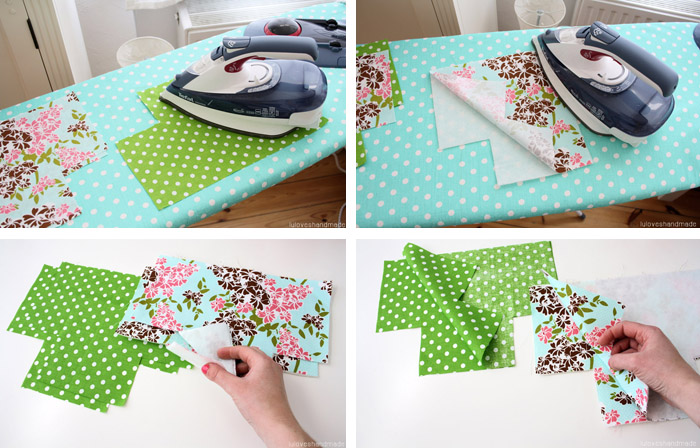
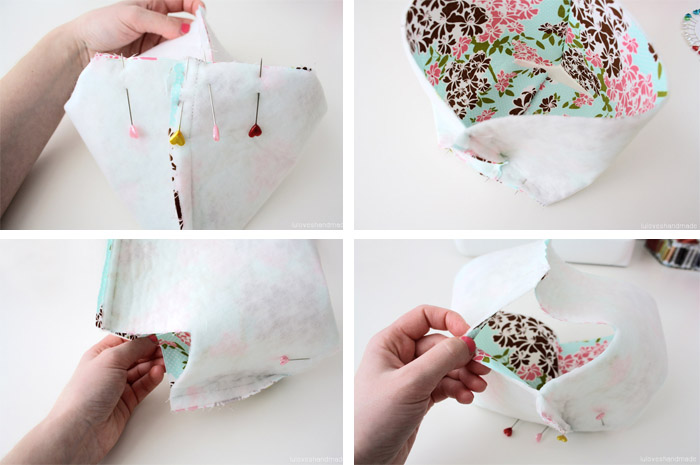
First of all, use an old dishtowel as pattern or take its measurements to cut the fabric. I put four layers onto each other and cut all of them with my roll cutter at once.

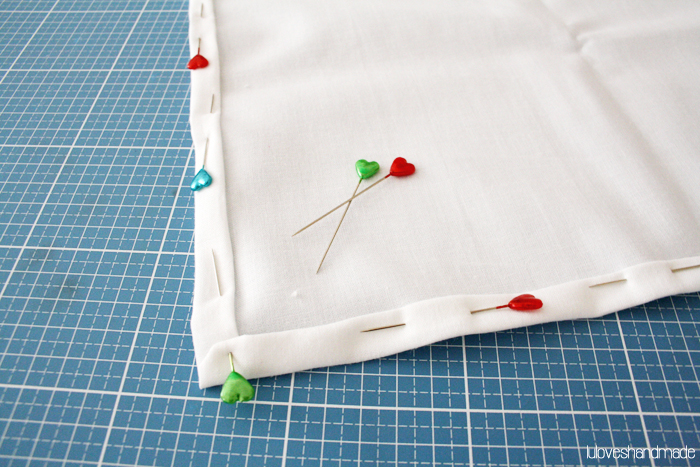
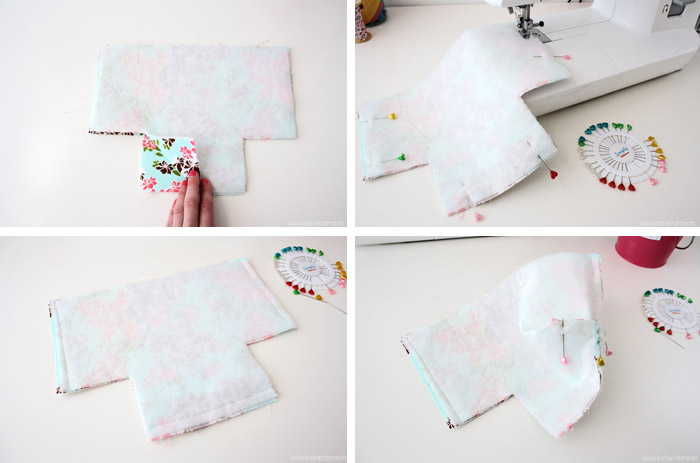
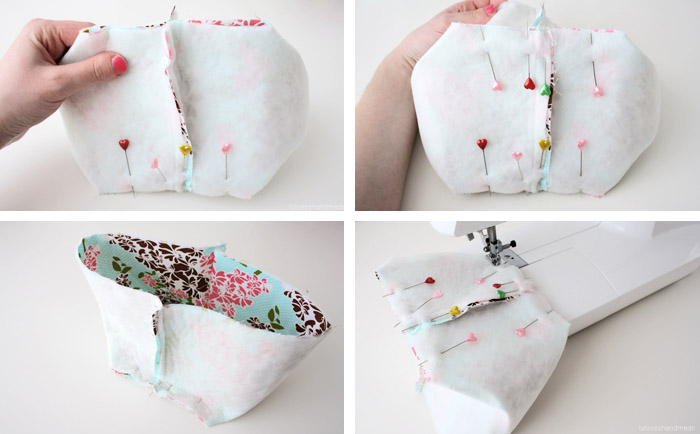
Next, fold over all four edges twice and pin them.

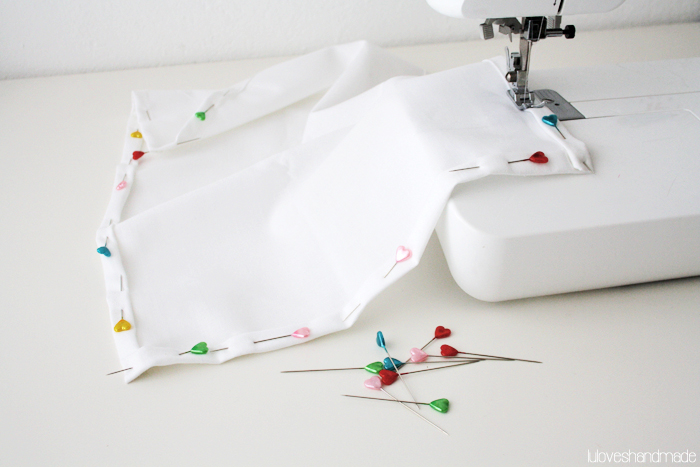
Now use your sewing machine to sew the layers of the edge onto each other. Top-stitch and make two seams next to each other.

Then  iron the edges.

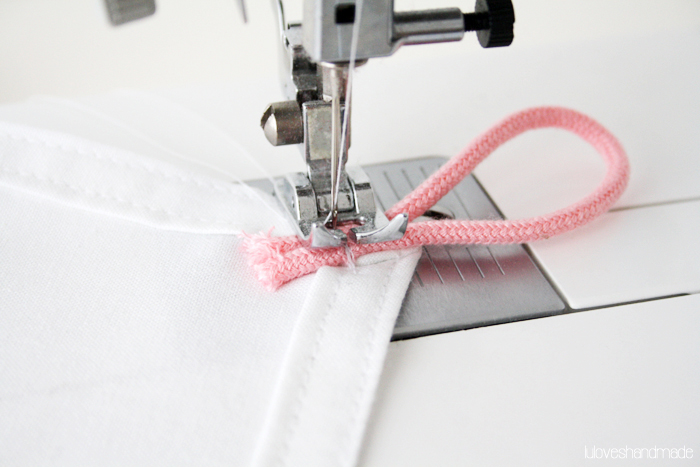
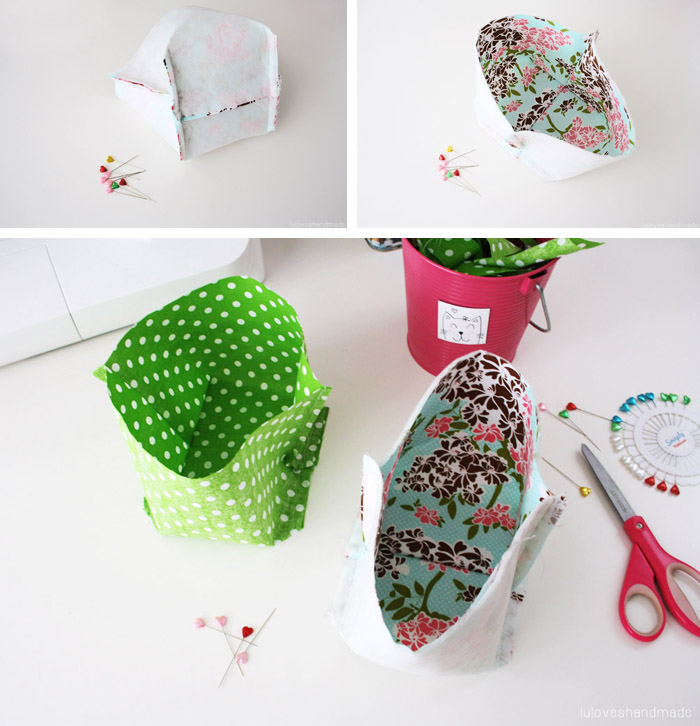
Finally, sew the cord into one corner (you could also do this before folding over the edges to hide its end under the folded fabric).

How to print your dishtowel:


After your dishtowel is finished, you can then print it with any pattern you like.

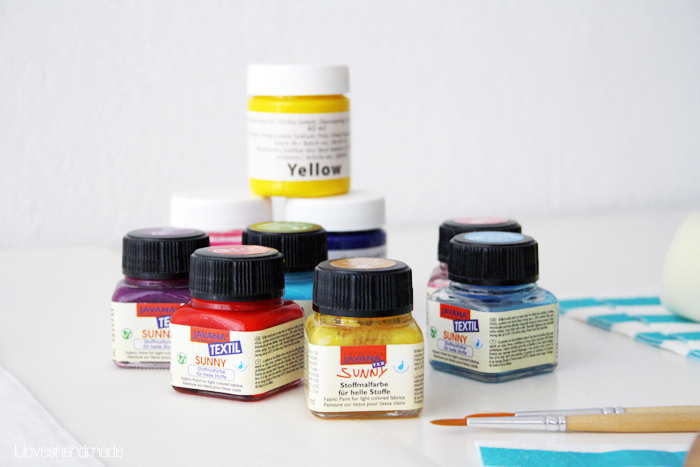
Therefore, you will need textile colors in any color you like. Make sure that it’s color which can be washed on a higher temperature afterwards so that you can always properly get your dishtowels clean.


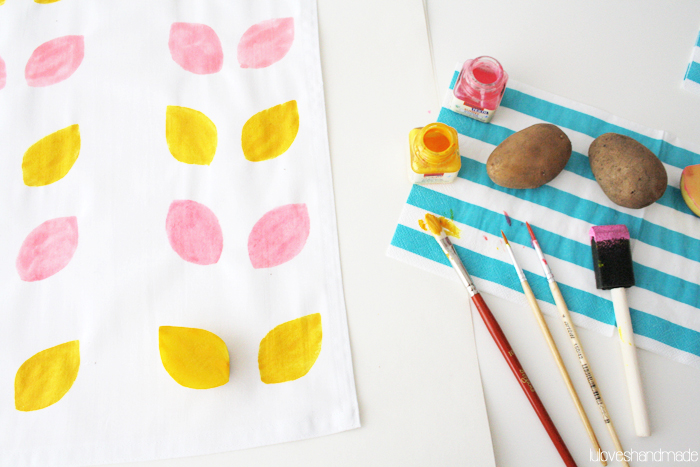
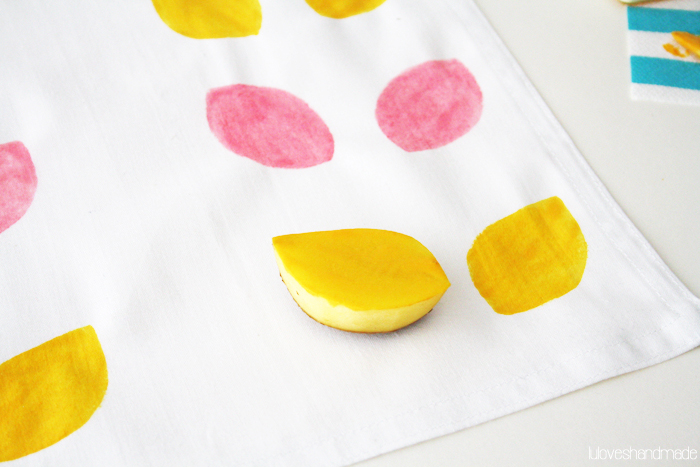
Use a sharp knife and cut out simple shapes, spread textile color onto the potato slices and print.

After the color has dried, you will normally have to iron the fabric to make the colors last longer. Therefore, put an old piece of fabric between the hot iron and your dishtowel to protect it.

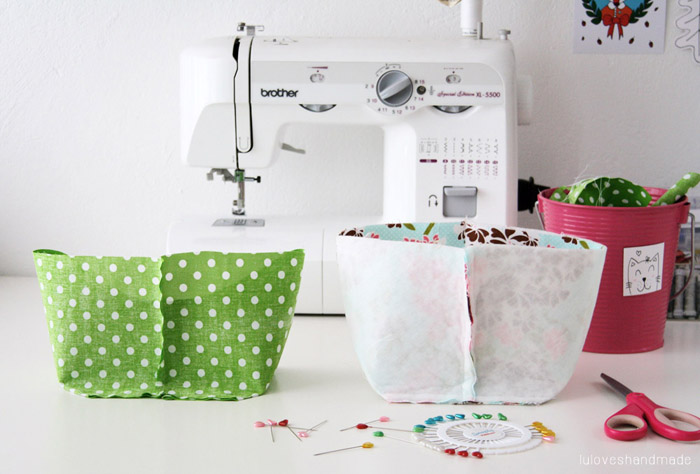
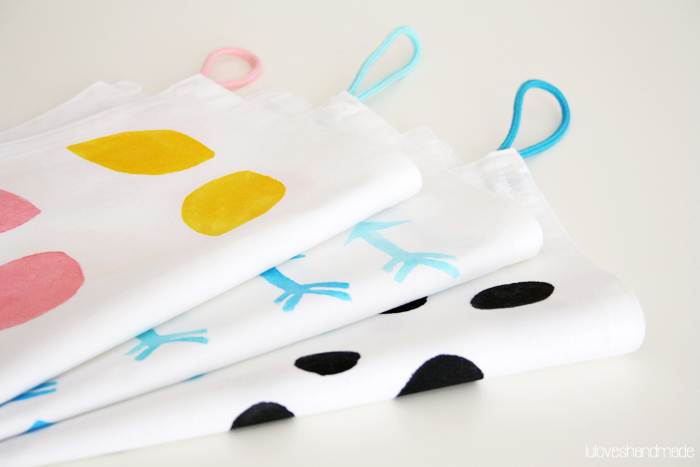
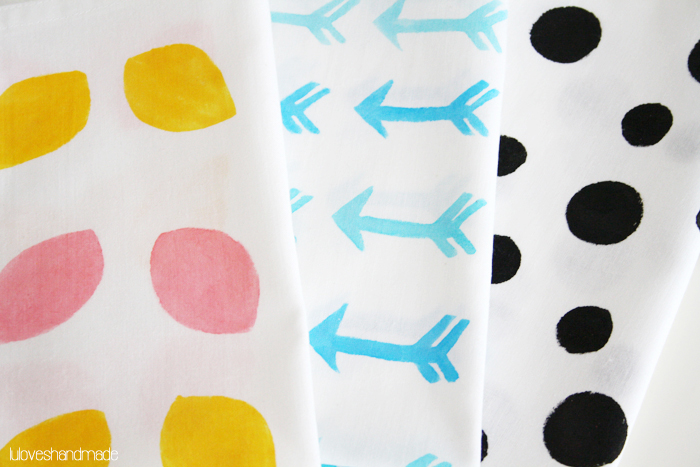
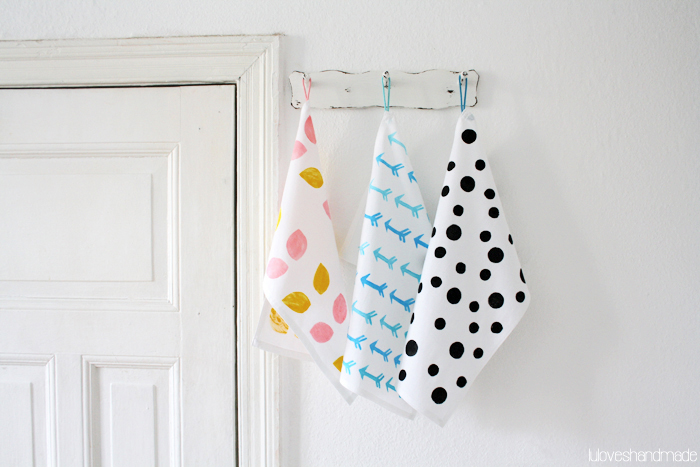
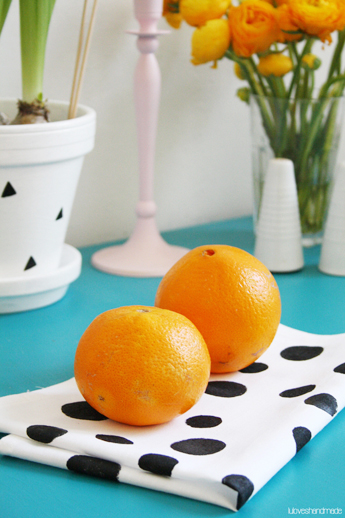
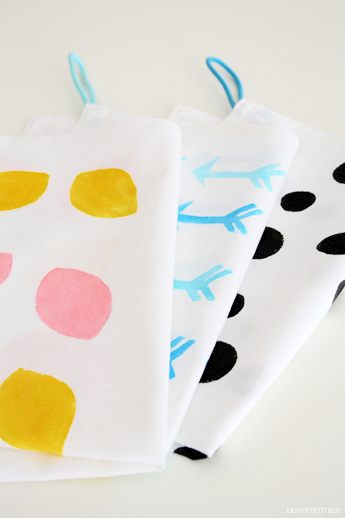
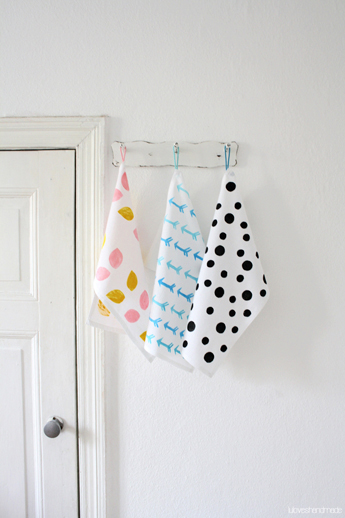
Your own handmade dishtowels:


That’s it, you’re done! Yippie!


The dotty dishtowel might be my favorite one, not only because it reminds me of Mogli’s fur. :D


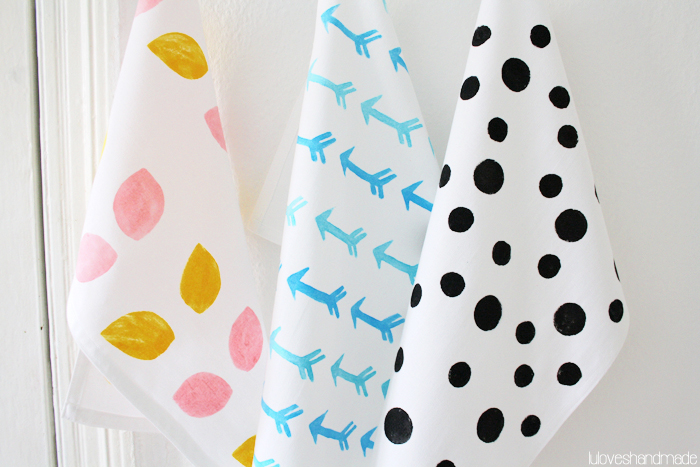
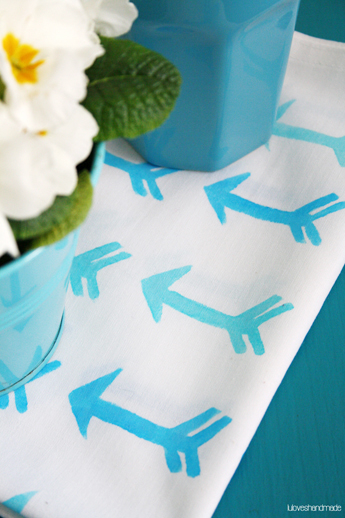
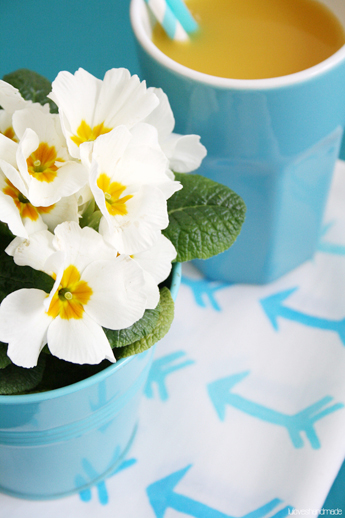
This arrow pattern is so pretty, too.


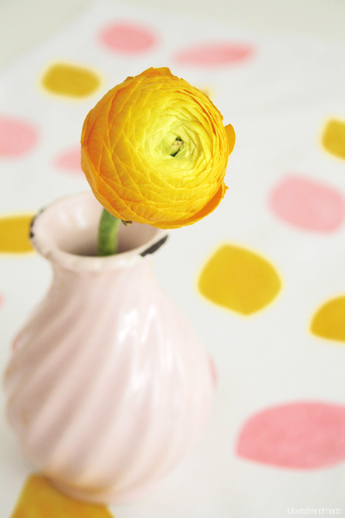
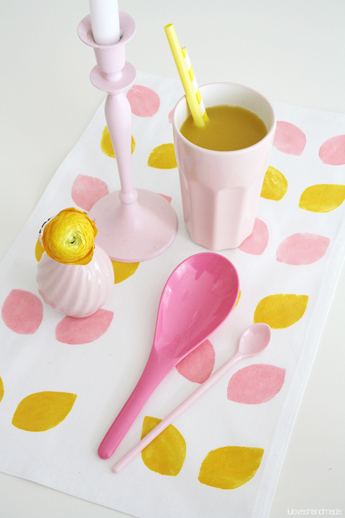
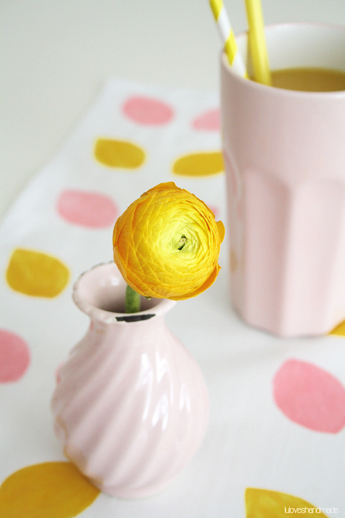
How much I like the color combination of yellow and rose!

That was lots of fun and really easy! Those towels are a great gift and make every kitchen look prettier!
Enjoy sewing & printing your own ones and don’t forget to share photos! :)
Happy weekend!
Lu

by luloveshandmade 
9 Comments
Everything Else

Favorite Restaurants and Cafes: Lu Loves Klunkerkranich

June 26, 2014


Hi everyone! :) For those of you who don’t know this awesome spot, yet, I’ve got a great place for spending a sunny afternoon in Berlin! :)
From time to time, I share new posts for my Berlin guide here on the blog and today it’s all about Klunkerkranich, a wonderful rooftop terrace in Berlin-Neukölln.

Klunkerkranich in Berlin


It was in early spring when I got there for the first time with some friends and I was super amazed! Klunkerkranich is on the top floor of the Neukölln Arcaden, a shopping-center next to the subway station ‘Neukölln’. You get up with the elevator and as soon as you are there, I’m sure you will be super excited about the breathtaking view all over Berlin.

Apart from being a rooftop-bar, Klunkerkranich is also a super pretty garden with homegrown plants and lovely handmade furniture and decor, full of love in every detail and so charming.

Between all those flowerbeds there can be found nice surprises everywhere.

Next to all those chimneys and plants, there’s even a photobooth. It couldn’t be more fun visiting this place!

If you want to, you can even buy plants and participate in gardening yourself.


This place is so incredibly awesome!
You normally have to pay 3€ to enter the main part of the location, but the view and the individual decoration of this place are totally worth it!
 
As you can see, there’s a pretty greenhouse over there, it’s mainly made of old wooden windows and doors, so cute!


Apart from a nice variety of drinks, there are also some snacks you can buy inside. On weekends, the inside as well as the outside of Klunkerkranich are super crowded and I was lucky to even be able to take some photos without people on them.
Next to the bar, there’s usually a DJ playing music, so good!


So cute!


Looking over all those rooftops always feels a little bit like watching Mary Poppins or Aristocats. :D

This place is awesome and so far, I’ve already been there three times this year and I can’t wait for many more summer days to spend there. If you’re from Berlin or planning a trip to go there, you should definitely put Klunkerkranich onto your list of places to visit! :)
Happy day!
Lu
Here’s where to get to Klunkerkranich:
Klunkerkranich
Karl-Max-Straße 66
12043 Berlin
Call: 030 / 666666
E-mail: freunde@fuchsundelster.de
Click to visit their website
by luloveshandmade 
7 Comments
Parties

Tropical Food Table

June 23, 2014


Hello and happy start of the week, my dear blog readers! :) As most of you know, I looove parties, food tables and matching decor (have a look at my past parties & food tables here) and what I love most about this is the whole process of planning – from the idea in my head to the final colorful table with delicious food. Thus, I relatively spontaneously decided at the beginning of the past week that I wanted to make a tropical food table on the weekend and use the German soccer team’s world cup match against Ghana as an occasion for this.
Separate blog posts with recipes for all the delicious things will follow in the upcoming few weeks, today I’m sharing the overall happiness of this colorful tropical food table with some close-ups of decor, snacks and cocktails. :) Enjoy!

My colorful tropical food table:


As the main savory snack, I made absolutely delicious exotic bagels with grilled cheese, apricot slices, pineapple cream cheese and salad. Hmm! As a sweet and fresh snack, there were fruit sticks with dragonfruit and watermelon. So refreshing!

For bright decoration, I bought these awesome pineapple honeycombs (via Tiger) and made this colorful fruit bunting out of cardboard. 

Preparing the whole table took me roughly about twenty-five hours, about fifteen hours were needed for making the food. Because I took so much time taking all the step by step photos for all the recipes I want to share soon and because of the cloudy weather, I was lake taking all the photos before dusk and so my dearest best friend Anja made the cocktails with me for getting finished in time. :* On the left photo, you can see the delicous mango colada that we made, mhhh!

Moreover, there were watermelon margaritas, so yummy! 

Apart from the refreshing fruit sticks, there was a homemade orange-mango cake with cream cheese topping and freshly grated organic orange zest.

Those bagels were soooo damn good, can’t wait to make them again, soon. For making them look extra nice, I used the pretty baker’s twine that Birgit of Garn & mehr once had given me. :)

This table turned out even prettier and more colorful than I had imagined, this makes me so happy!

Apart from the cake, I had also prepared the cupcakes the evening before so that I only needed to make the frosting on Saturday. Those cupcakes tasted like pineapple and coconut and were so tasty, mhhh (cupcake paper tins once bought from Birgit of partyerie). :)

Besides the bagels, there has also been another savory snack, namely fried rice balls. Those were made of rice, cheese, mango and orange. Oh my, my guests like these a lot!


Doesn’t this table look super pretty? I really enjoyed planning it and to prepare decor and food and now I can’t wait to share the recipes with you. :)
Have you aver been planning a food table? What was your favorite thing about it? Do you have any plans for upcoming food tables or theme snack tables?
Happy week and thanks for reading! :)
Lu
by luloveshandmade 
12 Comments
DIY

DIY: Bike Saddle Cover Sewing Tutorial

June 15, 2014


Hey everyone, happy Sunday! ;) Concerning my blog’s content and blog post frequency, I’m slowly managing getting back to normal and trying to post at least once a week (when possible on Sundays), despite the workload in my beloved DaWanda job and at university. :)
So this past week has been busy again, but I still managed to spend some time outside and to get things for the blog done. :)
This week, I’ve got another DIY for you:

In this blogpost, you can learn how to sew your own bike saddle cover, it’s not too difficult. Here we go:

What you need for sewing your own bike saddle cover:


You need:

– Some fabric oil cloth, enough for covering your saddle
– An elastic band, longer as the circumfence of your saddle
– Pins & scissors
– A sewing machine
– Pen and paper for making a pattern of your saddle’s size

Sew your own bike saddle cover


First of all, get the measurements of your saddle: make one pattern for the seat which is about 6cm wider than the seat itself (for the seam allowance and for having a cover which is big enough to pull it over the saddle).
Make a second pattern part which is as long as the circumfence of the saddle plus 4cm and which is double as high as the saddle to later being able to properly cover it and to include the elastic ribbon for closing it.
Next, use your two pattern pieces to draw the outlines onto the left side of the fabric and to cut out the pieces.
Then (as shown on the last photo), take your pins to attach both parts onto each other, right sides facing.

Now as you have attached both pieces onto each other (top left and top right photos), you can now  close the back seam of the saddle. This is where the two endings of the longer part for the saddle’s circumfence meet. First, simply top-stitch to connect both endings (lower left photo) and then use a zig-zag stich to neaten the edge (lower right photo).

The next step is now sewing the lower part onto the top part of the saddle cover. For doing this, top-stitch around the whole edge. Afterwards again use your zig-zag stitch to neaten it.

Now that the saddle cover itself is finished and all part have been sewn into one part, you now will have to insert the rubber band so that you later will be able to pull the cover over the saddle. Therefore, take the elastic band and use the pins to attach it to the cover. For doing so, you have to fold over the lower edge of the cover two times, put the ribbon inside and fix this with the needles (lower left photo). Then make sure to leave an opening in the back (lower right photo) where the ribbon can come out in order to make a knot after having fastened the cover onto the saddle.

As a next step, use your sewing machine and top-stitch. This way, you sew the lower edge which has been folded over two times onto the cover and you thus fix the ribbon. Don’t forget the opening (top right photo) and prevent the rubber band from coming out of the cover.
Now you’re done and then being put upside down, your cover should now be looking like on the lower left photo. Then you can use the elastic band to pull the opening together. Make a simple knot to prevent it from opening itself after having pulled it over the saddle.

Hooray, you now have your own handmade saddle cover which will prevent your bike’s seat from becoming wet and dirty. :)


Have fun using it and make sure to leave a link with photos in case you try out this DIY yourself! :)
Happy creative and sunny Sunday!
Lu

Merken

Merken

Merken

by luloveshandmade 
4 Comments
DIY

DIY: Fabric Basket Sewing Tutorial

June 8, 2014


Hey everyone! Wowza, this has been my longest time of blog absence so far! But no worries, everything is fine with me, I have just been super busy with my job at DaWanda,with university stuff and most importantly, with enjoying the first summer days. :) Nevertheless, thanks again to those of you who sent me e-mails, worrying if I was ok and telling me you were missing my blog posts. This made me incredibly happy! :)
So here I’m back with a new DIY for how to sew a fabric basket, yayy!

This basket is great for storing controllers, phones and tiny gadgets on a TV table or for putting toys or even bread on your breakfast table inside.

Sewing this basket is not too complicated, so here we go.

Supplies for sewing a fabric basket:


You need:
– A piece of cardboard for the pattern
– A sewing machine
– Hot iron and ironing board
– Scissors, pins, a measuring tape and a ruler
– Optional, but very useful: a roll cutter and a cutting pad
– Fabric according to the sizes of the pattern, twice for the inside and twice for the outside
– Voluminous interfacing (which has a sticky surface) two times according to the sizes of the pattern

First of all, use a piece of cardboard to draw the pattern. You don’t need to print this one out (it only has approximate size proportions), better make your own ones with the measurements given above.

Sew your own fabric basket:


Once you have prepared your pattern, use it to cut out the pieces of fabric: two times the fabric for the outside, two times fabric for the inside and two times the interfacing. Then you have six pieces of fabric of the same size. Iron the outter fabric (floral).

Also iron the inner fabric (dotty). Then take the outter fabric and iron both pieces each onto a piece of voluminous batting. It should have a sticky surface which connects both layers while ironing. Then you only have four pieces left: two times the inner fabric and two times the outter fabric with the interfacing on the back. Then take the two pieces of inner fabric and turn them right sides facing each other. Also do the same with the outter fabric.

Next, use your pins to pin the layers together. Then take your sewing machine to sew the left, right and bottom edges onto each other. Afterwards, use your pins to attach the right side to the bottm, seams meeting in the middle.

On the first photo you can see where the seams of side and bottom meet. When you put your basket onto the table, it should now look like on the top right photo where you can now slightly recognize the future shape of your sewing project. Then also attach the left side to the bottom and close the opening.

Again, make sure that the seams of side and bottom meet and close the opening with pins. Then it should be looking like on the lower left photo. Use your sewing machine to close both openings, leave a seam allowance of 1cm.

Now you can really recognize your basket to be. Next, do the same steps with the inner fabric and turn it into a basket as well.

Those are the two baskets, left sides outside.

As a next step, put the outter basket into the inner one, right sides facing. Make sure that the seams are at the same places and then connect the top edge with pins.

After having pinned both layers onto each other, you can now top-stitch and thus connect the inner and outter fabric. Make sure not to sew completely around, because you will need an opening to turn the basket inside out as it is indicated by the pins on the lower left photo. Now turn it inside out through the opening.

Iron the top edge, use pins to fix it and then top-stitch along the whole top edge in order to make it look neat and in order to close the opening.

That’s it, you’re done! :) Apart from folding the top edge over, you could also turn the basket around the use the other side (the dotted one) for the outside. :)

Doesn’t this basket look pretty on my nightstand?

Well, I use it for storing the TV remote, cosmetics, a notebook and my phone. What would you use it for?

Have fun with this sewing DIY and don’t forget to show me photos, can’t wait! :)
Happy sunny Sunday!
Lu

Merken

by luloveshandmade 
11 Comments
« Previous Page
Next Page »

Hello & Welcome

Hello & Welcome

I'm Lu, I'm 34 years old and I live in wonderful Berlin. I am a Content Creator and DIY enthusiast and I am the founder and editor of Luloveshandmade.com where I share colorful everyday life happiness, handletterings, tutorials and other creative content. Apart from being a Handlettering Artist and running my own indie business, I'm a Content & Communications Manager. Read more about me and my creative work or visit my business portfolio page and have fun exploring this blog.

Get Inspired

  • Luloveshandmade-Handlettering-Feminism-Feminismus-Pro-Choice-Weg-mit-219a-bunt

    Pro Choice // Weg mit Paragraf 219a!

    January 24, 2021
  • Luloveshandmade-Shop-Update-Illustration-Handlettering-Spreadshirt-1

    Luloveshandmade Shop Update – New Products with my Letterings and Illustrations via Spreadshirt

    October 19, 2020
  • Luloveshandmade-Handlettering-Illustration-Make-Periods-Table-Talk-Menstruation-Feminism

    Make Periods Table Talk

    September 11, 2020
  • Luloveshandmade-Uncle-M-Music-All-Boobs-Are-Beautiful-6

    All Boobs Are Beautiful – Special Limited Edition Shirt via Uncle M Music Shop

    July 24, 2020
  • Luloveshandmade-Free Handlettering Printable-We Will All Make It Through All Of This (1)

    Free Handlettering Printable: We’ll Make It Through This

    April 13, 2020

Tags

advice balcony berlin guide christmas cities diy fake polaroid fashion favorite blogs favorite indie label favorite restaurants and cafes favorite shops featured fellow bloggers feminism food and cooking food table freebie giveaway handlettering handmade home decoration home tour instagram instagram photo printing service life and friends list lomography longboarding makeover market news painting and drawing party photography potsdam guide pretty online finds recipe review selling sewing shopping sponsoring travel video vintage what I wore wishlist
...
Followers
Follow
...
Followers
Follow
...
Fans
Like
...
Followers
Follow
...
Posts
0
...
amazing followers

My favorite Posts

  • Our Sweet And Happy Croatia Adventure // Summer Holidays on Brač
    Our Sweet And Happy Croatia Adventure // Summer Holidays on Brač
  • Handlettering for Beginners (with Pinterest) & Valentine
    Handlettering for Beginners (with Pinterest) & Valentine's Day Printables
  • Pinterest Basics for Bloggers
    Pinterest Basics for Bloggers
  • A Colorful Portrait Shooting (& Advice for How to Prepare for It)
    A Colorful Portrait Shooting (& Advice for How to Prepare for It)
  • Handlettering Workshop Recap
    Handlettering Workshop Recap

English: Imprint // Data Protection
German: Impressum // Datenschutzerklärung

Copyright © 2025 · Prima Donna theme by Georgia Lou Studios

© 2010 - 2017 luloveshandmade · Theme by Georgia Lou Studios, adapted by kathastrophal.de.