
Hey everyone, happy Sunday! ;) Concerning my blog’s content and blog post frequency, I’m slowly managing getting back to normal and trying to post at least once a week (when possible on Sundays), despite the workload in my beloved DaWanda job and at university. :)
So this past week has been busy again, but I still managed to spend some time outside and to get things for the blog done. :)
This week, I’ve got another DIY for you:
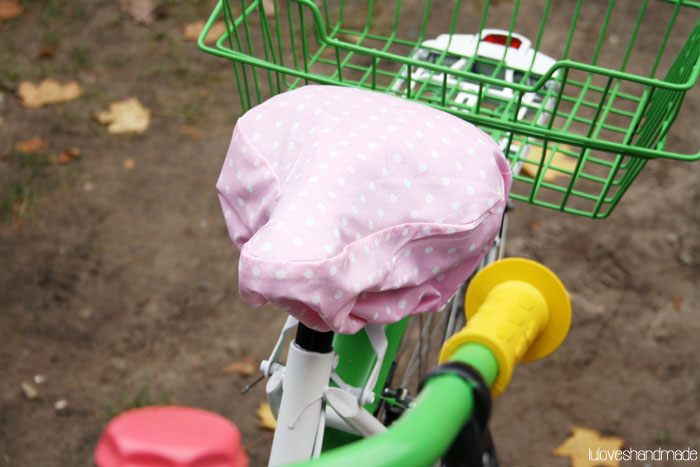
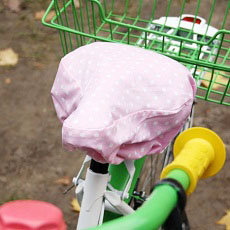
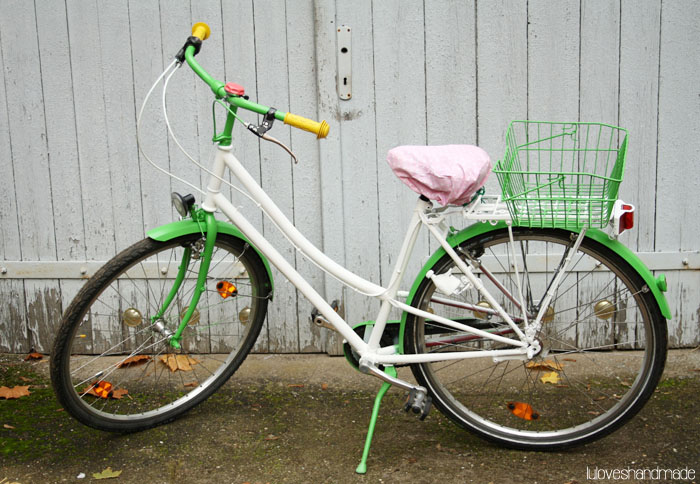
In this blogpost, you can learn how to sew your own bike saddle cover, it’s not too difficult. Here we go:
What you need for sewing your own bike saddle cover:
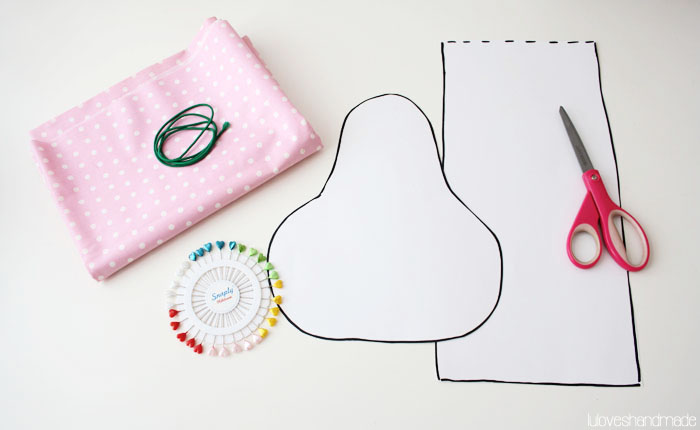
You need:
Sew your own bike saddle cover

First of all, get the measurements of your saddle: make one pattern for the seat which is about 6cm wider than the seat itself (for the seam allowance and for having a cover which is big enough to pull it over the saddle).
Make a second pattern part which is as long as the circumfence of the saddle plus 4cm and which is double as high as the saddle to later being able to properly cover it and to include the elastic ribbon for closing it.
Next, use your two pattern pieces to draw the outlines onto the left side of the fabric and to cut out the pieces.
Then (as shown on the last photo), take your pins to attach both parts onto each other, right sides facing.
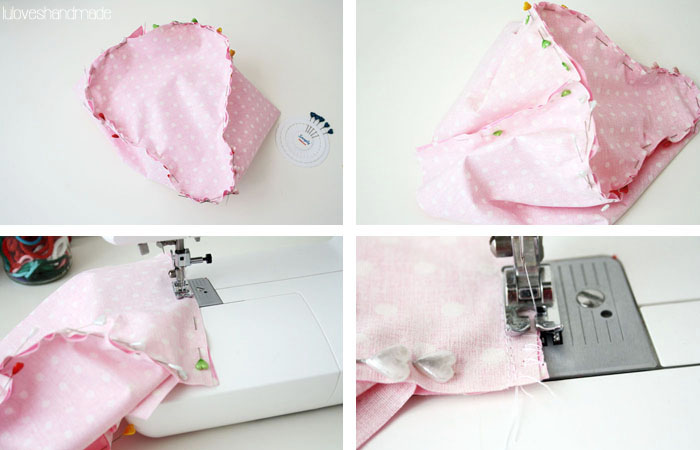
Now as you have attached both pieces onto each other (top left and top right photos), you can now close the back seam of the saddle. This is where the two endings of the longer part for the saddle’s circumfence meet. First, simply top-stitch to connect both endings (lower left photo) and then use a zig-zag stich to neaten the edge (lower right photo).
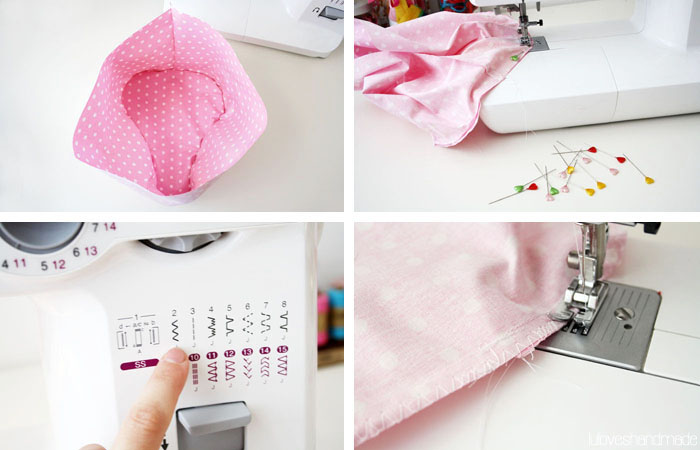
The next step is now sewing the lower part onto the top part of the saddle cover. For doing this, top-stitch around the whole edge. Afterwards again use your zig-zag stitch to neaten it.
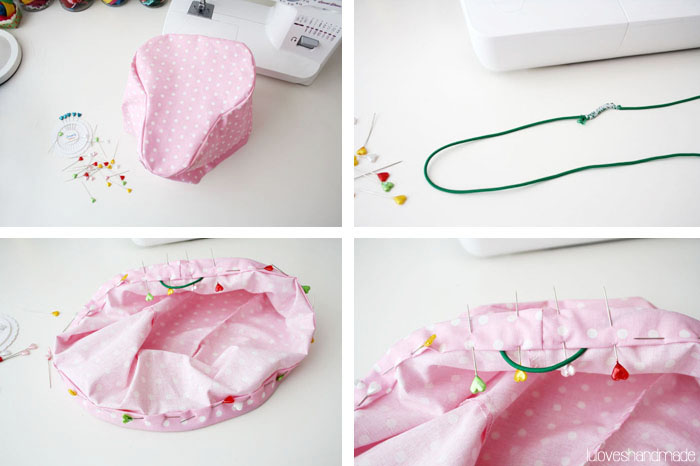
Now that the saddle cover itself is finished and all part have been sewn into one part, you now will have to insert the rubber band so that you later will be able to pull the cover over the saddle. Therefore, take the elastic band and use the pins to attach it to the cover. For doing so, you have to fold over the lower edge of the cover two times, put the ribbon inside and fix this with the needles (lower left photo). Then make sure to leave an opening in the back (lower right photo) where the ribbon can come out in order to make a knot after having fastened the cover onto the saddle.
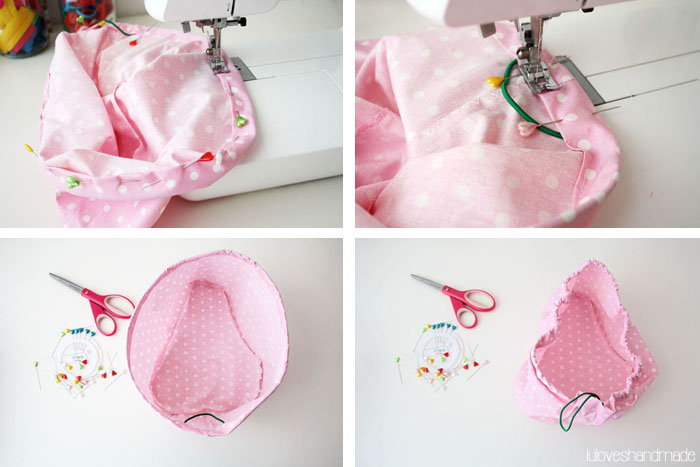
As a next step, use your sewing machine and top-stitch. This way, you sew the lower edge which has been folded over two times onto the cover and you thus fix the ribbon. Don’t forget the opening (top right photo) and prevent the rubber band from coming out of the cover.
Now you’re done and then being put upside down, your cover should now be looking like on the lower left photo. Then you can use the elastic band to pull the opening together. Make a simple knot to prevent it from opening itself after having pulled it over the saddle.

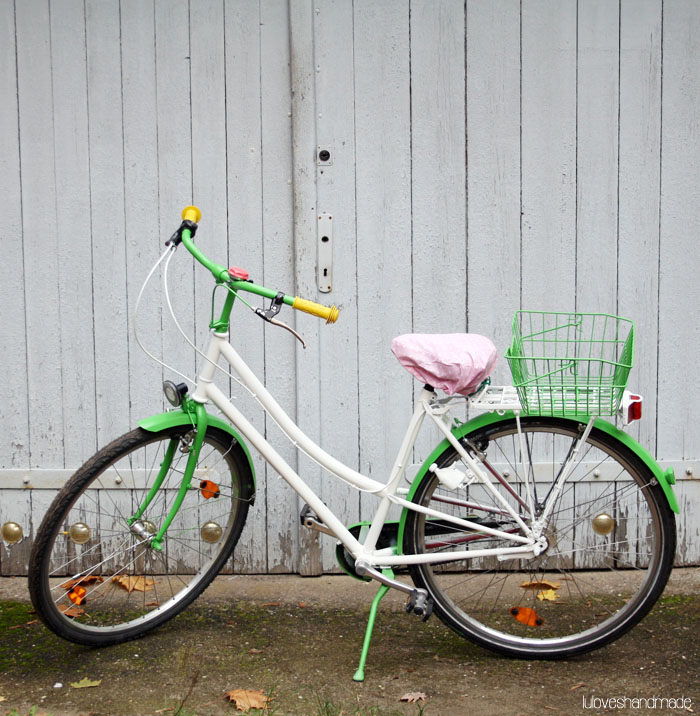
Hooray, you now have your own handmade saddle cover which will prevent your bike’s seat from becoming wet and dirty. :)
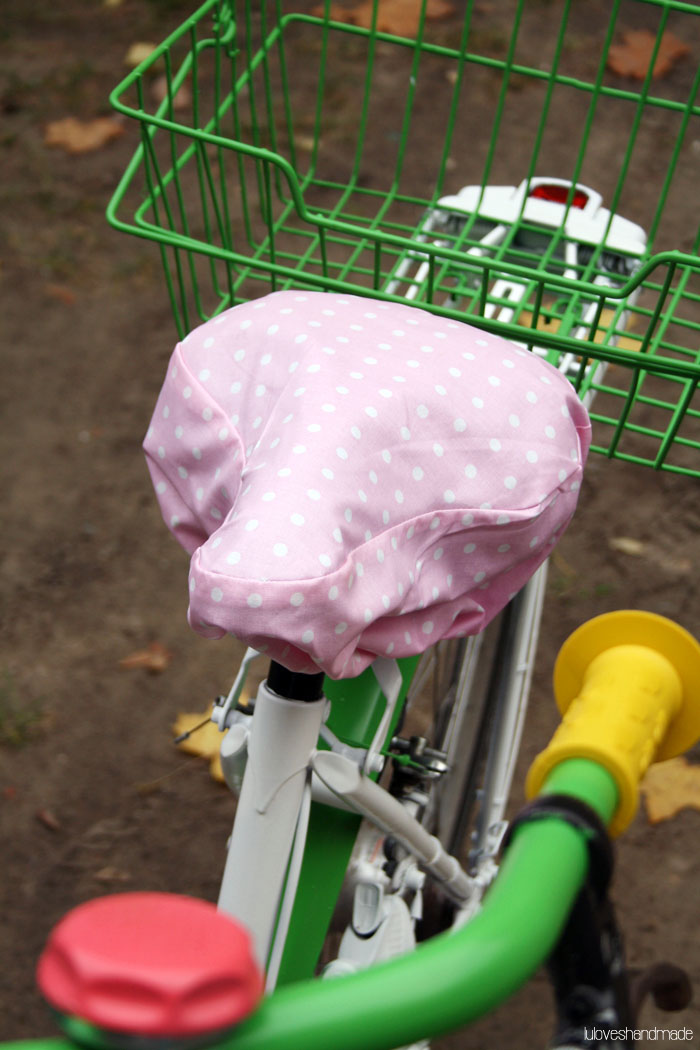
Have fun using it and make sure to leave a link with photos in case you try out this DIY yourself! :)
Happy creative and sunny Sunday!
Lu


Oh der Stoff ist so schön rosa! Und dann auch noch gepunktet! Ich würde es sofort mit genau diesem Stoff nachnähen, wenn ich denn ein Fahrrad hätte…bisher verzweifele ich nämlich an der Suche. Die schönen Räder sind einfach unbezahlbar :(
Einen schönen Sonntag dir!
Eda
Vielen Dank für die tolle Anleitung. Die kann ich gerade jetzt total gut gebrauchen!
Viele Grüße, Katharina
Sehr hübsch! Bin ja schon seit dem Fahrrad-Makeover neidisch! Jetzt ist es perfekt! Liebe Grüße von Stefanie aus dem Hinterhaus!
Liebe Stefanie, danke für Deinen Kommentar und ich freu mich so sehr, eine Leserin nebenan zu haben! :) Kein Grund, neidisch zu sein, kannst Du ganz einfach selber machen! :) Und wenn Du Tipps brauchst, weißt Du ja, wo Du mich findest! :) Liebste Grüße, Lu