

Hey everyone! Wowza, this has been my longest time of blog absence so far! But no worries, everything is fine with me, I have just been super busy with my job at DaWanda,with university stuff and most importantly, with enjoying the first summer days. :) Nevertheless, thanks again to those of you who sent me e-mails, worrying if I was ok and telling me you were missing my blog posts. This made me incredibly happy! :)
So here I’m back with a new DIY for how to sew a fabric basket, yayy!
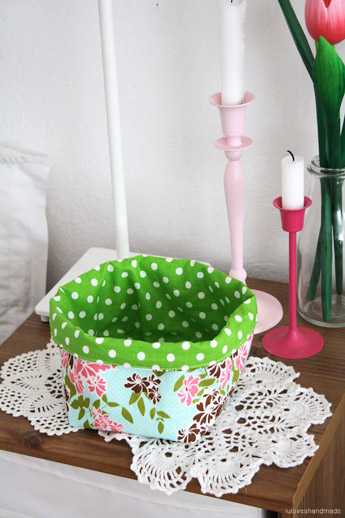
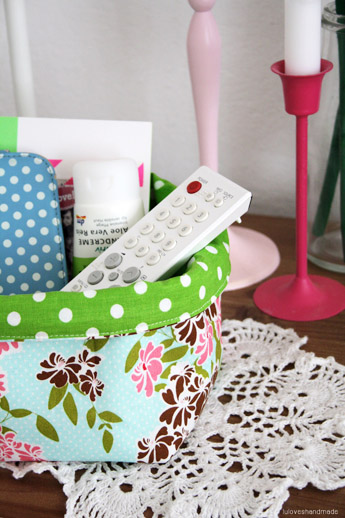
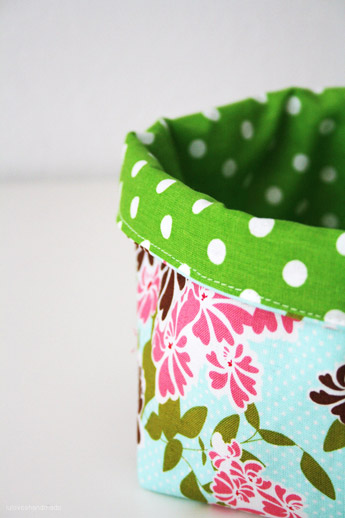
This basket is great for storing controllers, phones and tiny gadgets on a TV table or for putting toys or even bread on your breakfast table inside.
Sewing this basket is not too complicated, so here we go.
Supplies for sewing a fabric basket:
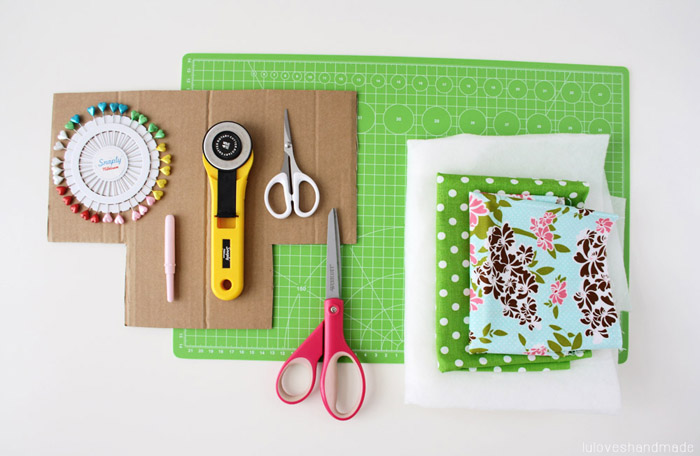
You need:
– A piece of cardboard for the pattern
– A sewing machine
– Hot iron and ironing board
– Scissors, pins, a measuring tape and a ruler
– Optional, but very useful: a roll cutter and a cutting pad
– Fabric according to the sizes of the pattern, twice for the inside and twice for the outside
– Voluminous interfacing (which has a sticky surface) two times according to the sizes of the pattern

First of all, use a piece of cardboard to draw the pattern. You don’t need to print this one out (it only has approximate size proportions), better make your own ones with the measurements given above.
Sew your own fabric basket:

Once you have prepared your pattern, use it to cut out the pieces of fabric: two times the fabric for the outside, two times fabric for the inside and two times the interfacing. Then you have six pieces of fabric of the same size. Iron the outter fabric (floral).
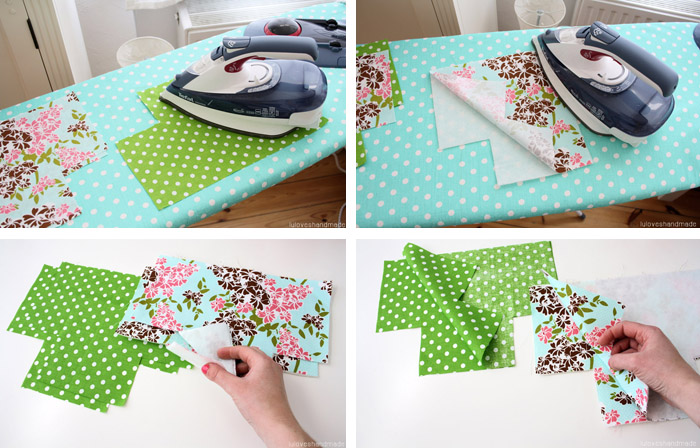
Also iron the inner fabric (dotty). Then take the outter fabric and iron both pieces each onto a piece of voluminous batting. It should have a sticky surface which connects both layers while ironing. Then you only have four pieces left: two times the inner fabric and two times the outter fabric with the interfacing on the back. Then take the two pieces of inner fabric and turn them right sides facing each other. Also do the same with the outter fabric.
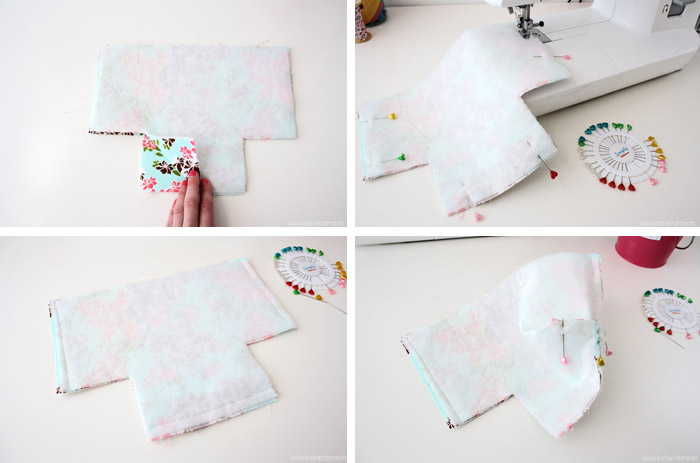
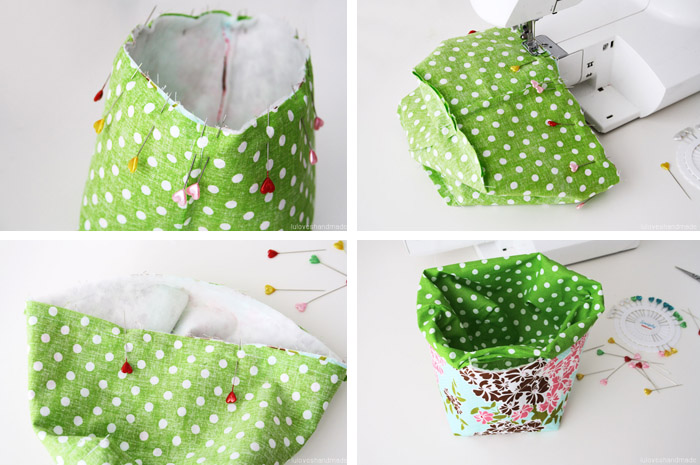
Next, use your pins to pin the layers together. Then take your sewing machine to sew the left, right and bottom edges onto each other. Afterwards, use your pins to attach the right side to the bottm, seams meeting in the middle.
On the first photo you can see where the seams of side and bottom meet. When you put your basket onto the table, it should now look like on the top right photo where you can now slightly recognize the future shape of your sewing project. Then also attach the left side to the bottom and close the opening.
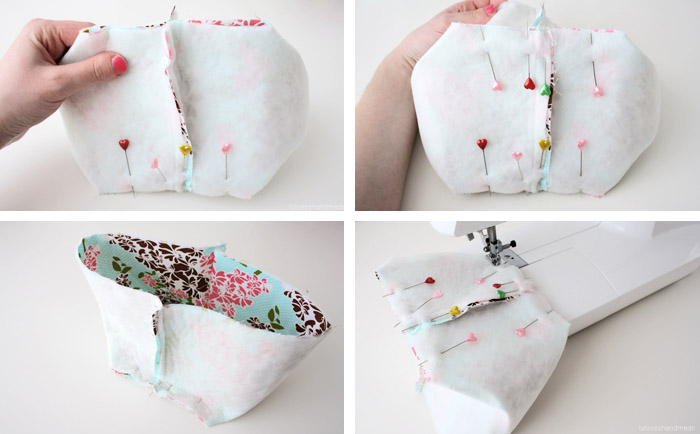
Again, make sure that the seams of side and bottom meet and close the opening with pins. Then it should be looking like on the lower left photo. Use your sewing machine to close both openings, leave a seam allowance of 1cm.
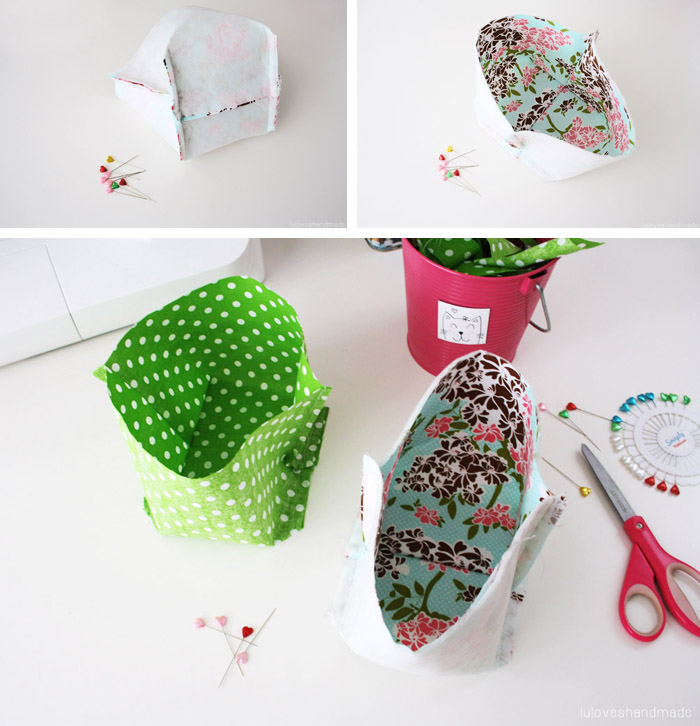
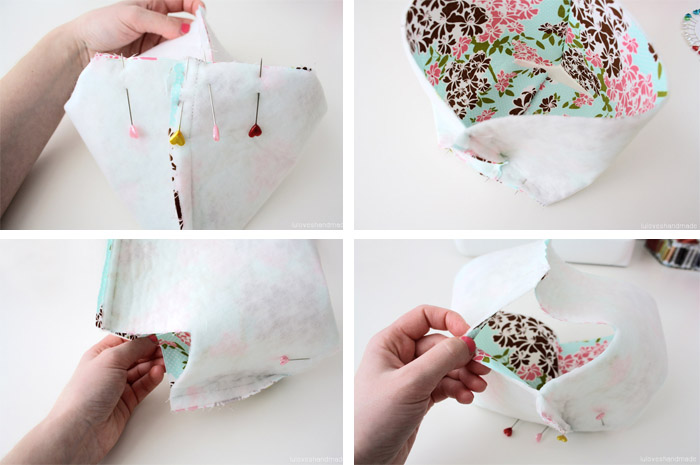
Now you can really recognize your basket to be. Next, do the same steps with the inner fabric and turn it into a basket as well.
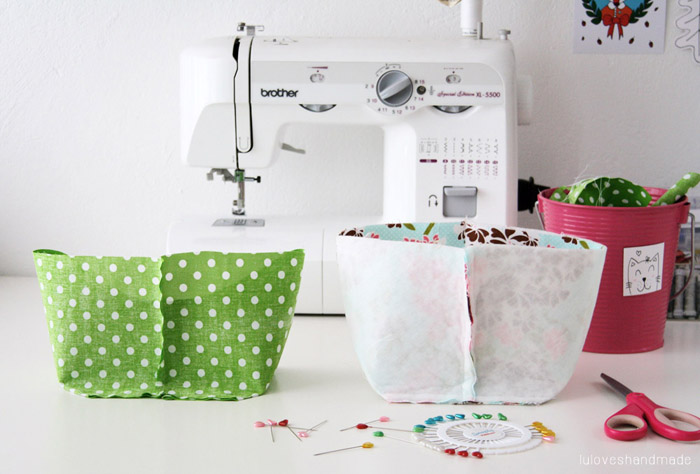
Those are the two baskets, left sides outside.
As a next step, put the outter basket into the inner one, right sides facing. Make sure that the seams are at the same places and then connect the top edge with pins.
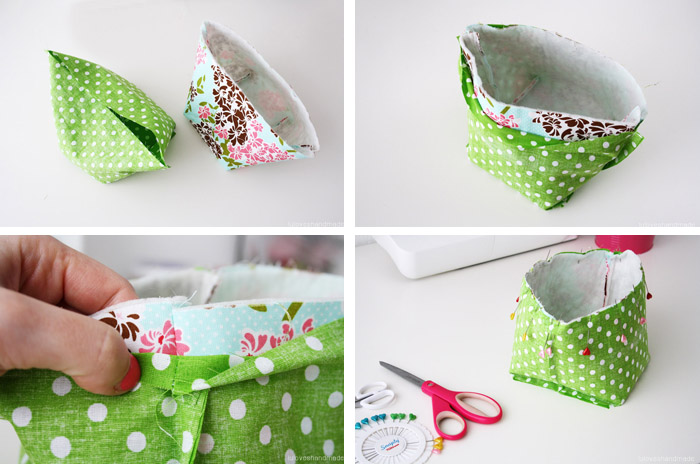
After having pinned both layers onto each other, you can now top-stitch and thus connect the inner and outter fabric. Make sure not to sew completely around, because you will need an opening to turn the basket inside out as it is indicated by the pins on the lower left photo. Now turn it inside out through the opening.
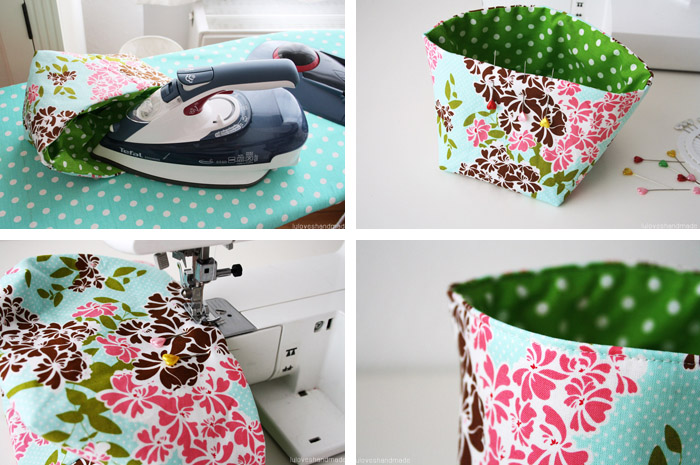
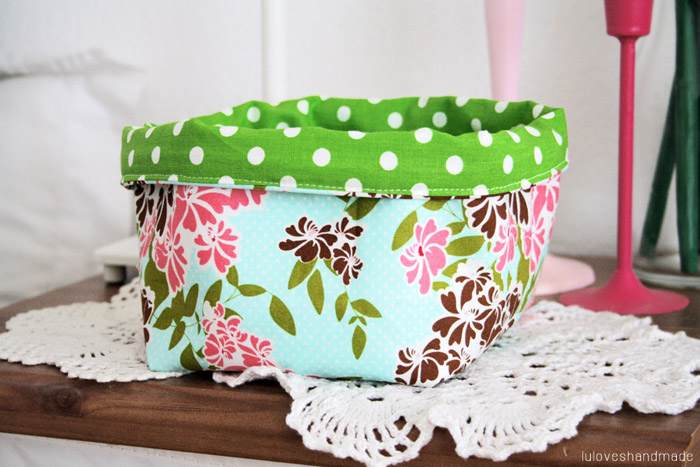
Iron the top edge, use pins to fix it and then top-stitch along the whole top edge in order to make it look neat and in order to close the opening.
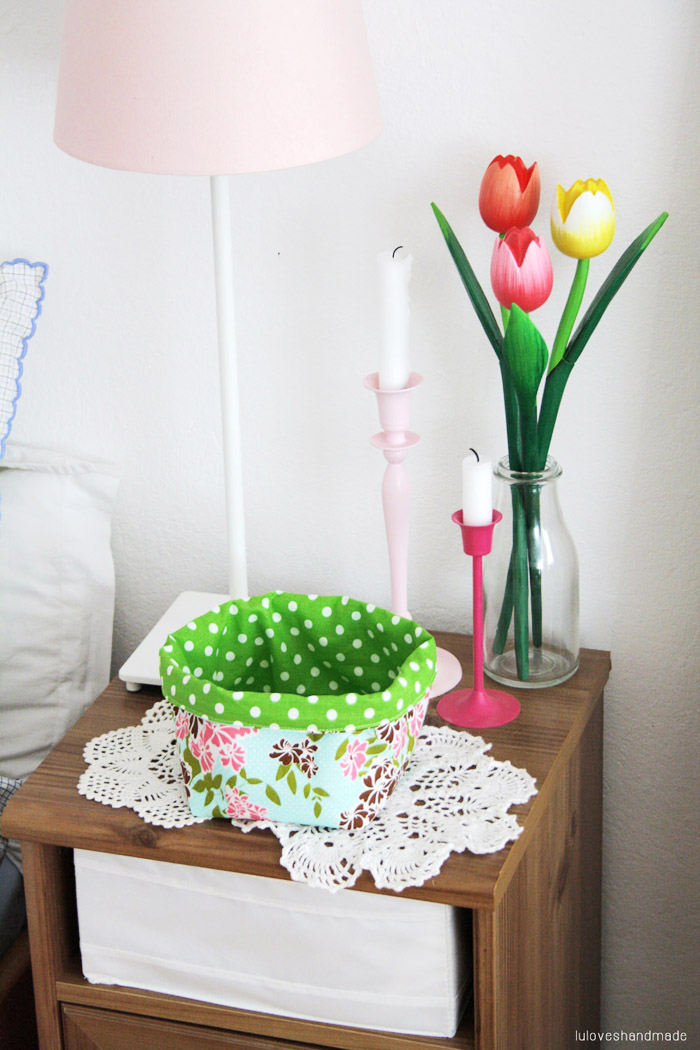
That’s it, you’re done! :) Apart from folding the top edge over, you could also turn the basket around the use the other side (the dotted one) for the outside. :)
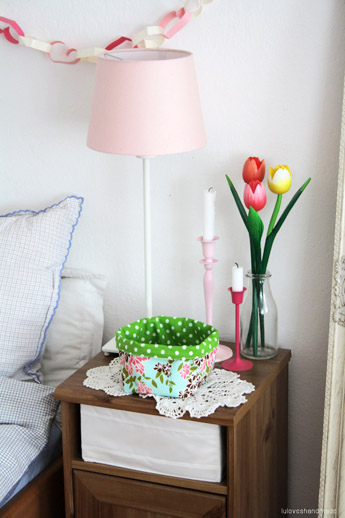
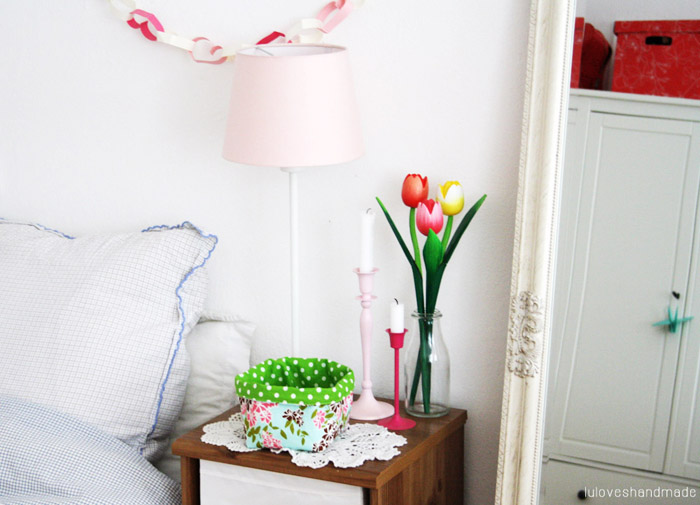
Doesn’t this basket look pretty on my nightstand?
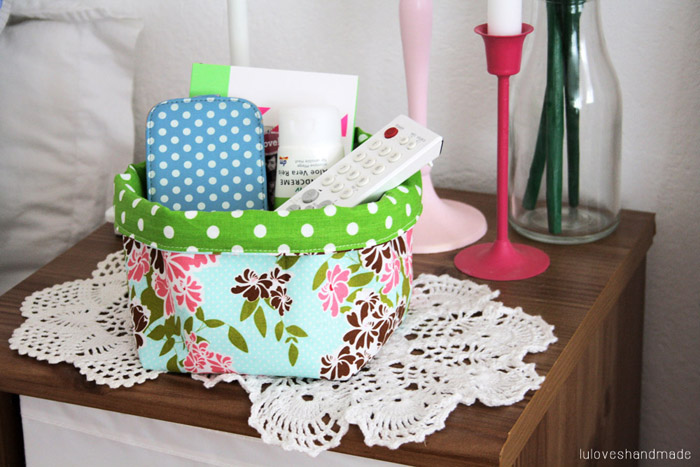
Well, I use it for storing the TV remote, cosmetics, a notebook and my phone. What would you use it for?
Have fun with this sewing DIY and don’t forget to show me photos, can’t wait! :)
Happy sunny Sunday!
Lu


Liebe Lu,
es ist so schön, hier wieder was von dir zu lesen! Ich habe deine Postings auch vermisst – wobei ich dir natürlich jeden entspannten Tag in der Sonne gönne! – und freue mich wirklich sehr :)
Das Körbchen sieht sehr hübsch aus, das könnte ich auch gebrauchen. Danke für das Tutorial!
Alles Liebe ♥
Katha
Liebe Lu,
auch ich habe mir Sorgen gemacht, ob Dir wohl etwas passiert ist!
Da Du sonst regelmäßig postest, kommt man schon ins grübeln.
Aber auf Instagramm gab es Lebenszeichen von Dir.
Zukünftig musst Du uns aber vorwarnen!
Thanks for the nice Tutorial.
Greetings & Love
Ines
Ich hab mich auch zwischendurch gewundert, weil von dir kein Post kam ;)
Aber umso schöner jetzt wieder von dir zu lesen. Der Stoffkorb gefällt mir! Ich würde wahrscheinlich Akkuladekabel, Streichhölzer und Stifte darin aufbewahren. Das ist so der Kram, der lose auf meinem Nachttisch rumfliegt (Fernbedienungen habe ich keine) ;) Ich kann mir so einen Stoffkorb aber auch prima im Bad für Kosmetik vorstellen.
Liebe Grüße und genieß weiterhin das schöne Wetter,
lotta
Hallo Lu,
vielen Dank für das tolle Tutorial, da hast Du Dir aber echt Mühe gegeben!!! Endlich mal eine komplette Anleitung, so einen Korb wollte ich schon lange nähen, aber ich checke normale Anleitungen meistens nicht :). Mit Bildern ist es doch viel leichter!
Liebe Grüße und jetzt ab an den See!
Katharina
Huhu
schön malwieder was von dir zu lesen und danke für die Anleitung mit den schönen Bildern
Liebe Grüße
Das Moos von http://moosteppich.blogspot.de/
Super tolles Tutorial, was mich wirklich dazu verleitet meine Nähmaschine endlich wieder hervorzuholen :) Finde deine Stoffwahl ganz besonders schön.
Liebe Grüße,
Suey
Super süß!
Und ich liiiiiiiebe deine Bilder einfach!
Liebste Grüße
Susa von http://projekt-federleicht.blogspot.de/
Sehr sehr cool, das mach' ich bestimmt mal nach – perfekt für all den Kleinkram, der so rumfliegt! (: Und schön, dass du wieder da bist!
Alles Liebe,
Laura
Super Anleitung! Ich hab's direkt nachgemacht. Ich freue mich jedes Mal über deine Projekte.
http://www.pinterest.com/pin/420523683928941735/
Liebe Grüße, Meike
Liebe Lu,
deine Anleitung fü die Körbchen ist echt super! Ich hab auch gleich eins für mich und eins für meine Mam genäht.
Liebe Grüße
Julia
I think that your directions where very easy to follow. I made one of these baskets and I think it came out really cute. Thank you for the instructions and the pattern. I will be making more of these for sure.