
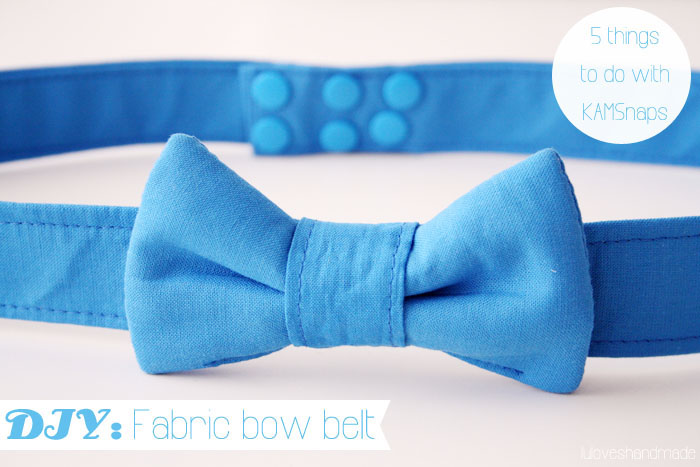
Hello, hello! :) Remember my four past DIYs using KAMSnaps that I have been posting since April? :) I shared a tutorial for how to sew a fabric bow bracelet, a tutorial for a faux leather business card holder, a DIY for a cat felt needle case and a DIY for a pillow case. Today I want to share the final post out of five parts of the series called “5 things to do
with KAMSnaps” featuring the awesome products of my sponsor Snaply
who sent me a package with lots of awesome things from their shop that
I’ve chosen in order to show you what to make with their products.
As I just said, this tutorial is part five of the blog posts telling
you what
to use KAMSnaps for. These are colorful plastic snaps which you can use
for many different projects and they are so useful. So here’s my
idea, a sewing DIY for how to make a super cute fabric bow belt which
you can then close with the snaps and wear it with your favorite
dresses. :) Have fun!

This is what you need:
– A piece of fabric, fourth times as wide as you later want the belt to be and as long as your circumference of waist plus 10cm (to close it)
– A piece of interfacing (in German: eine dünne Schabracke) with the same measurements to give your belt more stability
– Two pieces of fabric (for the front and back) with the size of your bow plus 1cm seam allowance
– Also for the bow: two pieces (or one thick piece) of interfacing / batting with the size of your bow to give it some volume
– A final piece of fabric to attach your bow to the belt, about 8cm x 12cm
– Sewing machine, ironing board and hot iron
– KAMSnaps, a KAMSnap plier and a bradawl
– Scissors and magic pen
– Optional and really helpful: a cutting pad and a roll cutter
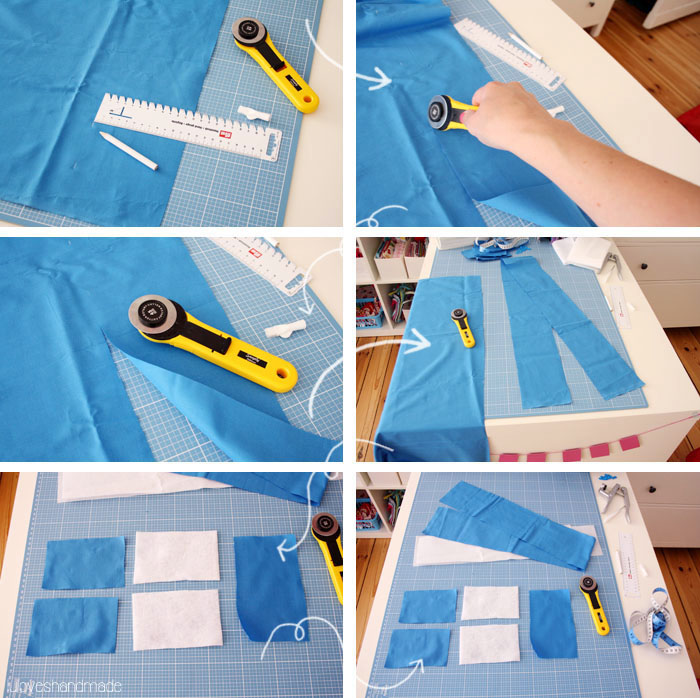
At first, use the roll cutter and your cutting pad to cut out the long piece of fabric for the belt itself. Mine was 12cm wide (fourth times as wide as I later wanted the belt to be) and 95cm long (85cm for my circumference of waist plus 10cm to close it). Then cut out a piece of interfacing of the same size. Next (as seen on the lower left photo), cut out the pieces for the bow (front and back plus interfacing) and the piece of fabric (the right one on the lower left photo) which you will use to attach the bow to the belt.
You then have cut out all the pieces that you need (as can be seen on the lower right photo): The long piece of fabric for the belt itself and a piece of interfacing of the same size, front and back fabric part for the bow plus interfacing and one piece of fabric to attach the bow to the belt.
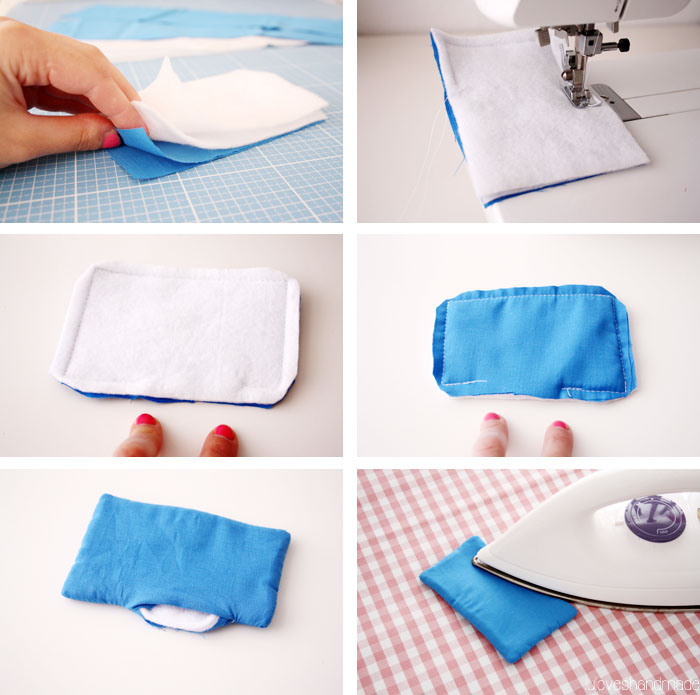
Next, put all layers of the bow onto each other (front and back plus one or two layers of interfacing) so that the two fabric layers are facing each other with the right side. Next, sew all layers onto each other and leave an opening in the middle of one of the longer sides (between my finger, shown on the photos). Then cut off the edges so that you can then easily turn the inside out. Iron.
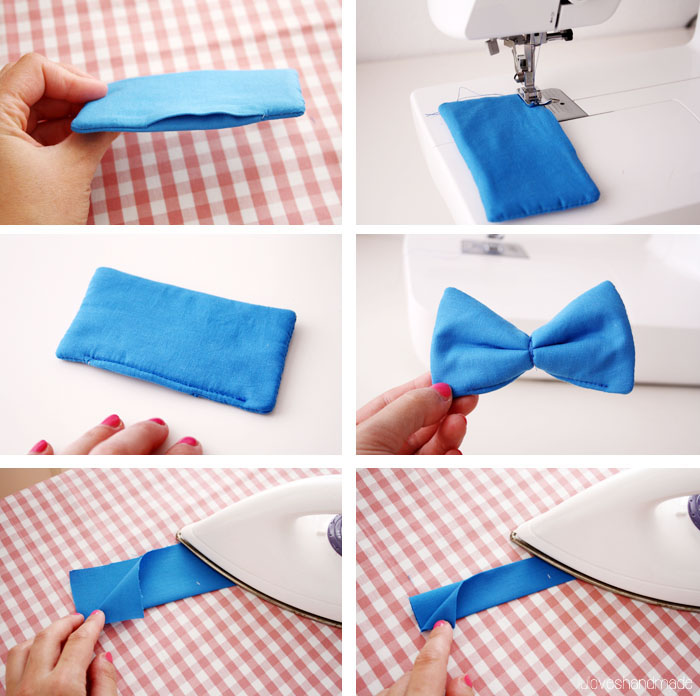
This is how it now should be looking now! Next, use your sewing machine and top stitch to close the opening. Afterwards, fold your piece of fabric to make it a bow and use a matching thread to wrap it around and to bind it. As a next step, take the small piece of fabric which will be used to attach the bow to the belt: fold it lengthwise and iron. Fold it another time so that the edges are now in the middle and you don’t see them anymore. Iron again.
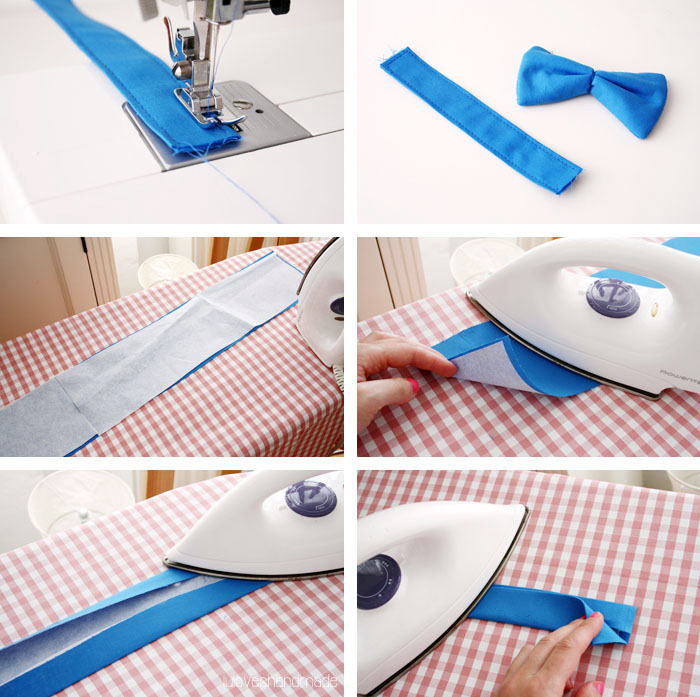
Now use your sewing machine to topstitch along the edges of the piece of fabric. Now you have this piece and your bow which is half finished. Next, take the long piece of fabric for the belt, iron it, put the interfacing on top and iron it onto the fabric. Then fold the edges to the middle and then fold the whole belt lenghtwise so that it then has the width that you wanted and that you can’t see the edges anymore. Iron the belt.

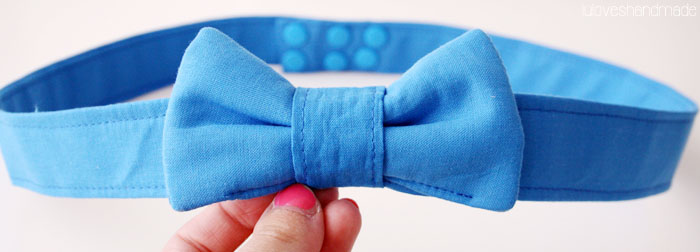
Next, again use your topstitch to neaten the edges and to sew all layers onto each other and carefully close the short endings. You then should have three pieces looking like on the top right photo. Afterwards, put your bow onto the belt and wrap the small strap around both of them. Close the opening with your sewing machine and use a zig zag stitch to carefully neaten the edge.
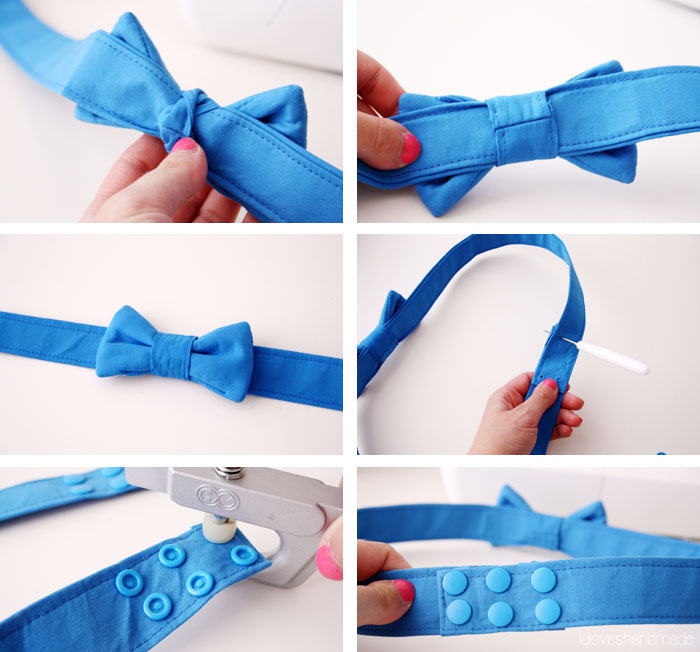
The turn the fabric strap inside out so that it looks more pretty. Your bow is ready! :) Now there’s only one final step to be done: take the bradawl to get holes into the back part of the belt where both layers are supposed to overlap and then use your KAMSnap plier to attach the snaps to the belt (according to the instructions on its package). I made several rows so that I can always adjust the length of the belt. :)
That’s it, you are done!
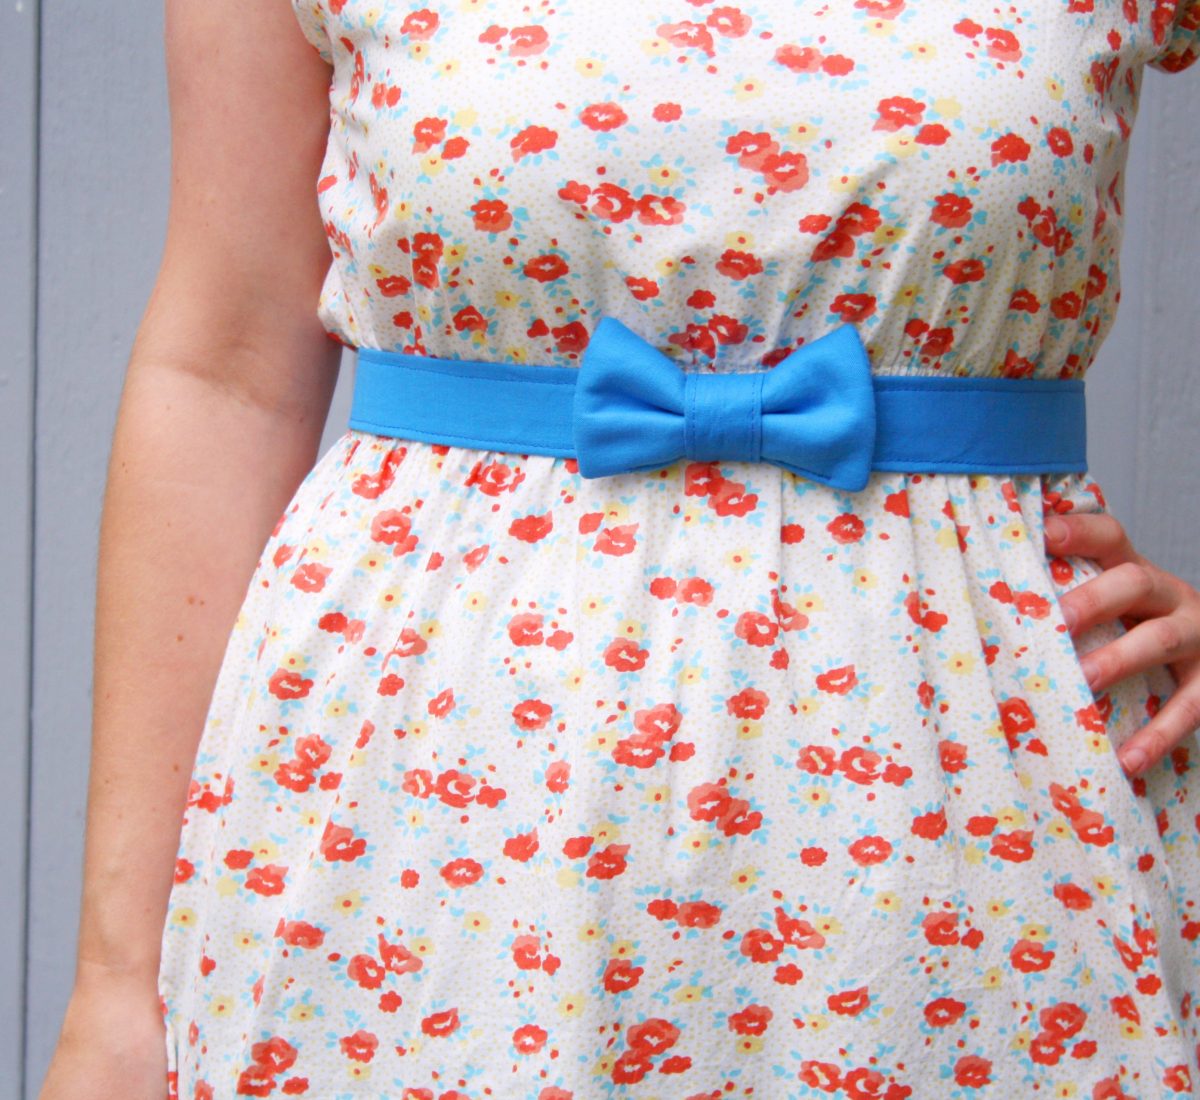
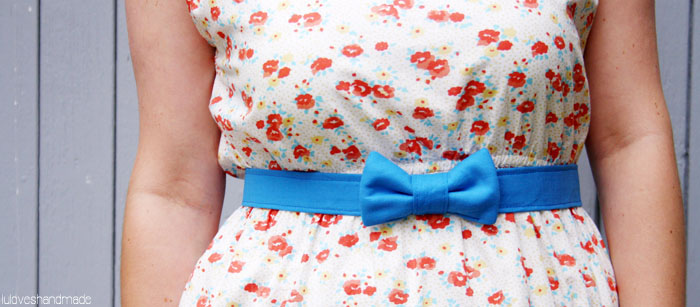
Congratulations, you now have your own handmade fabric bow belt!

I totally adore the final result and the great color matching my floral summer dress!
Happy sewing, can’t wait to see your cute bow belt!
Lu


Jeah, ziemlich cool, ich glaube, sowas brauche ich auch! Ich mag Schleifen, traue mich aber selten, welche zu tragen. Aber ich glaube, als Gürtel geht das schon :) Danke für Inspiration und Anleitung!
Liebe Grüße!
liebe Katha . Ich habe eine Hose , die echt 2 Nummern zu groß ist . Ich habe mir so einen Gürtel ohne Schleife gemacht : passt perfekt
Supersüß! Schleifen sind einfach toll! Danke dafür, das werde ich mal ausprobieren ;)
Liebe Grüße, Jessica
Sieht toll aus. Wäre aus Leder sicher auch sehr nett.
Lg Claudia
Really beautiful belt. Maybe I should make one out of all fabric scraps.
Toll!!!
Wirklich sehr schön!
WOW, also ich bin echt sowas von begeistert!
Ich selbst habe leider keine Nähmaschine und wenn wäre ich bestimmt recht ungeschickt darin…
Trotzdem liebe ich Gürtel und finde deinen Post echt großartig…
weißt du ich träume gerade davon später zu meiner Hochzeit allen Trauzeugen eine passende Fliege zu verpassen ;D
Liebe Grüße
Mary
Very cute project, I love this idea :)
Der Gürtel ist toll geworden – mal wieder eine wunderhübsche Projektidee! (:
Alles Liebe,
Laura
Cute idea, I love it!
Super Idee. Das probier ich aus.
Danke für Deine Ideen
Liebe Grüße
Collo
That shade of blue is awesome. It has a vintage feel, and it accentuates your hips and dress. If I were you, I'd make one in different colors to match your other outfits. Thanks for sharing how to make that dainty belt. Stay pretty! Allyn Winston @ TheInfinityBelt.com
You shared useful post. I like your blog. Keep sharing.non woven bags machine