
Hey! :) Lovely Stefanie of Squeaky Swing has
invited me to prepare a guest post for her blog and of course I happily
accepted this invitation. :) Since she writes her posts in German, I also
prepared my guest post in German, but for those who only understand English,
here’s another version for you on my own blog. So if you’re from Germany, go and check out her blog and say hello, she’s totally appealing and
has lots of cute DIY ideas. :) Fortunately, lots of her projects can be
understood without reading the text, so it might also be interesting for
international readers! :)
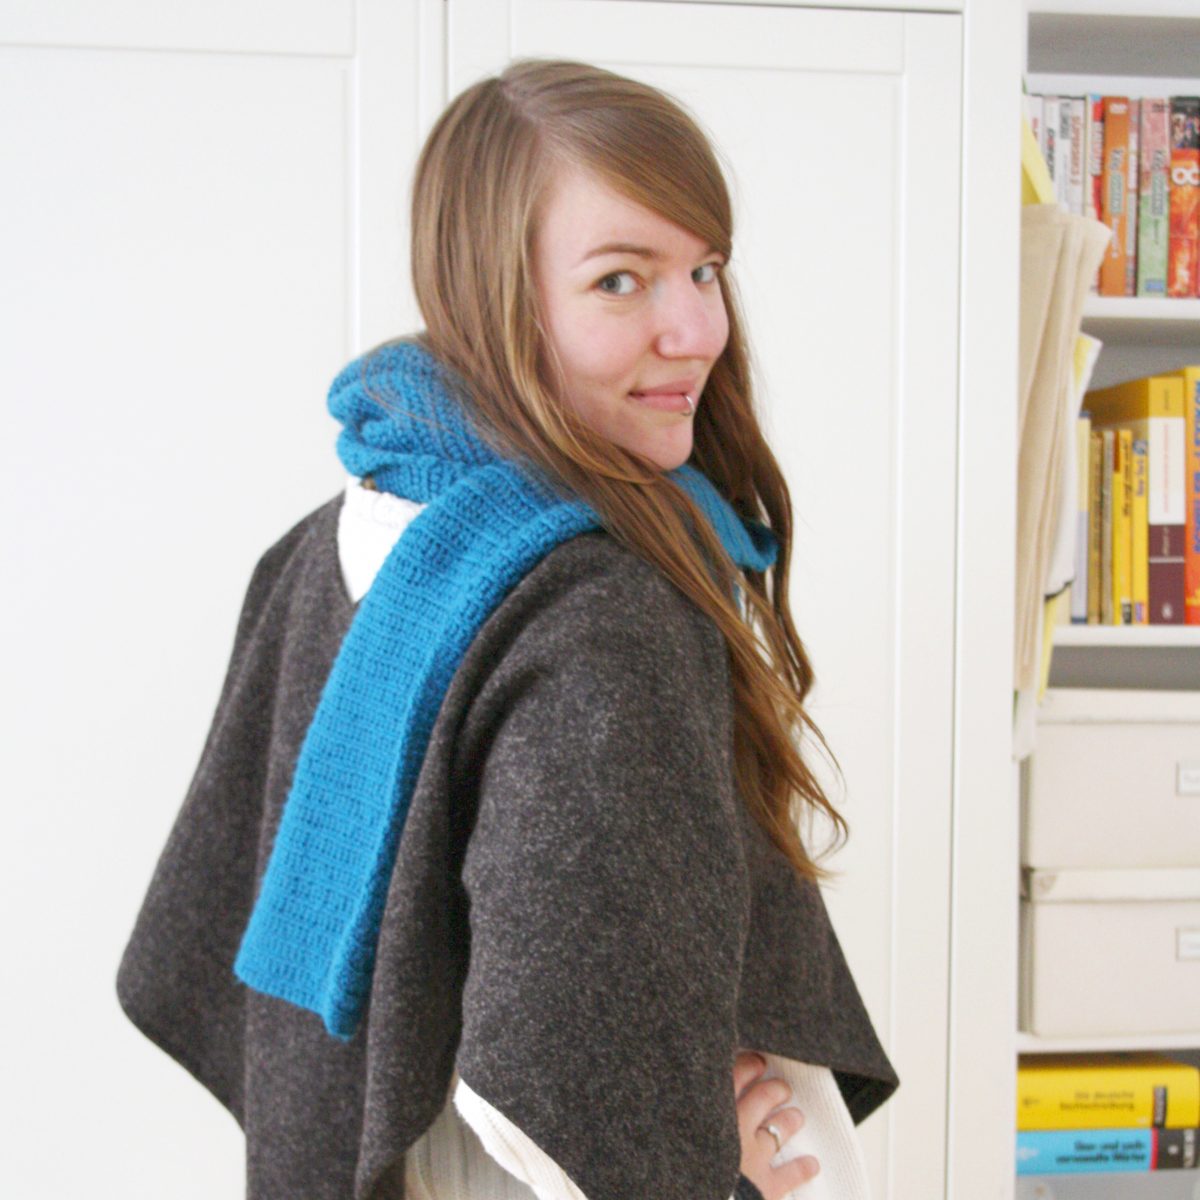
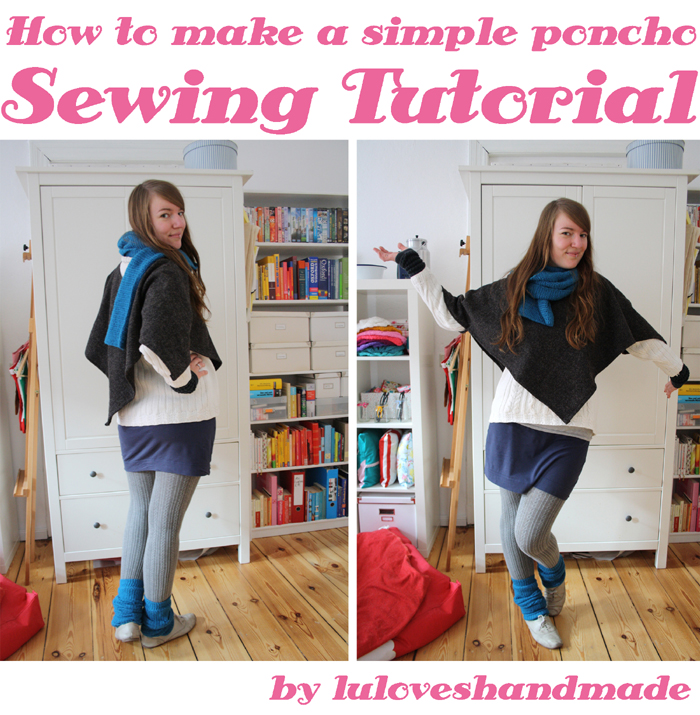
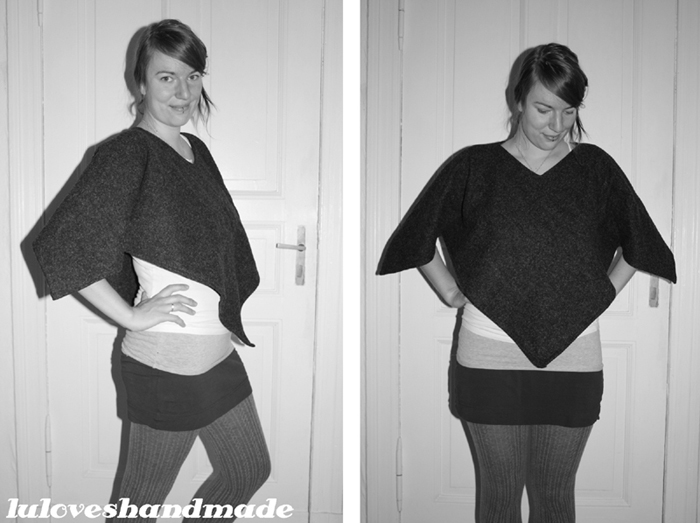
With this tutorial, I wanna show you how to sew
a simple poncho, all you need are a chunky, cosy, square piece of fabric (I
chose fabric which consists of 70% wool and 30% polyester), 1m x 1m (3,28 feet
x 3,28 feet / 1,09 yard x 1,09 yard), a sewing machine and sewing equipment
like a measuring tape, pins and scissors. :)
a simple poncho, all you need are a chunky, cosy, square piece of fabric (I
chose fabric which consists of 70% wool and 30% polyester), 1m x 1m (3,28 feet
x 3,28 feet / 1,09 yard x 1,09 yard), a sewing machine and sewing equipment
like a measuring tape, pins and scissors. :)
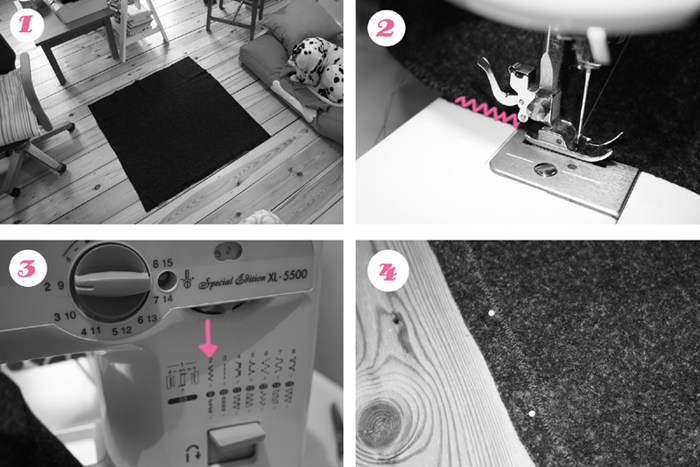
Let’s go! Therefore, put the piece of fabric
onto the floor or onto a large table, cut out a square (Step 1) and use a zig zag
stitch (Step 2&3) to hem the edges to prevent unraveling of the fabric. Next, turn all 4 edges to the
back of the fabric and pin those with pins (Step 4).
onto the floor or onto a large table, cut out a square (Step 1) and use a zig zag
stitch (Step 2&3) to hem the edges to prevent unraveling of the fabric. Next, turn all 4 edges to the
back of the fabric and pin those with pins (Step 4).
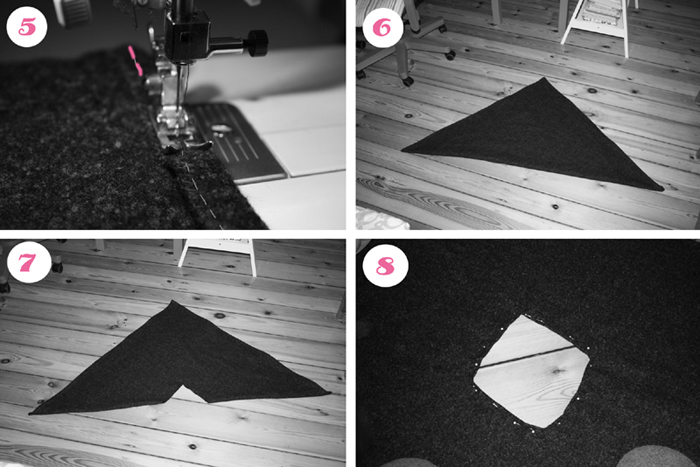
Now you have to stitch the edges onto the piece
of fabric to make them look neat (Step 5). Then, put the fabric onto the
floor and fold it to the shape of a triangle (Step 6). Next, cut a hole into
the middle which is later going to be the neckline where you put your head
through (Step 7). It is up to you whether you want to have a round or a square
neckline. :) Don’t make the hole too big; better adjust it to your head’s size
step by step. Then, the edges of the neckline have to be turned to the back of
the fabric and have to be stitched onto it to fix it. Therefore, the edges have
to be pinned onto the fabric (Step 8).
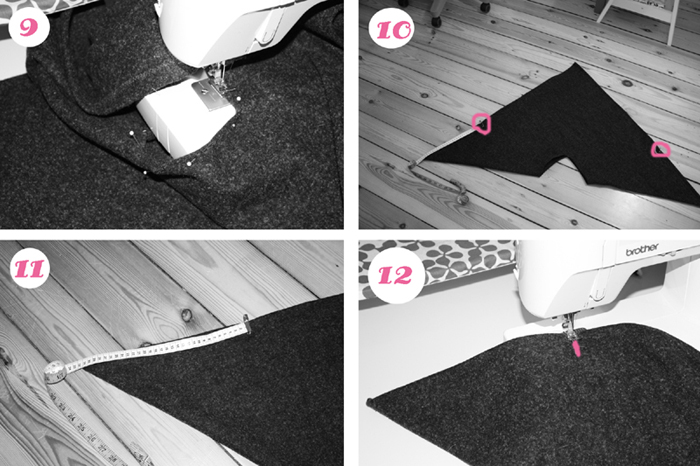
Now you can stitch up your neckline’s edges
(Step 9). Afterwards, put the poncho as a triangle onto the floor or onto a
table to fix the ‘sleeves’ so that the poncho stays in its place while wearing
it. :) Therefore, you can put in on and pin those points where you want to
attach the front and the back onto each other (Step 10 and also shown on the photo below on the left bottom corner). When I sewed my
poncho, this was at a distance of about 30cm /11,8” from the edge which is
later supposed to be on my shoulders, but this depends on your total size (Step
11). After you’ve symmetrically pinned those two parts of the poncho, you can
fix them with a short seam (Step 12). Later, this is going to be the part of
your poncho which is under the arms and prevents the poncho from slipping.

Have fun while you are sewing and feel free to
ask me if there are any questions! :)
ask me if there are any questions! :)
I’m glad Stefanie asked me to prepare something
for a guests post, so don’t forget to visit her blog and to say hello! :)
for a guests post, so don’t forget to visit her blog and to say hello! :)
Love, Lu


I'm jealous of your sewing skills!!!
well done! Happy Friday