
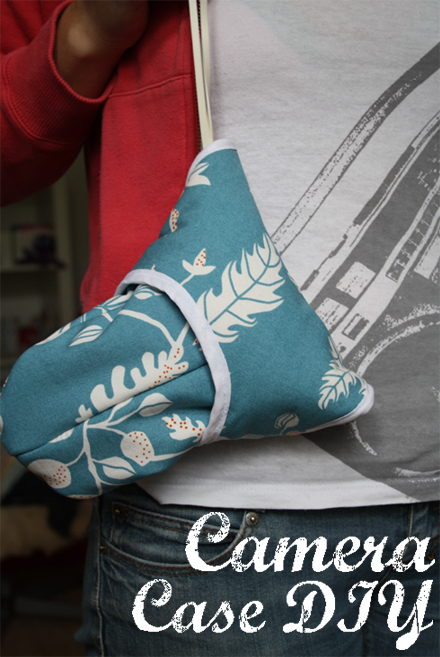
Hello! :) Here’s an easy DIY project for you to make a case to protect your precious camera. Of course you can make the sketch for the pattern according to the size of your own camera. :)
(CLICK HERE FOR THE GERMAN VERSION // DIE DEUTSCHE VERSION GIBT ES HIER! :))
You need:
– Fabric (I used two different colors, one for the inside, one for the outside)
– Lining (For a better protection to insert it between the two layers of fabric)
– Bias (The length needed depends on the size of your camera)
– A short piece of velco / hook and loop fastener
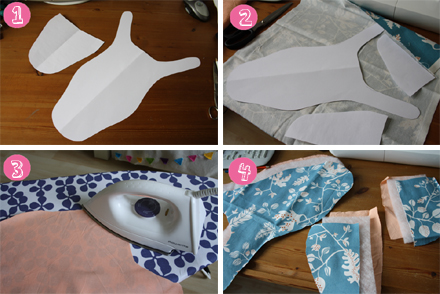
1. Draw a pattern similar to mine and cut it out.
2. Cut out 2 layers of fabric and 1 layer of lining (I used polyester lining) according to the pattern.
3. Iron the fabric you’ve cut out.
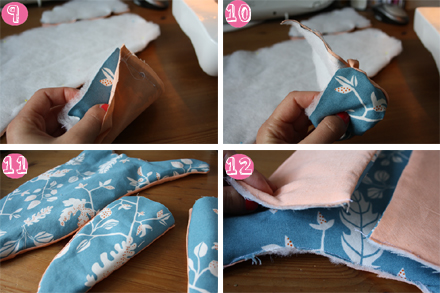
4. As you can see on image 4, you now have 3 different layers for each of the three parts of the pattern.
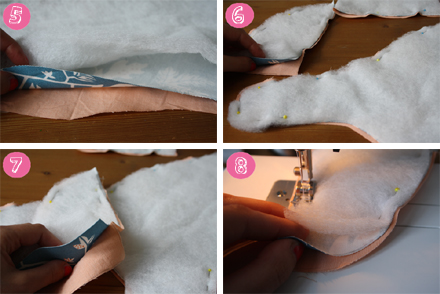
5. Then, it is important to put the layers onto each other in a certain order: The lowest one is the fabric you want to have on the inside, then the fabric for the outside with the colored or patterned side down and then, on the top, the lining.
6. Fix all of the three layers with pins.
7. This is how it should look like. :)
8. Then, doing this with each of the three parts of the patterns, sew the 3 layers onto each other, leaving free one opening at one side so that you can turn it around afterwards so that you don’t see the lining anymore and that it disappears on the inside between the two layers.
9. + 10. Next, turn the outside into the inside and do this with all of the three parts, the huge one and to smallers ones.
11. This is how it is supposed to look like as soon as you have turned the lining to the inside of the three parts. :)
12. The parts you have left open for turning the outside to the inside have to be closed, too, so make a seam there so that all three pieces are ready and you cannot see the lining anymore.

13. Take the two smaller pieces, pin them onto each other on the straight side, the colored or patterned sides you later want to have outside touching each other.
14. + 15. Sew them onto each other so that it looks like this when you unfold them. :)
16. Pin bias onto the straight side of the piece of fabric you have just sewn together, then sew it on.

17. For getting the shape of a camera case, you now need to attach both pieces to each other, fix them with pins. Doing this, the sides which are later supposed to be on the outside therefore have to touch each other on the inside.
18. Sew them onto each other.
19. Make sure that the seams are neat and strong enough.
20. Then, turn the inside of the case which looks like a gigantic toungue to the outside. :D
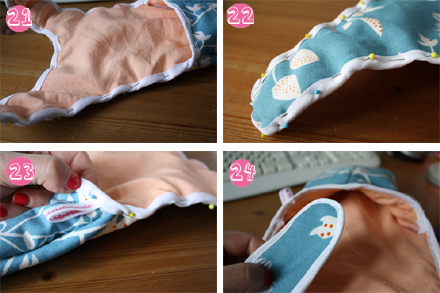
21. – 24. What you now have to do is to sew on the bias to fix the hems of your case. So fix the bias with pins and then sew it on. I also attached my garment label. <3
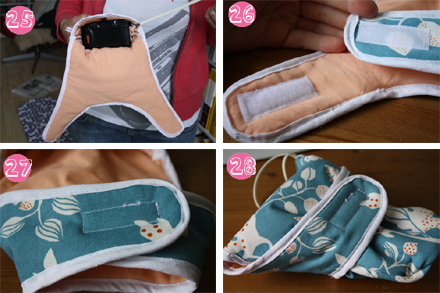
25. This is how it looks like when you put the camera onto the case. Depending on the length of your pattern, there is enough space for a large objective lens.
26. + 27. Finally, sew the two pieces of velco / hook and loop fastener on so that you can close the case.
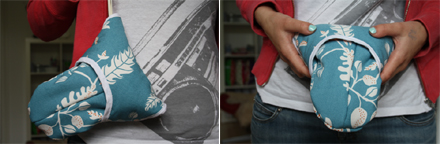
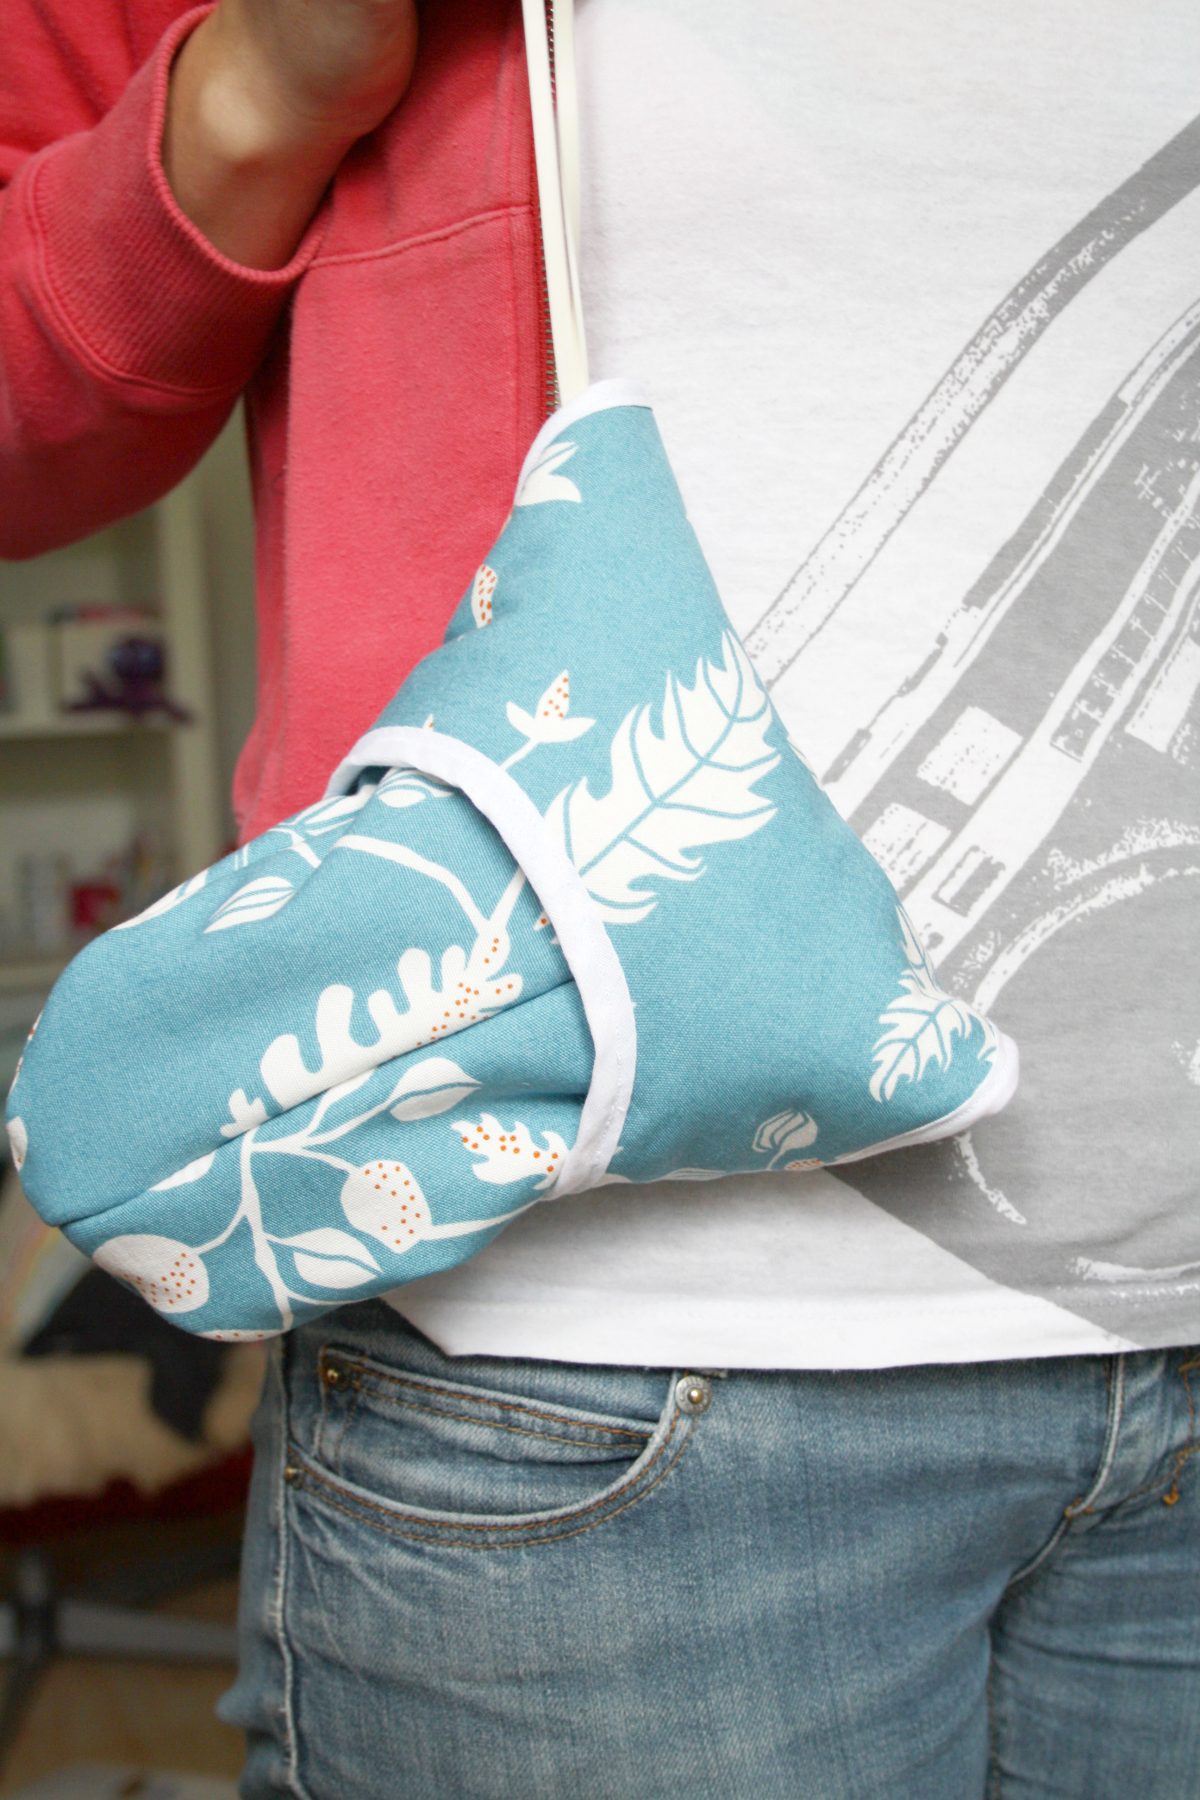
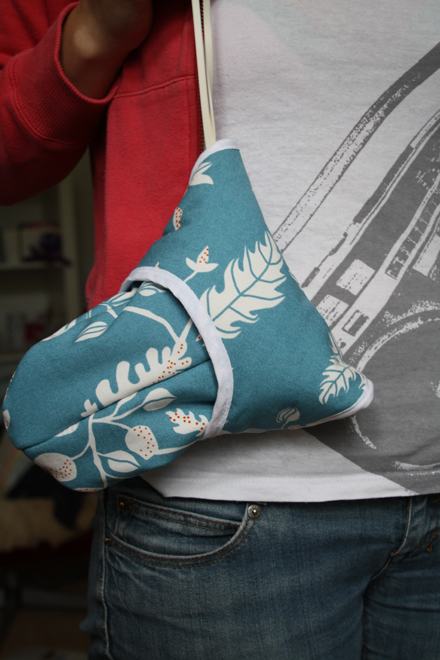
Here’s the completed camera case which can easily protect your camera from scratches, dirt or dust. <3
That’s it! :) I hope you like the tutorial. In case you sew such a case youself, please share photos, I’d love to see what you make of it. :)


wow! sehr cool!
<3
Danke!! :)
What an interesting shape! And so cute. I'm following your blog. :)
Thank you! Great that you are following me! :)
This is so sweet and clever!
Thank you for sharing this tutorial ^_^
love the shape… that was an extremely detailed tutorial. awesome. thanks for sharing!
i like the fabric you chose too. enjoying your posts :)
I will absolutely be making my own version on this! I'm so used to sewing tutorials from "pros" with their lingo that it makes it hard to understand a laymens terms tutorial! Haha how my brain works. It turned out beautiful by the way. I had been looking for a way to carry my camera with me without having to haul my purse and camera bag nor having to convert an entire bag into a camera bag. With a little extra padding I could just toss the cam in my day to day purse with my wallet & other purse items! Thanks!
I will absolutely be making my own version on this! I'm so used to sewing tutorials from "pros" with their lingo that it makes it hard to understand a laymens terms tutorial! Haha how my brain works. It turned out beautiful by the way. I had been looking for a way to carry my camera with me without having to haul my purse and camera bag nor having to convert an entire bag into a camera bag. With a little extra padding I could just toss the cam in my day to day purse with my wallet & other purse items! Thanks!