

Hello and happy Monday, everyone! Some of you might just be sitting at work while reading this, others may be enjoying their well-deserved summer holidays, yippie! :)
To celebrate those awesome hot days, here’s a DIY for you about how to make nautical rope bracelets. Of course all those shapes can also be used for making necklaces or belts out of ropes, but here I will only focus on bracelets and how to create those shapes. For how to close them, read the text below or even use own methods for attaching a jewellery clasp.
So in this blogpost, I will show now you which supplies you need, you will be provided with sketches for better understanding of some of the sailor knots and of course I’m gonna show you my sources of inspiration, since I didn’t invent all those knots myself! :)
Happy crafting!
Supplies for Making Nautical Rope Bracelets:
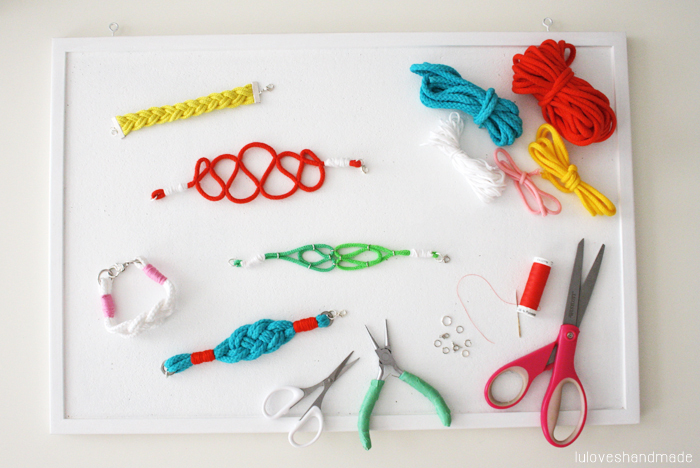
You need:
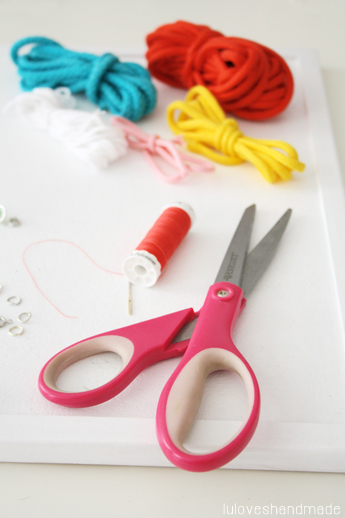
– Cotton ropes in all kinds of colors
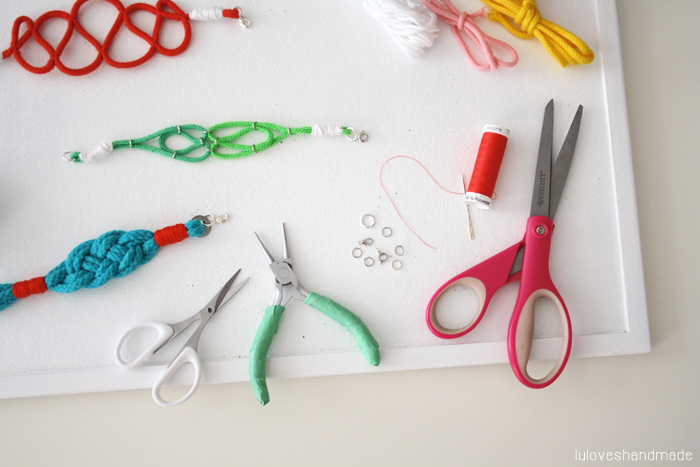
– Scissors, a jewellery plier, needle and thread
– Jewellery claps and tiny rings
– Wool / thick yarn (not shown in the photo)
– Masking tape (not shown in the photo)
– All-purpose glue which dries fast (not shown in the photo)
Once you’ve gathered all your supplies, you can get started. :)
Here’s How to Make Those Nautical Rope Bracelets:
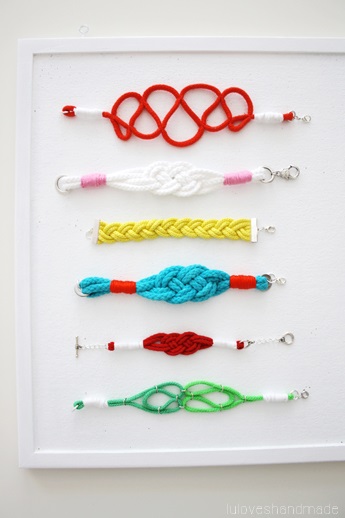
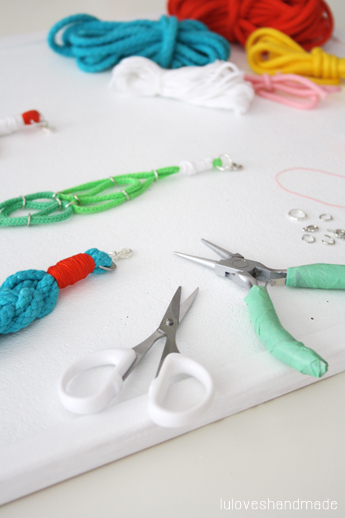
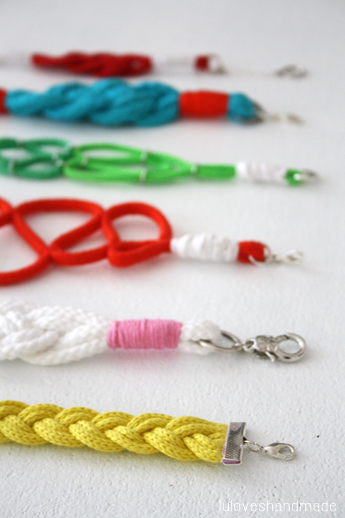
As you can see on the two photos above, there’s a huge variety of bracelets in different shapes which you can make. There are real sailor knots, simple braiding techniques and folding schemes which you can use.
Here we go with the first one:
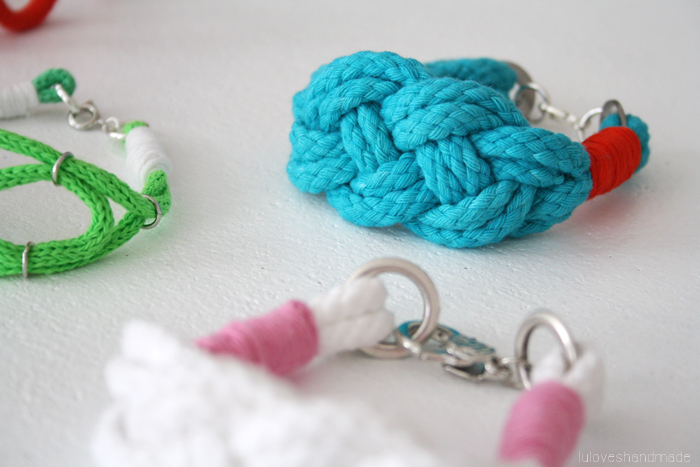
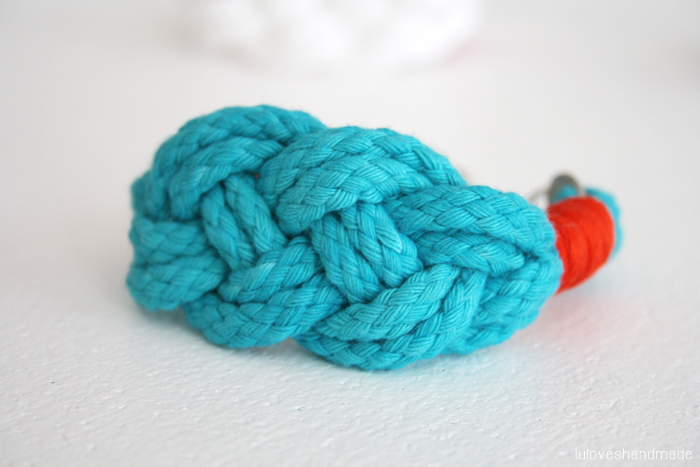
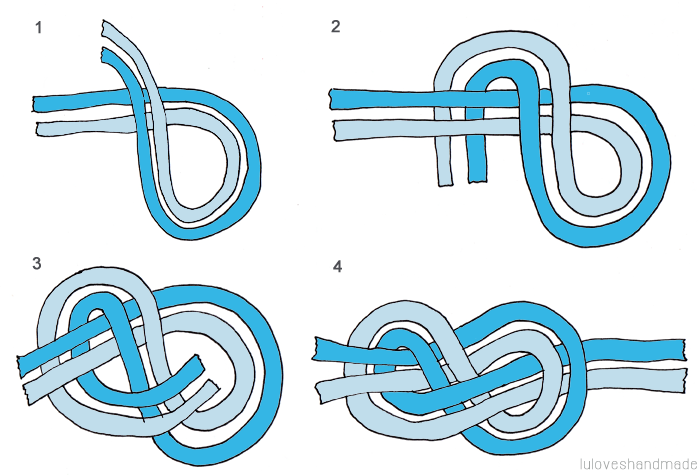
This bracelet is made with a real sailor knot. Thanks to the Internet, I found tons of photo and video instructions for how to make these, so I learned it really quickly.
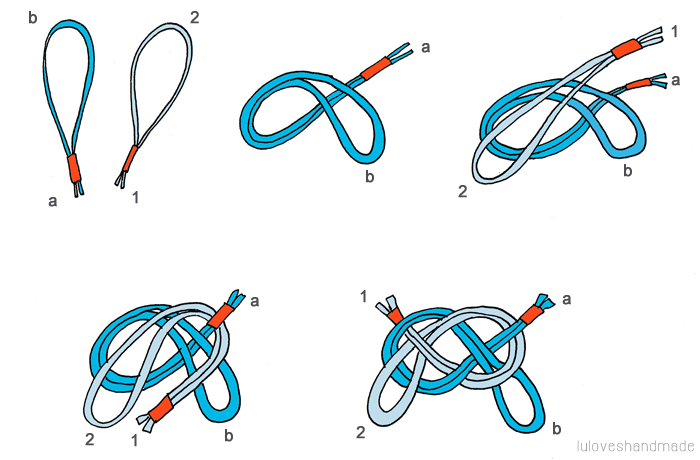
For a better understanding, I made those drawn instructions for you with which you can easily follow all steps. Use two pieces of rope which are each about 60cm long, use masking tape to hold their endings together and then you can get started.
In case you rather prefer a photo tutorial, hop over to the etsy blog, there’s an awesome photo DIY for such a sailor knot rope bracelet and they even have a great way to attach the clasp which could be really helpful for you.
If the first knot shown above is too complicated and you rather want to try out an easier and more time saving version, you can also use this one: for making a bracelet with it, you will need two pieces of rope (with the same color or in two different colors) which are each about 30cm long. Then simply put the ropes onto the table according to the drawing above. In the end you can use a wide clasp which you can jam onto the endings of the rope.
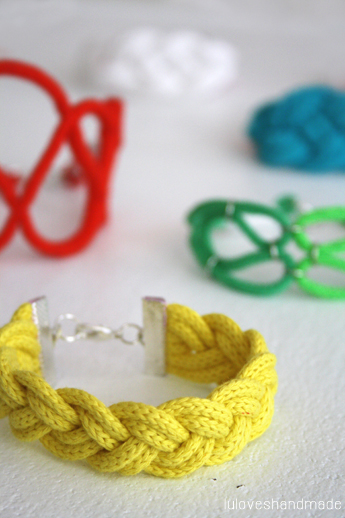
The next bracelet is the easiest one, it’s a braided rope bracelet:


For making this bracelet, cut off six pieces of rope which are each about twice as long as the circumfence of your arm. Next, glue the endings and press them in between the jewellery clasp. Then start braiding like if you were braiding a girl’s hair and always use two ropes at a time. As soon as your bracelet is long enough, cut off the remaining pieces of rope and glue the bracelet into the clasp.
The next one is the ‘snake’ bracelet:
This is an awesome way of how to fold a rope which I found on Rotkehlchen’s blog: she made a necklace by simply folding the rope like a snake, always sewing parts next to each other.
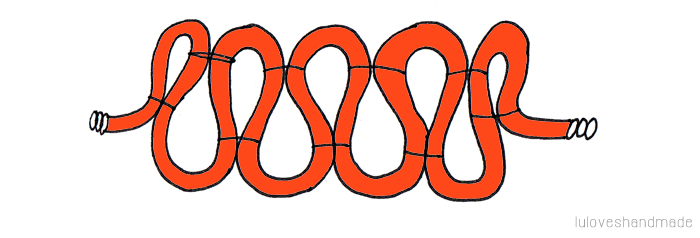
Then I used her great idea for making a bracelet, I just changed the way or making the clasp. Above, there’s a sketch for you for where to sew. This is not complicated, but the sewing takes some time. Best use yarn in the color of you rope, then it won’t be seen.
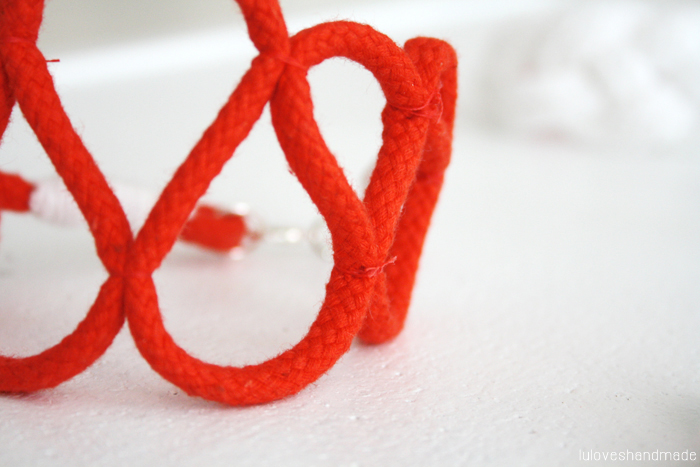
Finally, there’s still another version for how to make a bracelet:
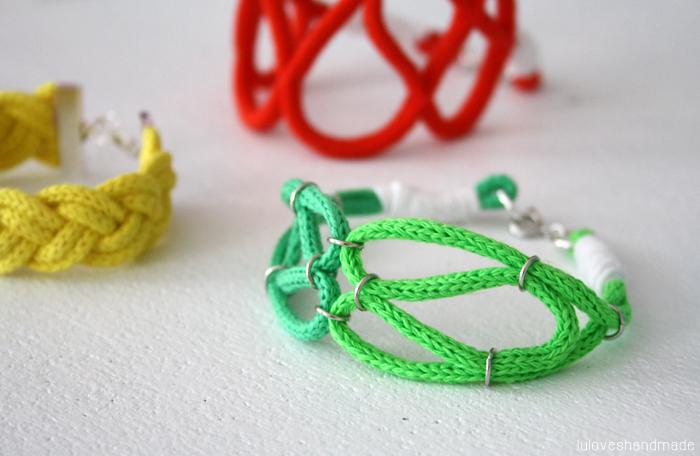
This one is simply made out of two pieces of rope which are laid onto the table and then attached to each other by tiny jewellery rings.
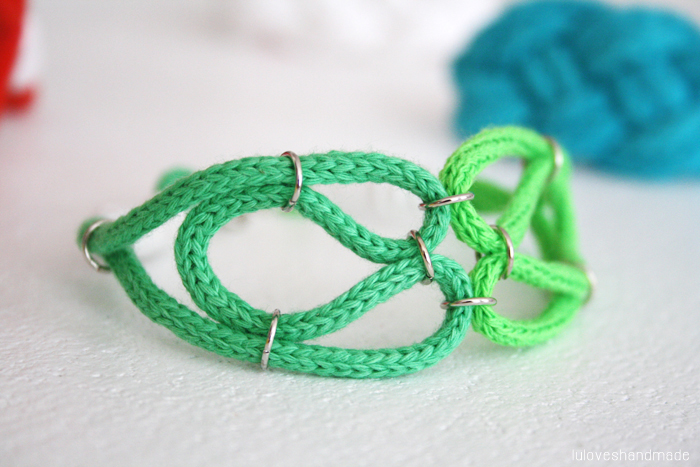
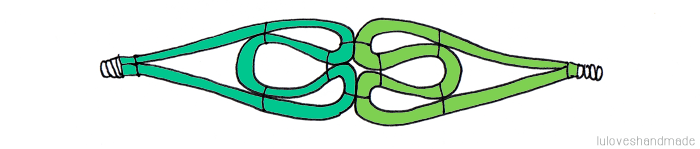
Cut off two pieces of rope which are each about 35cm long. Put them onto the table and fold them like seen on the drawing above. Then you will need your jewellery plier and the tiny rings to attach both pieces of rope to each other at the spots where it is shown. Then you will get this cool shape. :)
Your Handmade Nautical Rope Bracelets:
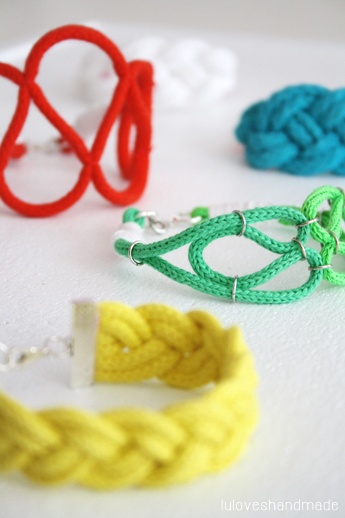
That’s it! :) As you can see, this is super easy and there’s a huge variety of shapes for how to make such a nautical rope bracelet.
For closing the bracelets, you can either buy such a wide clasp which is pressed onto the rope by using a plier, or you can use a clasp which you bind at the ending of a rope (like seen above with the white, green, orange and turquoise bracelets) by means of folding over the ending, putting it onto the remaining piece of the rope and then binding everything with a piece of wool or yarn.
Have tons of fun making your own bracelets and don’t forget to share photos! :) Can’t wait!
Enjoy these summer days!
Lu
P.S.: For more tutorials, check out my blog’s DIY page or have a look at my DIY videos! :)


Wauw! They are so cool your bracelets. I have a lot of that kind of robe at home, thanks for the tutorial and inspiration.
Huhu! Das sieht super schön aus und macht richtig Lust auf Sommer. Danke für die tolle DIY Idee! Werde ich auf jeden Fall mal ausprobieren. Echt schön :) Liebst, Kate von Liebstes von Herzen.
Total cool und mal was ganz Neues!GLG, Olga.
Sehr entzückend und so schöne Farben.Da bekommt man lust, nach zu machen.Liebe Grüße Christin
hach, mit diesem Post hast du in mein Herz getroffen! Da bekomme ich gleich Lust, auch wieder mit dem Knoten anzufangen :) Danke auch für die Verlinkung und liebste Grüße,Sarah
Also die sind ja mal ziemlich cool!!
These are amazing Lu! Love all the different colours :)xox
Du hast einen echt tollen Blog! :)Ich würde mich sehr über einen gegen Besuch freuen, vielleicht findest du unseren Blog auch toll und folgst uns? Wir würden uns sehr darüber freuen. Mach weiter so! Grüße Eric MY STYLEBOX
Really really good !!!!! me encanta !!! lo voy a hacer de una !!! eres super creativa !
Schöne Idee! Ich finde deinen Blog richtig cool und bunt. Mach weiter so mit deinen tollen Ideen!http://passion-stuff.blogspot.de/
Schöne Armbänder! Besonders das Gelbe gefällt mir. Ich bin schon seit Wochen in allem Bastelläden der Umgebung auf der Suche nach dieser Art von Verschluss. Sobald ich fündig geworden bin werd ich es dann auch mal ausprobieren Liebe Grüsse :)
Waho, It's so easy to create by own Nautical Rope Bracelet I like this. Thankx for sharing such kind wonderful creativity.
This is so beautiful. I definitely need one of these bracelets! I love it, such a good tutorial.Top Alaskan Brown Bear Hunts grizzly