
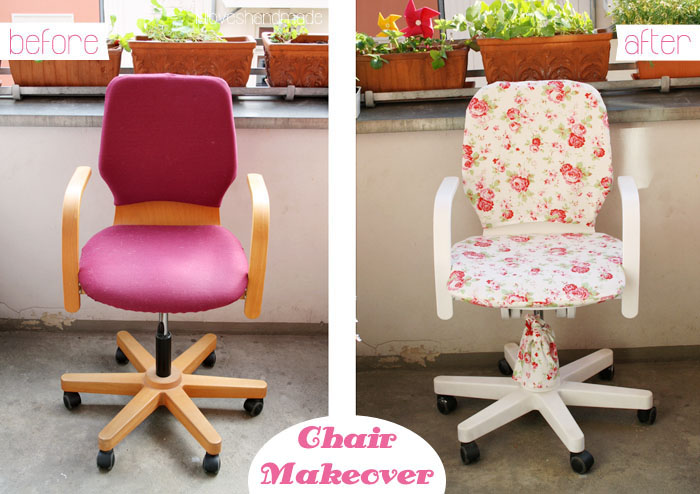
Hello, hello! Here’s a DIY project I want to share with you: on the left side of the photo, you can see my desk chair chair which I have been owning since my childhood days. Its quality is awesome, it is made of really good wood and my mother once bought it at an organic furnite store, but I didn’t like its look anymore, so I changed the color and I sewed new covers for the pillows. :)

For painting a wooden chair, you need:
– Paint brushes and a paint roller
– Wood paint
– Sandpaper
– Tarpaulin or oilcloth to protect the floor from the paint
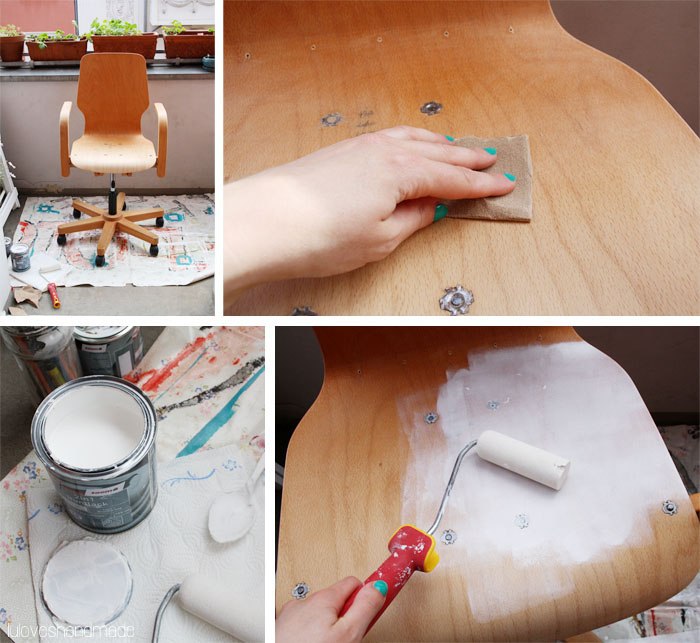
First of all, use the sandpaper to sand down the wooden surface evenly. Next, use your wood paint to apply the color all over the chair (everywhere where there’s wood). Use the paint roller for larger surfaces and uses the brushes for little details and corners.
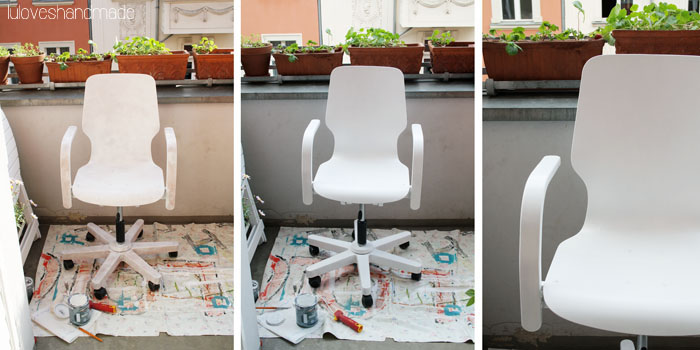
As you can see, you will need several layers and have to let the color dry in between until there’s an even layer of paint and you don’t see the wood anymore.
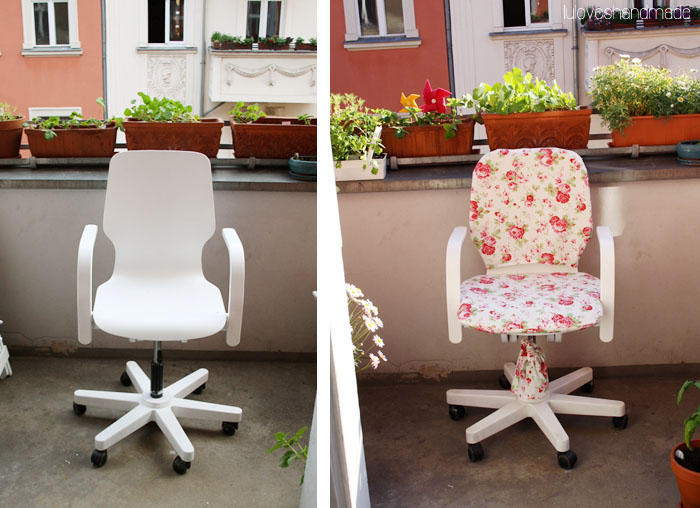
After having painted the chair, I sewed new covors for the pillows, one for the seating surface, one for the backrest. Therefore, I took the old covers and used them to make a pattern. I used this pattern for sewing new covers of exactly the same size. :)
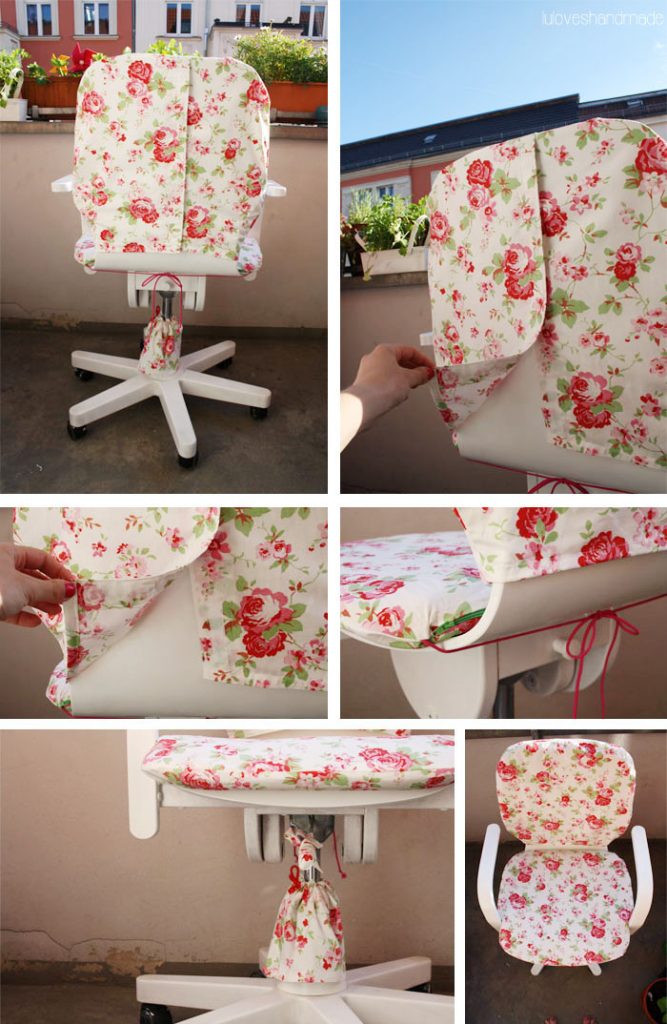
Here are some details of the floral cover: in the back, one can open it with a velcro fastener and on the seating surface, it can be opened with a simple zipper and it is bound to the chair with a cord.
Moreover, I also added a little fabric cover to the chair’s leg to cover it. :)
Soooo much better than before!
Happy Sunday! :) Lu


tolles ergebnis, super anregung, muss gleich überlegen, welchen stuhl ich in angriff nehmen könnte! danke fürs teilen!
ein schönes restliches pfingstwochenende und schöne grüße vom bodensee,
frau mani
Klasse Stuhl! Hab hier auch so`n olles Gestell stehen und schon mehrfach überlegt, wie ich das umsetze. Auf die Lösung mit dem Klettband bin ich noch nicht gekommen:)
Liebe Grüße,
Martina
Wow, was für ein schöner Stuhl! Und im neuen Gewand sieht er gleich noch viel schöner aus.
LG Anni
Sehr schön geworden. :) Vor allem kann man je nach Stoff und Farbkombi eine ganz andere Wirkung erzielen. :) Toll!
Ach ja, dein hübscher Stuhl. An den kann ich mich noch gut erinnern!:) Und wenn du mal keine Lust mehr auf den Blumenstoff hast, kannst du dir einfach einen neuen Überzug nähen. Viel besser als immer wieder einen neuen Stuhl zu kaufen!
Der Stuhl ist ja wirklich der Kracher geworden! Vorher eher langweilig, jetzt ein richtiger Blickfang. Gefällt mir wirklich gut! :)
Liebe Grüße
Lisa
Dein Stuhl ist so toll geworden (konnte mich ja schon live davon überzeugen), eine echte Verwandlung im Vergleich zu vorher! (: Wie immer sehr inspirierend, liebe Lu!
Laura
http://www.tagtraeumerin.de
Gefällt mir echt gut, so einen würd ich wahrscheinlich sofort kaufen, aber mit dem Nähen gehts bei mir noch nicht so gut haha :)
Das sieht super aus. WIr haben vier Esszimmerstühle aus Kunstleder, die sich leider auflösen und ich habe schon überlegt, auch einfach was selbst zu nähen, aber ich weiß nicht, ob der viele Stoff nicht nachher teurer ist, als wenn ich Überzüge kaufe. Ist auch gar nicht so einfach, weil es Schwingstühle sind. Aber vielleicht probier ichs jetzt doch. Danke für die Idee!!!
Grüße, Steffi (www.cuchikind.blogspot.de)
Richtig toll ist er geworden Dein neuer alter Stuhl!!!
Wünsche noch einen schönen Pfingstmontag!!!!
LG
Joanna MAria
Wirklich toll geworden, kaum wieder zu erkennen! Der Stuhl passt jetzt genau zu Dir!
LG, Steffi
oh mein goooottt! du machst ja so tolle dinge! und deine anleitungen sind echt super übersichtlich! ich liebe deinen blog jetzt schon, gleich abonnieren ;)
liebste grüße, sarah
super idee, und ist auch richtig schön geworden :) dein blog ist richtig toll, du hast so viele wunderbare Ideen!
LG Jojo
http://www.supernatural-delights.blogspot.de