
 Hi there! My name is Mirij from Liepsch – a blog where I write about DIY, my sewed stuff and my kids and life.
I’m thrilled to guestblog here on luloveshandmade and hope you enjoy my little tutorial!Only 13 days left for Christmas
and you are still wondering which presents you can gift?
Don’t worry, there are plenty of ideas what to gift without even spending a
dime.
Some friends and family are so far away that you can and will send them
only a nice letter.
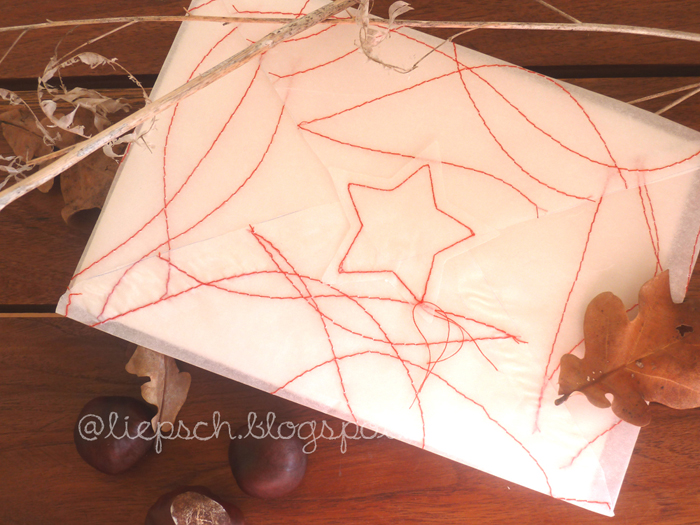
That’s why I want to share a quick tutorial with you for doing your own Christmas-,
stars- and snow-inspired stationary.
You need:
– baking paper, the white one (comes recyled as well)
– sewing machine
– yarn (of course)
– (optional) star punch
– old envelopeI love, love, love, baking paper so much, because it can be used for so many
things. The white looks really winterly and snowy to me and it is not only used here
for sewing patterns and baking, but also for crafting laterns, punching out stars, for decorating and so much more.
Let’s start:
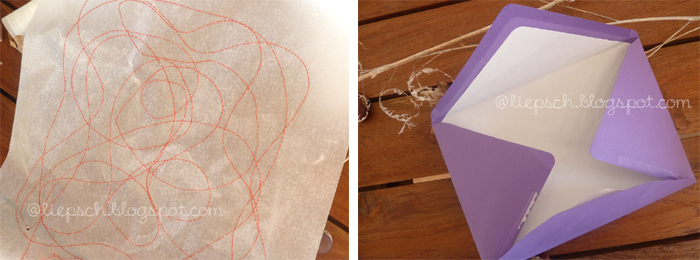
Take one sheet of baking paper (I got paper which has already been cut) and red yarn and go
creative on the paper. We really had a lot of fun to pull the paper through my
sewing machine. My oldest child (almost 3 years) helped me with it and was glad to
finally sew something himself. It’s always nice if you can involve the kids in a crafting project.
creative on the paper. We really had a lot of fun to pull the paper through my
sewing machine. My oldest child (almost 3 years) helped me with it and was glad to
finally sew something himself. It’s always nice if you can involve the kids in a crafting project.
Now take the paper and
create the envelope.
create the envelope.
Therefore, you need to carefully rip apart an old envelope. This should not be too
difficult, considering the huge amount of unwanted mail we all receive each day.
:(
You can choose between the smaller ones or the bigger ones like in this
tutorial.
This is then the model/pattern for your own envelope.
difficult, considering the huge amount of unwanted mail we all receive each day.
:(
You can choose between the smaller ones or the bigger ones like in this
tutorial.
This is then the model/pattern for your own envelope.
Transfer the outline on
your baking paper and then cut it out.
your baking paper and then cut it out.
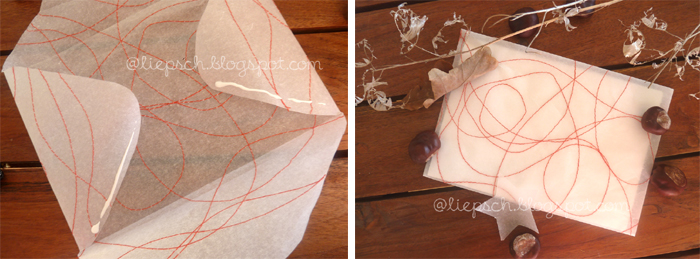
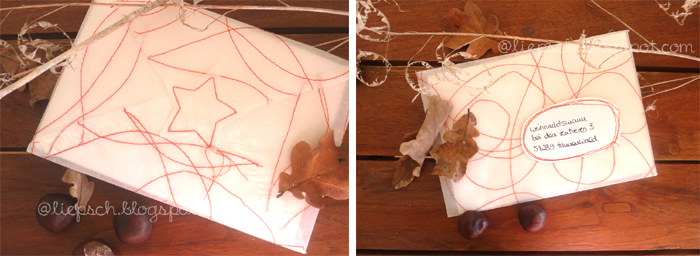
Glue the edges together
and, if you want to, pimp the back with another cutted backing paper star.
For the front I used a
self-adhesive paper label and sewed around it before sticking it onto the
envelope.
For the letter itself, just use plain
backing paper and write with a pencil. It looks clean, but also a little
romantic – perfect for christmas.I’m also planning to use this sewed baking paper for all the present
wrapping which I recommend to try out as well. What is more, it’s so much cheaper than
buying present paper and perfect if you also forgot to do so. ;)
I really love my envelopes and wrapping paper and hope you like it, too!
Have a nice Christmas time everyone!
Mirij
***
Thank you for sharing, this is such a pretty and easy idea! :)
Lu


Oh, der siht ja schön aus!
Sehr sehr coole Idee!
This is a lovely idea – thanks for the inspiration!
Do you have any tips about type of thread / thread tension?
oh oh, so many spelling mistakes in my text….
Das sieht so schön aus, ich bekomme nächste Woche eine Nähmaschine (freu) und das werd ich sicher gleich ausprobieren. Danke für die tolle Idee!
I'm glad you like Mirij's post! :)
Dear Suki, I think you could chose a normal / average thread tension. :)
Juhu, Katinka, eine neue Nähmaschine ist sowas Tolles, viel Spaß damit!! :)