

Hello, everyone!
My name is Allie, and I run a little blog called Of All The Nonsense. I’m quite honored and
excited to be a part of Lu’s Christmas Blog Party. Today I’m going
to show you how to make a quick and adorable holiday wall hanging!
My name is Allie, and I run a little blog called Of All The Nonsense. I’m quite honored and
excited to be a part of Lu’s Christmas Blog Party. Today I’m going
to show you how to make a quick and adorable holiday wall hanging!
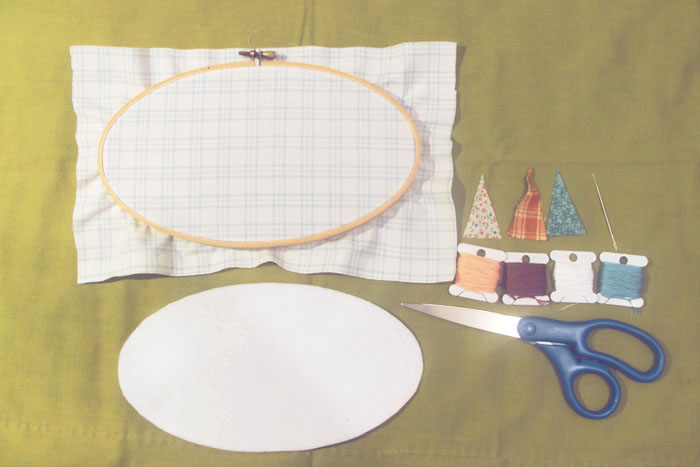
For this project you will need:
–
An embroidery hoop. [I chose an oval-shaped hoop, but you could
choose any one you like.]
An embroidery hoop. [I chose an oval-shaped hoop, but you could
choose any one you like.]
–
Fabric for the background.
Fabric for the background.
–
Three triangles cut from mismatched fabrics. [Mine were between 1.5
and 2 inches in height.]
Three triangles cut from mismatched fabrics. [Mine were between 1.5
and 2 inches in height.]
–
A sheet of sticky-backed felt.
A sheet of sticky-backed felt.
–
Embroidery floss in the colors of your choice.
Embroidery floss in the colors of your choice.
–
Scissors.
Scissors.
–
An embroidery needle.
An embroidery needle.
1. Before
you place your fabric in your hoop, trace around the inside of your hoop
on the back of your sticky-backed felt. I forgot to do
that beforehand and had to take my fabric out!
you place your fabric in your hoop, trace around the inside of your hoop
on the back of your sticky-backed felt. I forgot to do
that beforehand and had to take my fabric out!
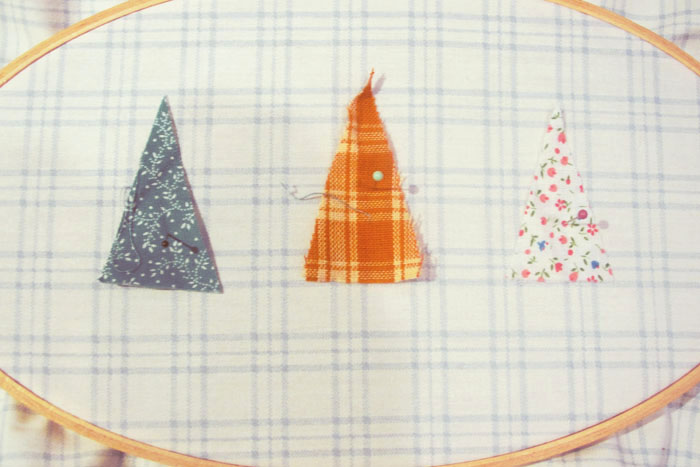
Once
you’ve finished with the felt, place your background fabric in
your embroidery hoop, and line up your triangles wherever you would like
them. I used a couple of pins in each to help hold them in place.
you’ve finished with the felt, place your background fabric in
your embroidery hoop, and line up your triangles wherever you would like
them. I used a couple of pins in each to help hold them in place.
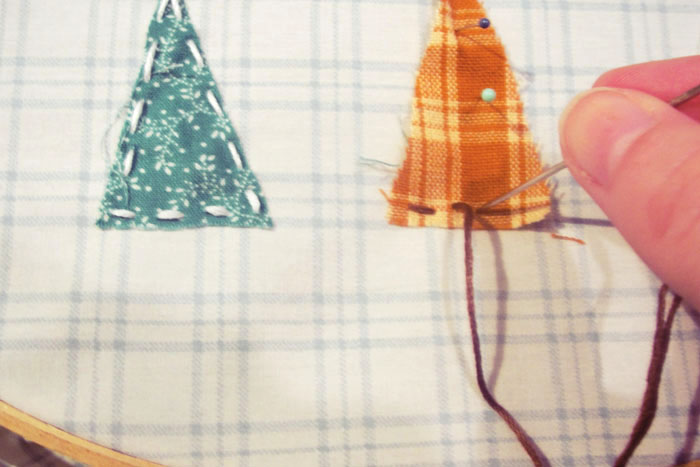
2. Using
embroidery floss in the color of your choice for each triangle, stitch
around each one. I used a simple running stitch.
embroidery floss in the color of your choice for each triangle, stitch
around each one. I used a simple running stitch.
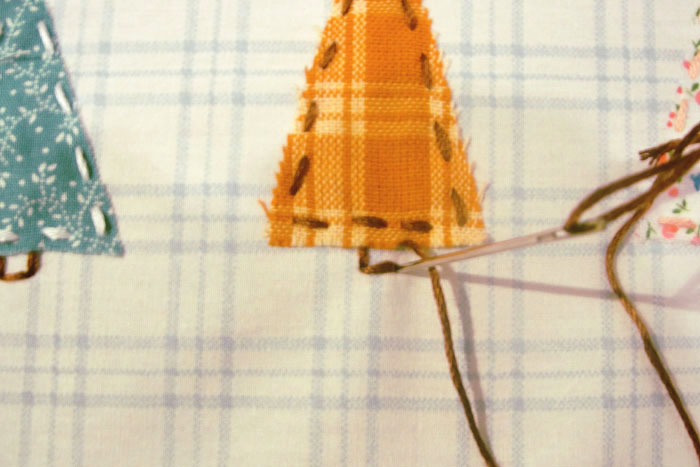
3. Once
you’ve stitched all around of your triangles, stitch a small trunk to the
bottom of each one. I chose not to fill my in, but you could fill
yours in if you like, using a satin stitch or something similar.
you’ve stitched all around of your triangles, stitch a small trunk to the
bottom of each one. I chose not to fill my in, but you could fill
yours in if you like, using a satin stitch or something similar.
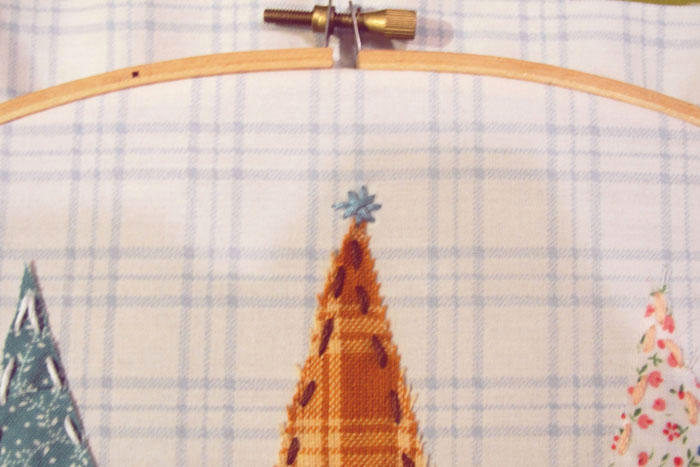
4. After
I finished with the tree trunks, I thought it would look cute to stitch a
small star to the top of the middle tree. To do this, I
basically just made small single stitches in the shape of an asterisk.
You could even stitch a star to the top of each tree, if you like!
I finished with the tree trunks, I thought it would look cute to stitch a
small star to the top of the middle tree. To do this, I
basically just made small single stitches in the shape of an asterisk.
You could even stitch a star to the top of each tree, if you like!

5. Now
it’s time to finish off your wall hanging. I finished it by trimming my
fabric closely to the back of my hoop. I know that there are better
methods of finishing off embroidery hoop pieces, but this has generally worked
well for me in the past. [If you know of any other methods, please feel
free to share!] Do make sure you pull your fabric tight before
trimming! After you’ve trimmed your fabric, remove the wax
backing off of your felt, and lay it sticky-side down in the back of your hoop,
covering your stitches.
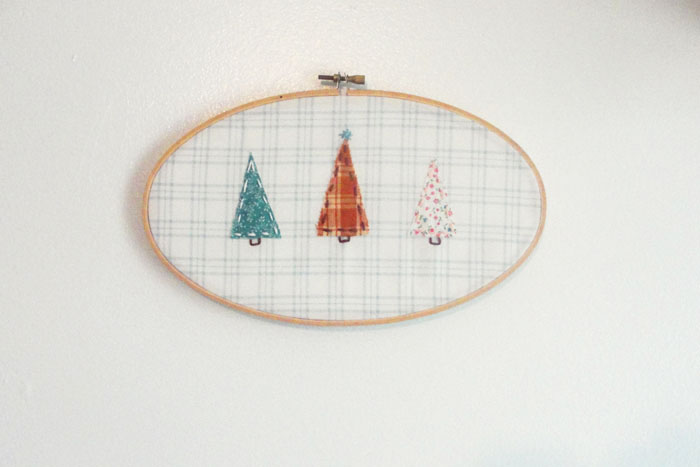
6. And
there you have it – a super easy and adorable wall-hanging, that you could even
leave up all winter! I love this project because there are so many
different designs you could do. If you make one of your own, I hope
you’ll share photos!
there you have it – a super easy and adorable wall-hanging, that you could even
leave up all winter! I love this project because there are so many
different designs you could do. If you make one of your own, I hope
you’ll share photos!
Thank you so much for having me, Lu!
It’s been such a joy!
It’s been such a joy!
Happy holidays!
xo, Allie
***
Oh, it’s so pretty! :) I’m so thankful for all the lovely ideas all of you have been sending me. :)
Thank you so much for participating, Allie! :)
Lu <3


Süß! Gefällt mir! :-)
Hach, ich hab ja ein Faible für Stickrahmen…
Yay! Thanks for sharing my post, Lu! It was such an honor to be part of your blog party! :]
Welch herrliche Idee und so flexibel. Ich könnte mir gut vorstellen, die "Stickereien" den Jahreszeiten oder bestimmten Themen anzupassen. Bis jetzt bin ich immer zurückgeschreckt, weil mir fürs Sticken einfach die Geduld fehlt. Aber diese Variante ist fantastisch!
Oh Mann, das war jetzt die volle Inspirationsladung :))
Liebste Grüße, Sindy